Staking via web app
Babylon Labs provides a web dApp (BTC Staking Dashboard) for staking BTC to the Babylon Genesis chain. Following is a step by step guide to stake BTC using the dashboard.
1. For Phase 1 Stakers
How to register your Phase 1 stake to Phase 2
According to the requirements set by the Babylon Foundation, you must convert your Phase 1 staking to Phase 2 in order to start earning BABY staking rewards or qualify for any additional airdrops. The process is as follows:
Step 1: Access the Staking Dashboard
Visit the Babylon Staking website.
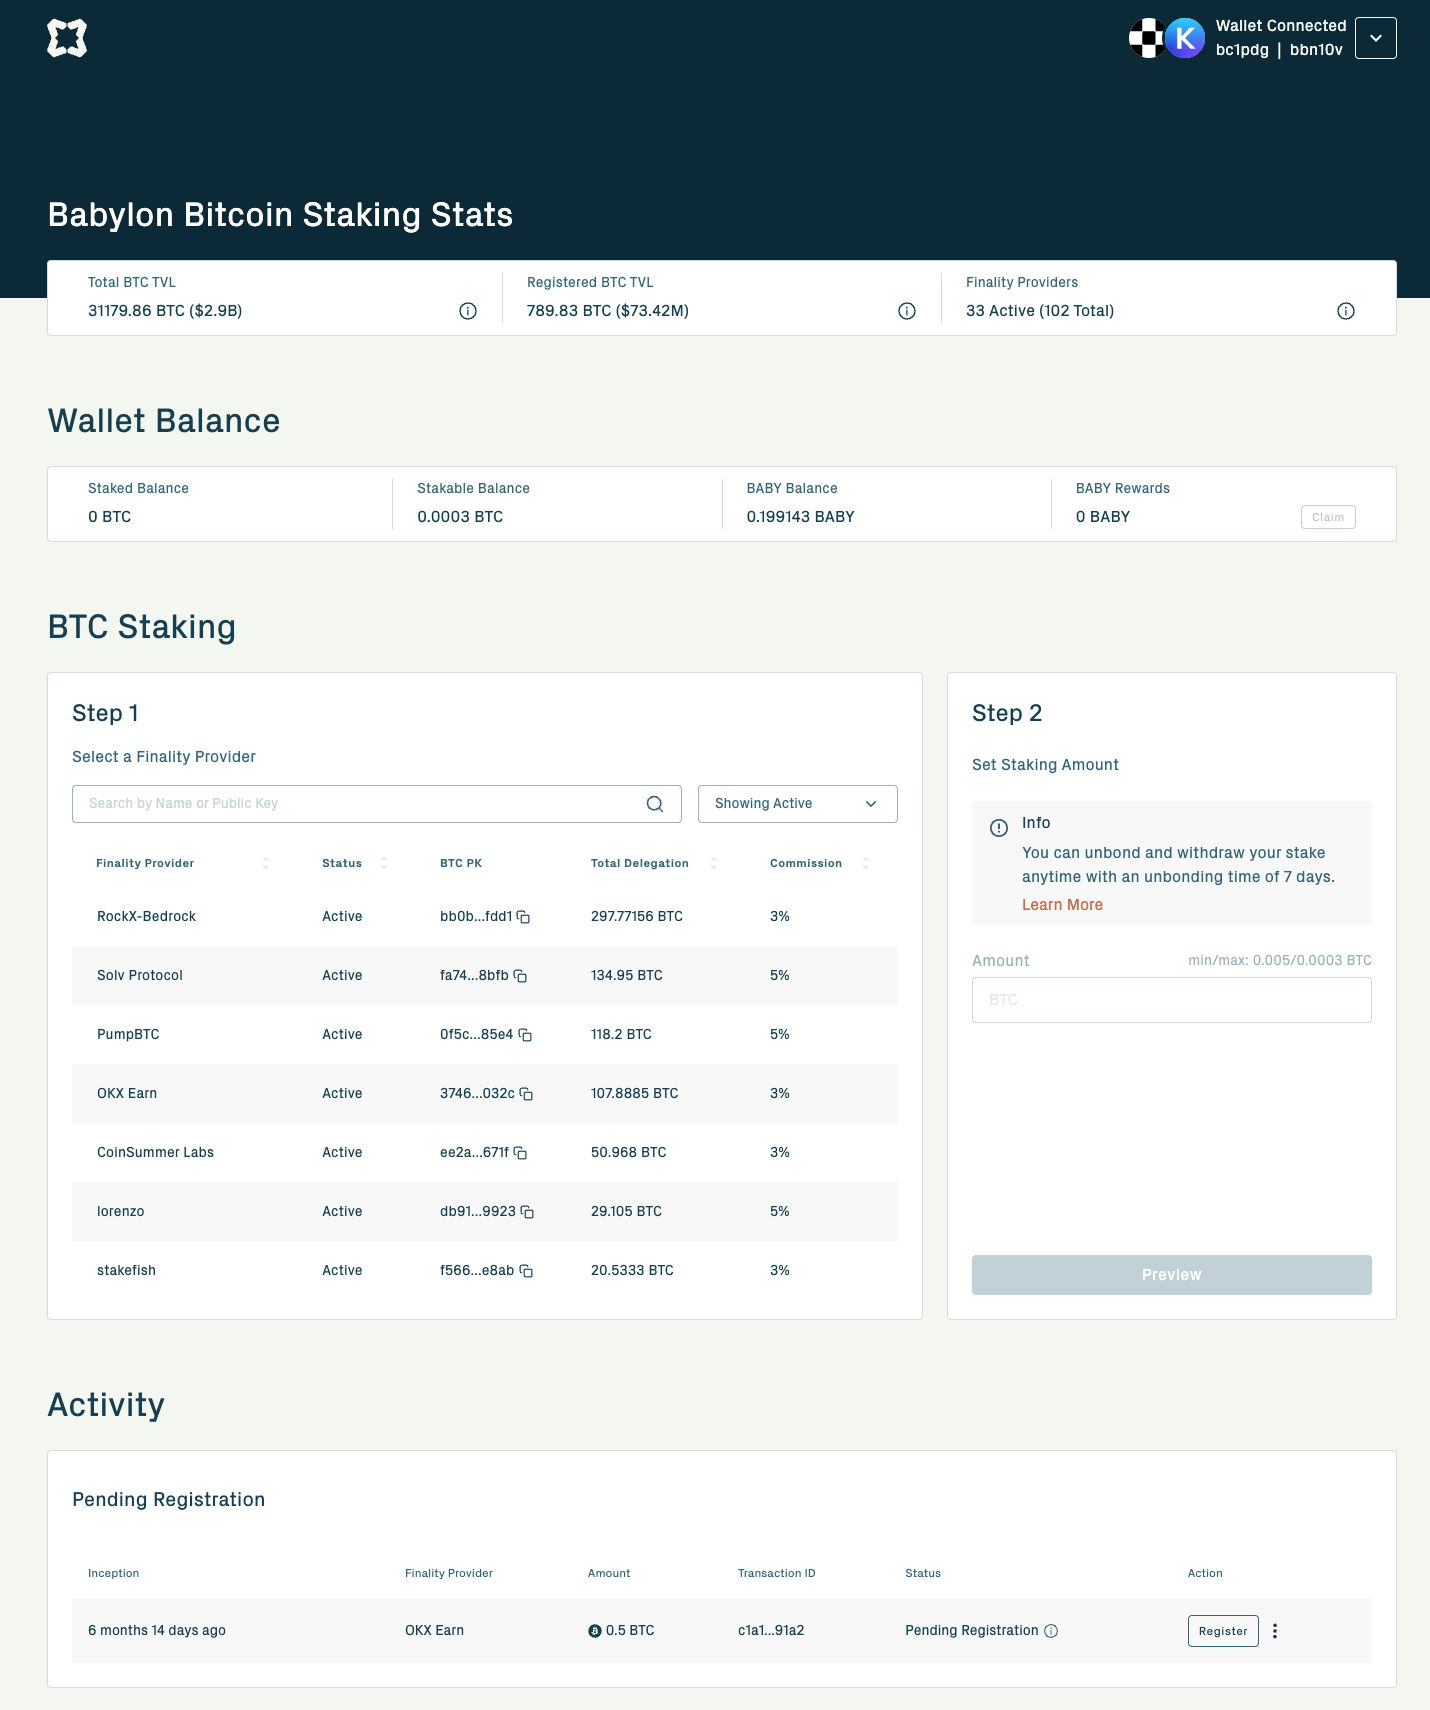

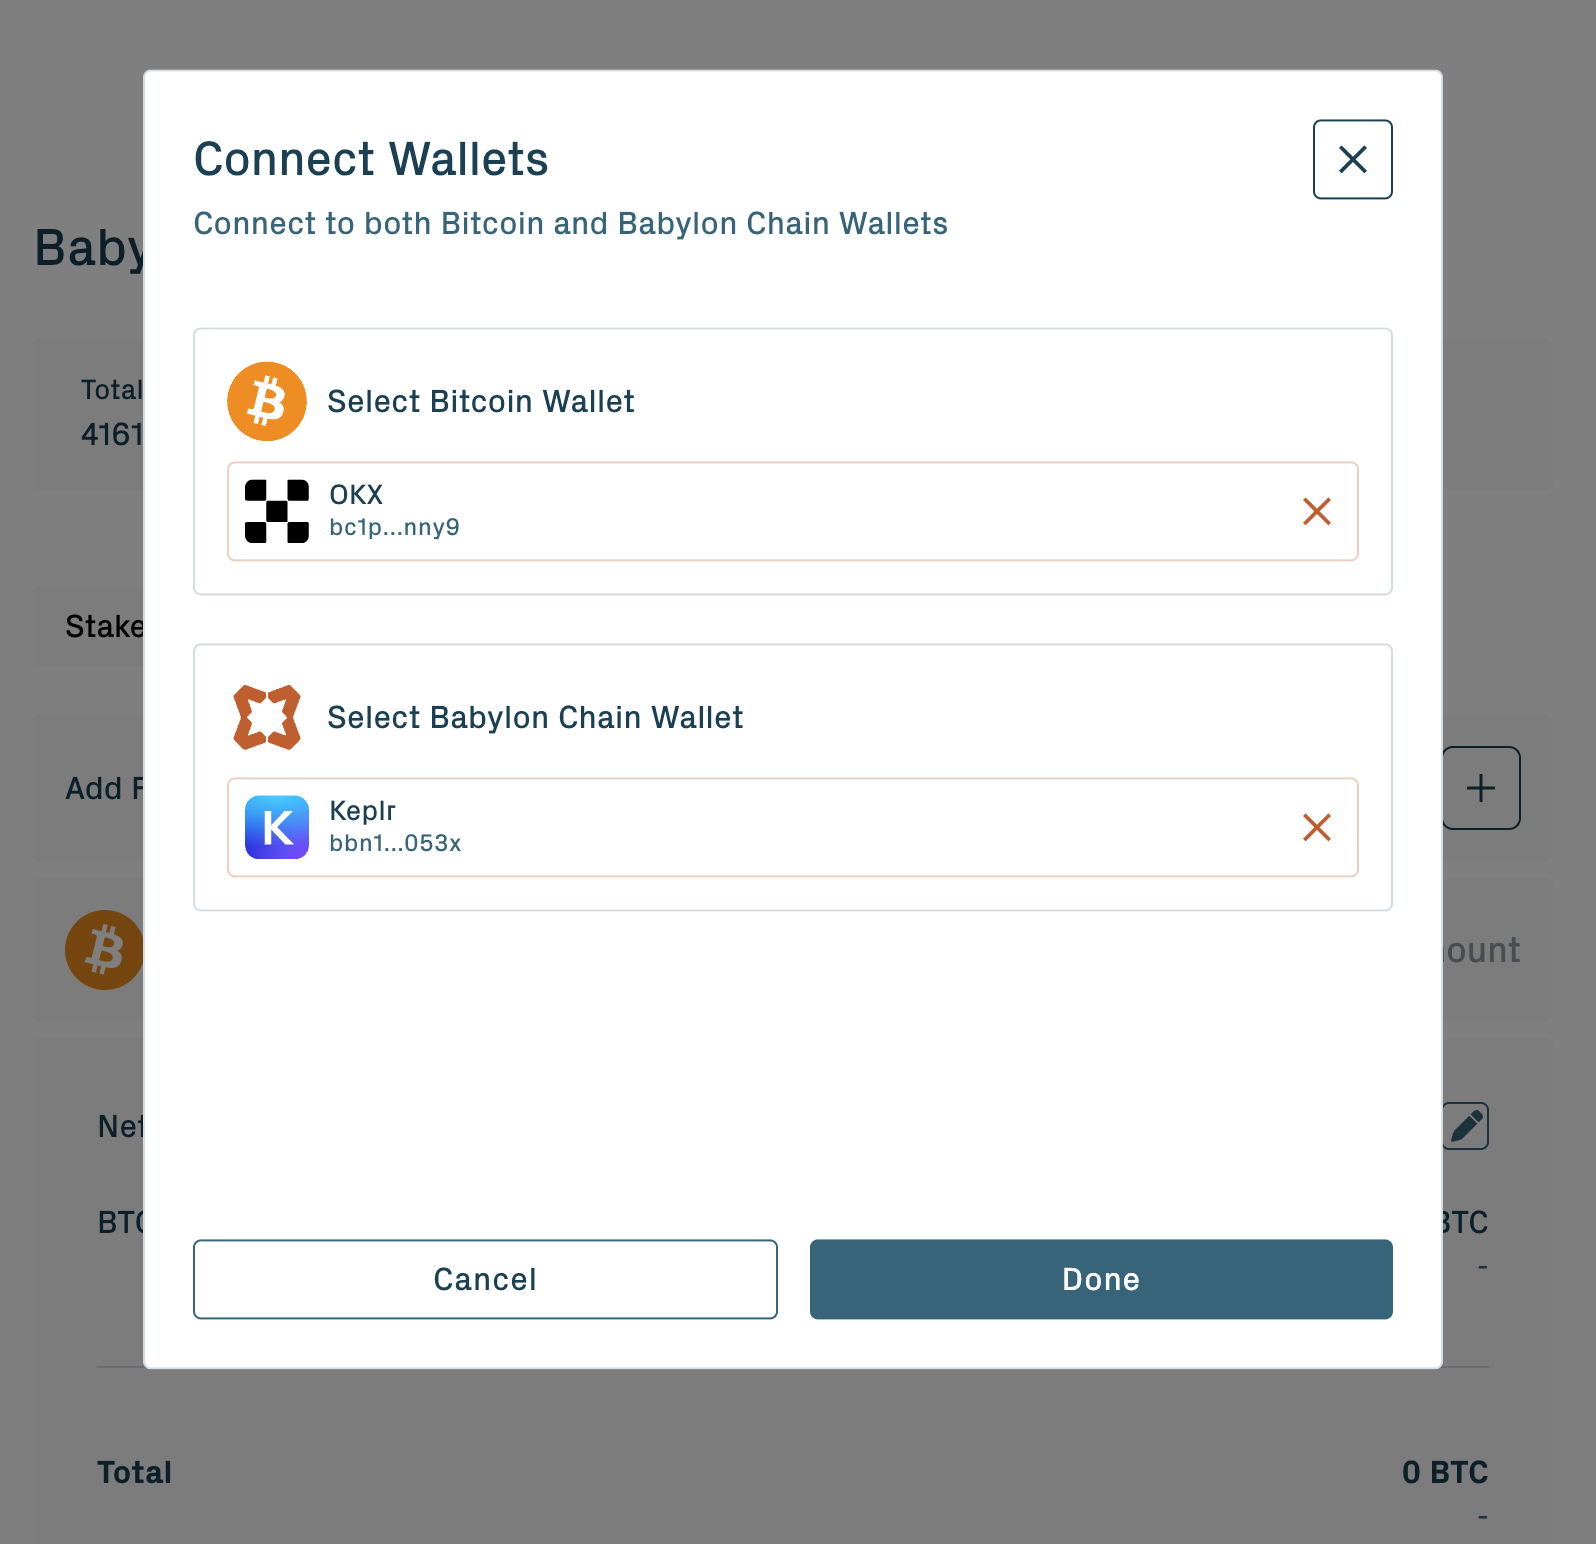
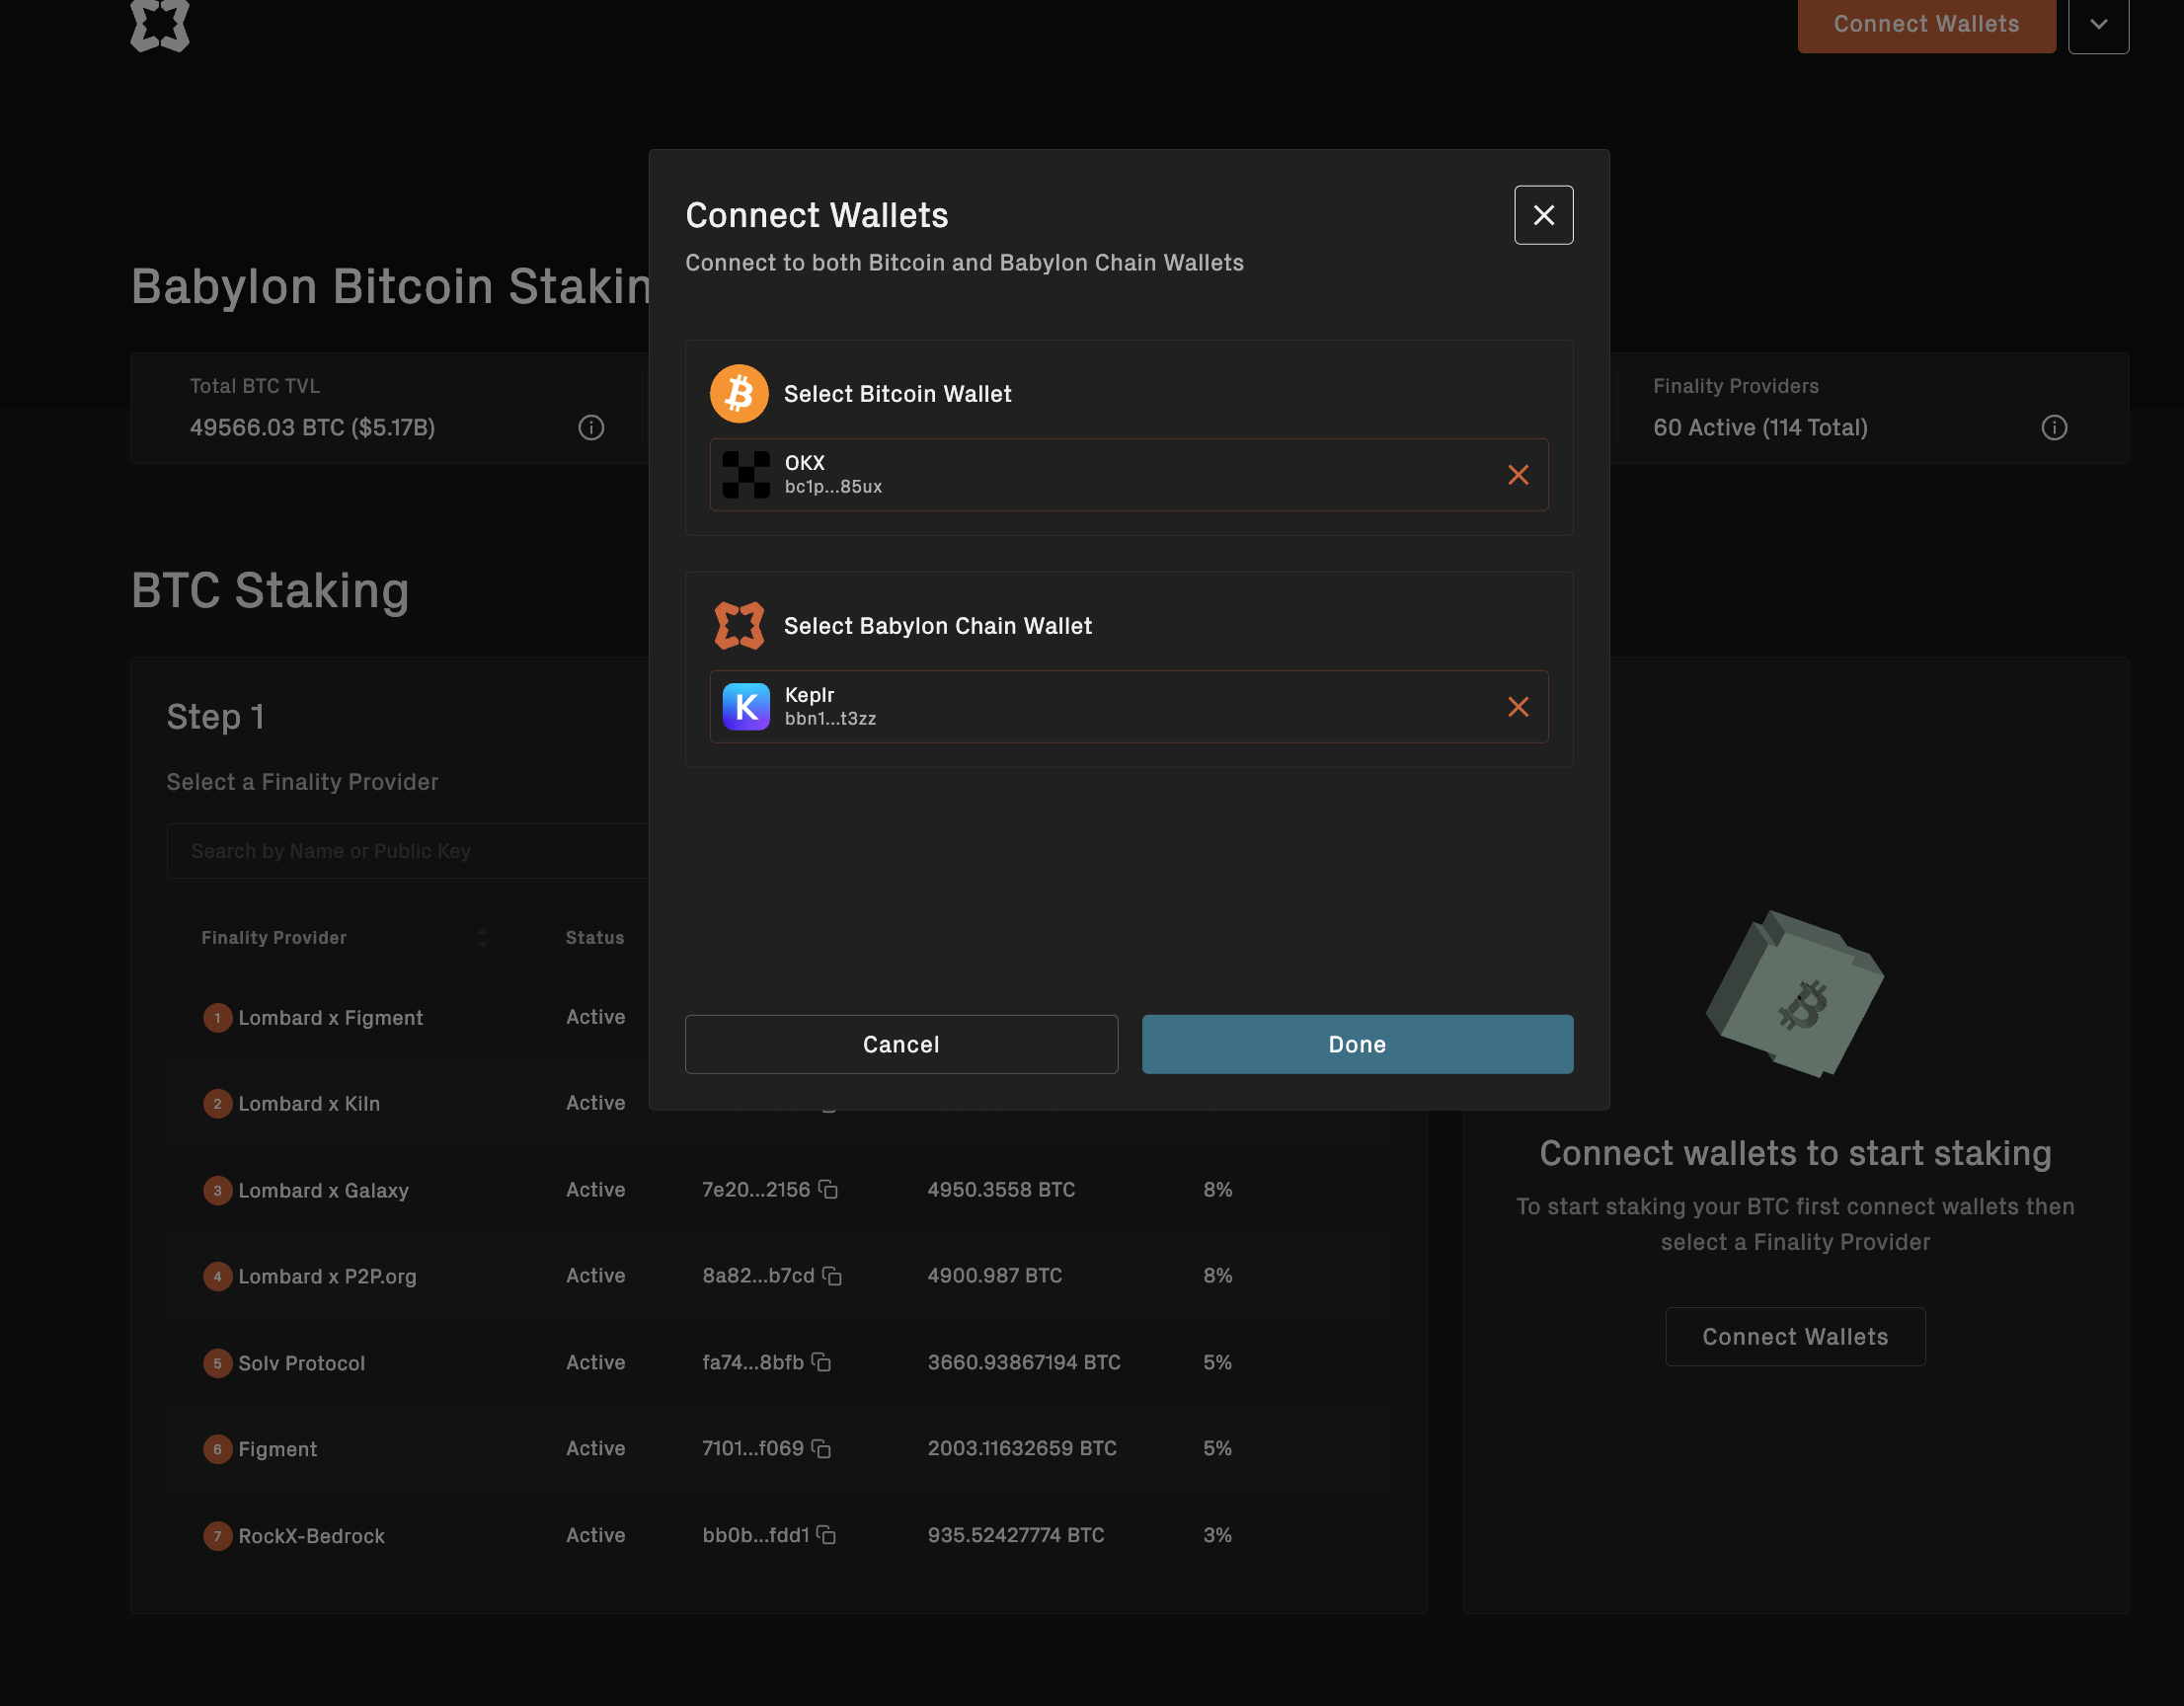
Step 2: Connect Your Wallet
Connect your compatible wallet compatible wallet to continue with the staking operation.
Step 3: Submit the Registration Transaction
Phase 1 stakers need to submit a registration transaction to the Babylon Genesis chain. Follow the instructions below to submit your registration transaction in the Babylon BTC Staking Dashboard:
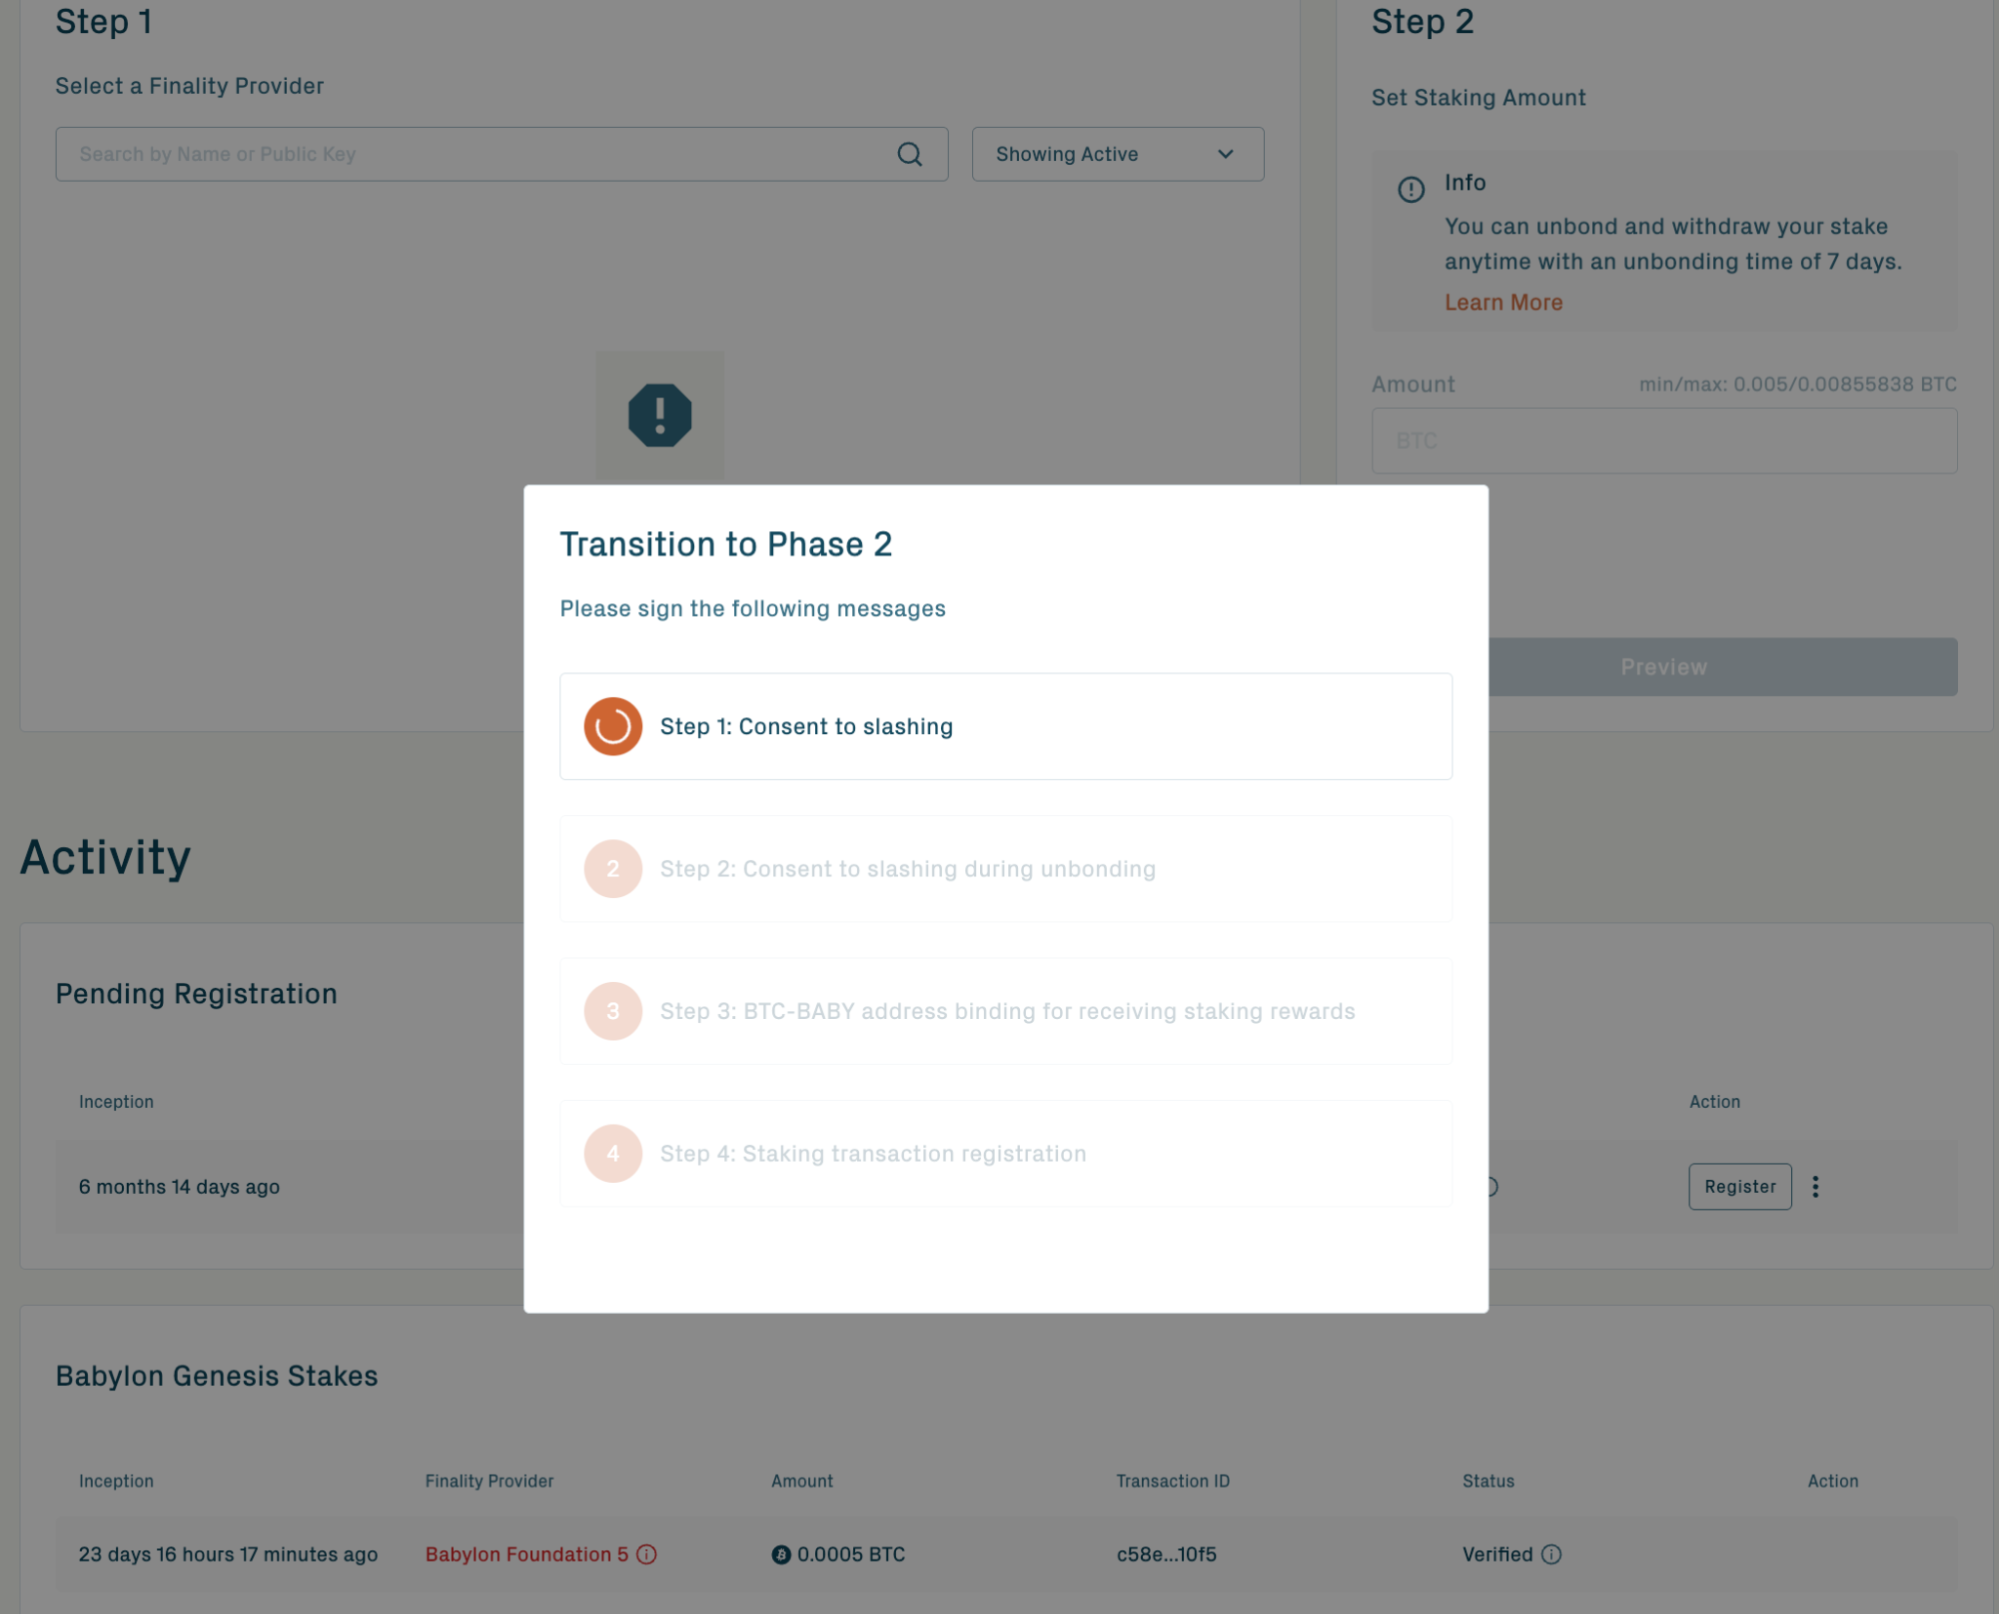
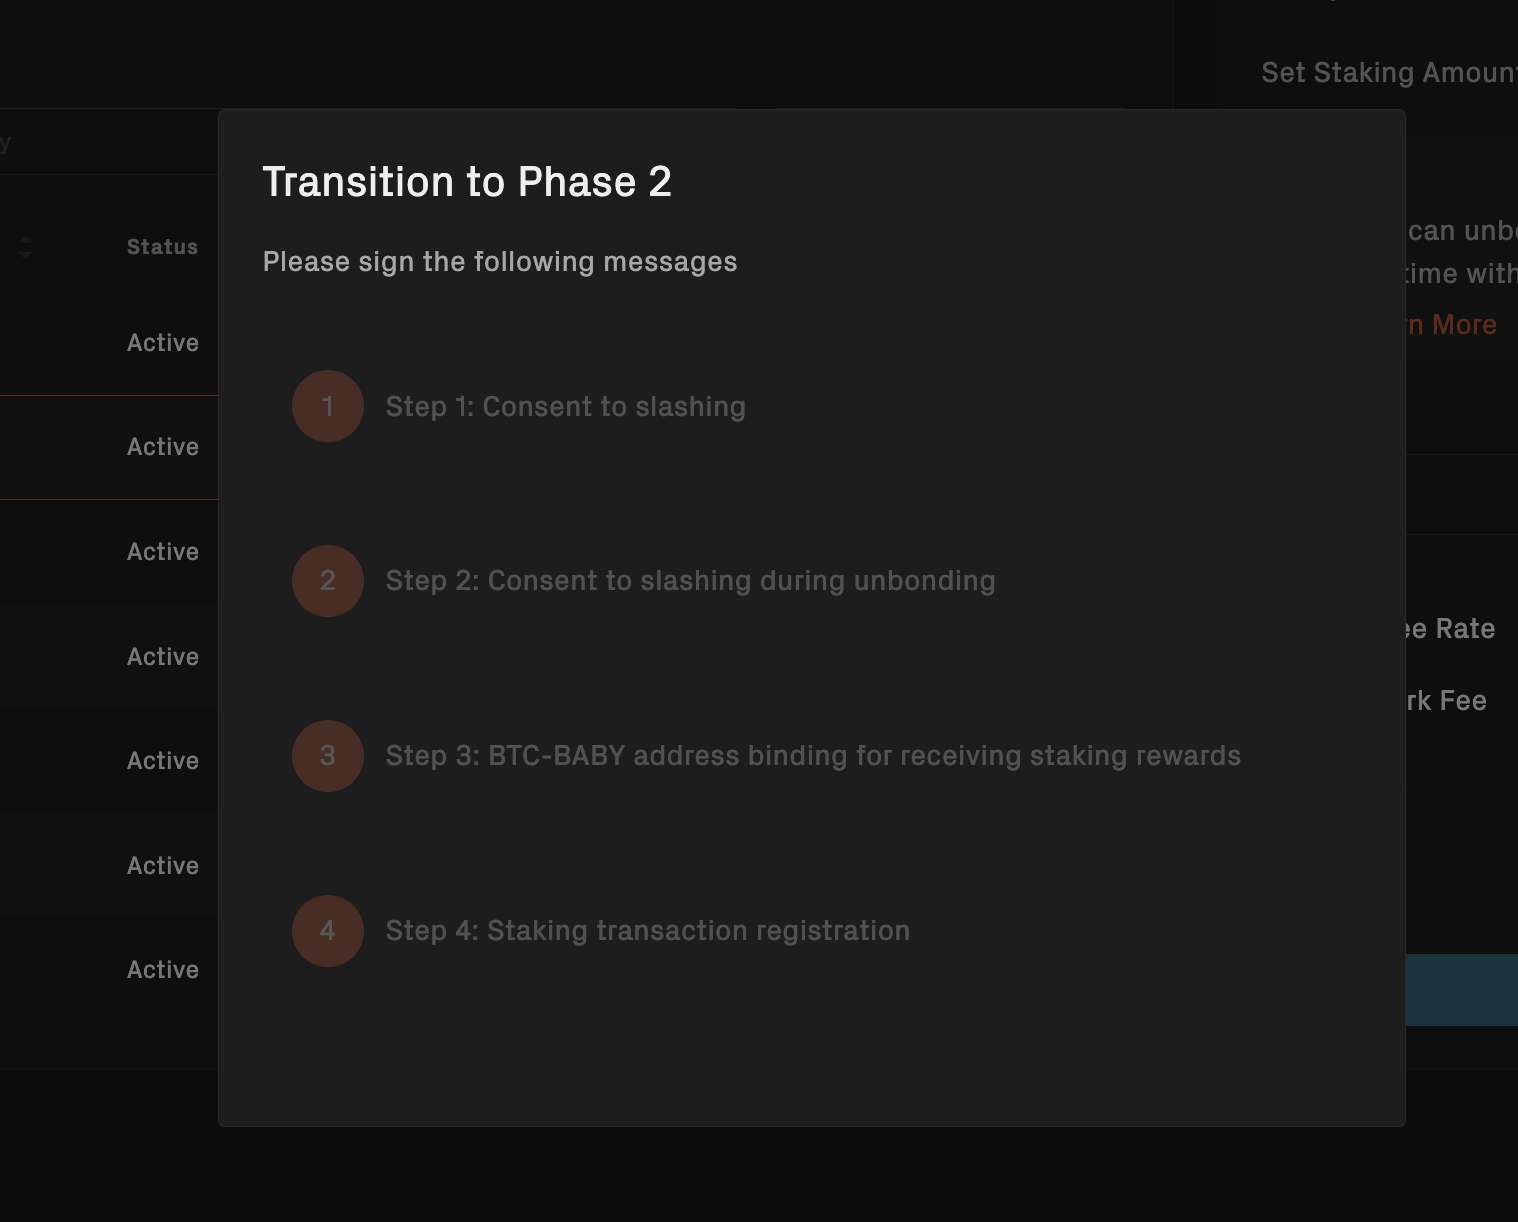
- This registration transaction requires a small amount of BABY as a transaction fee.
- The transaction must include the binding of BTC and BABY addresses to activate staking and requires the staker's signature as consent for penalty security.
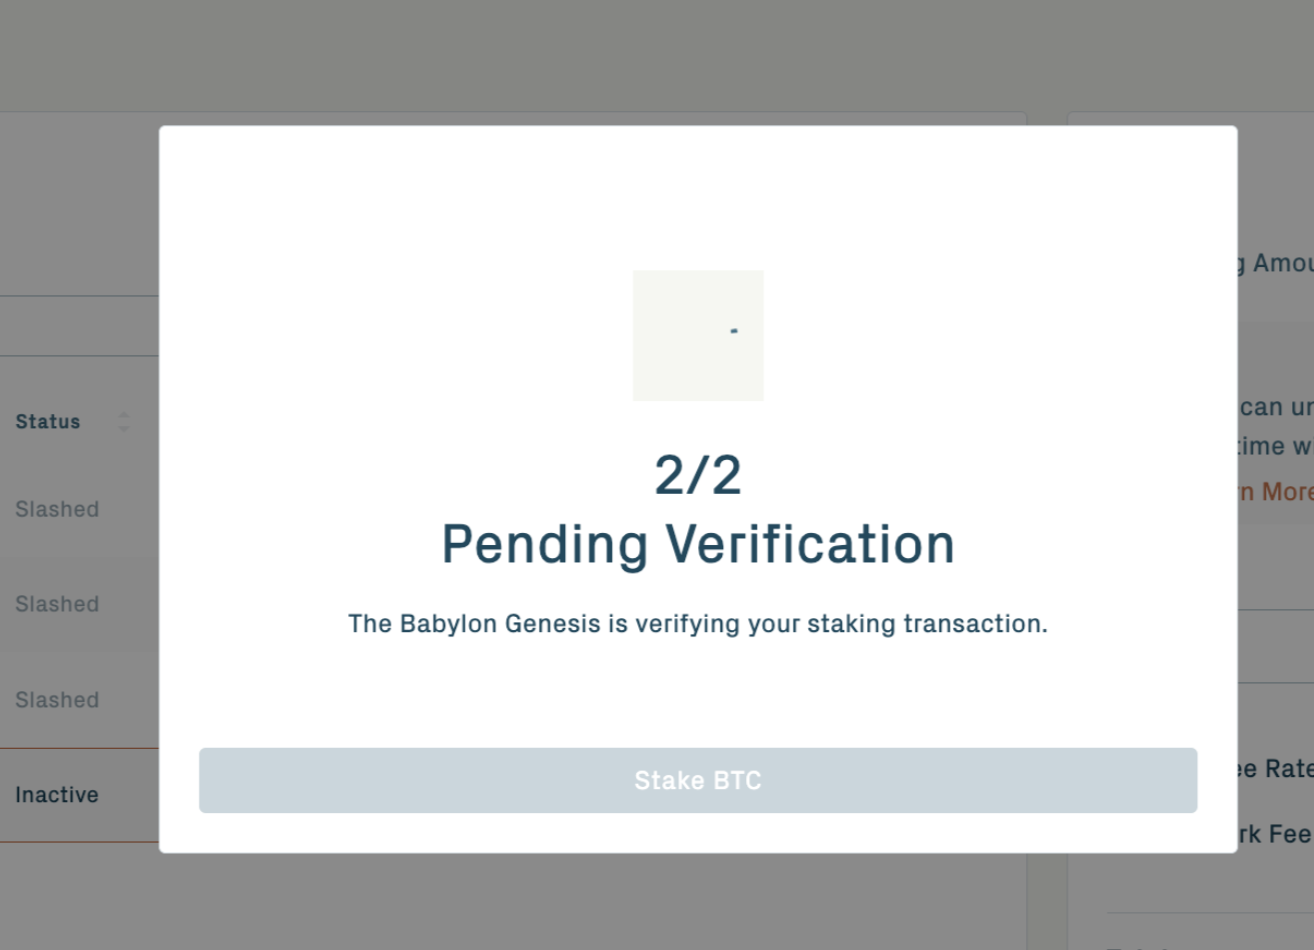
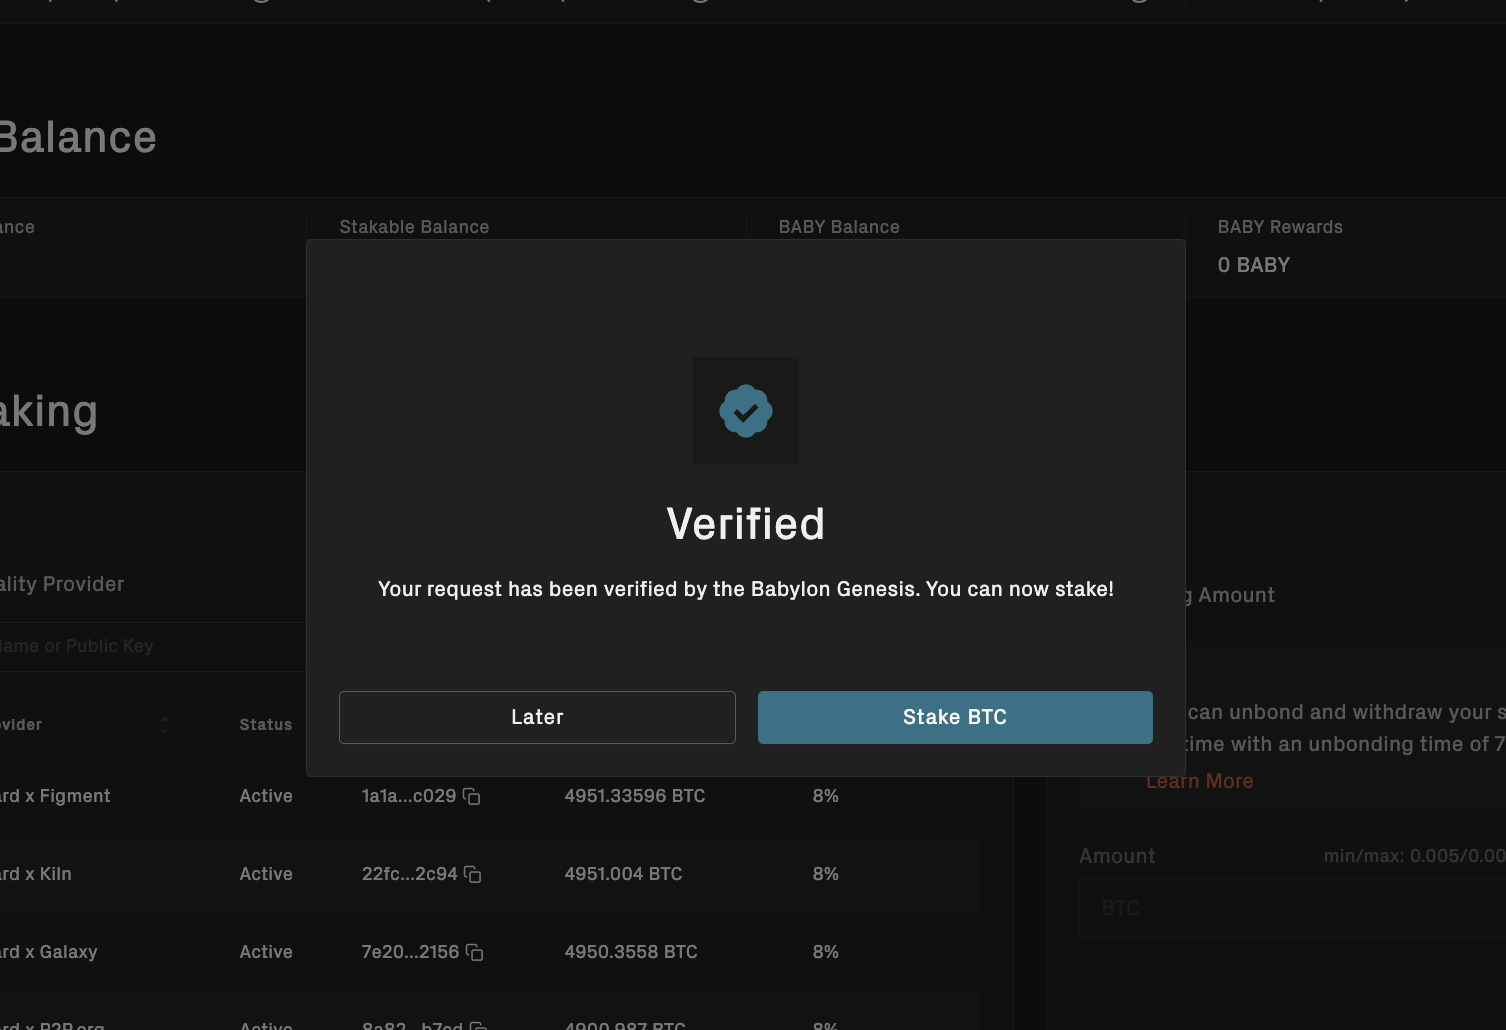
Step 4: Wait for Verification
After submitting the registration transaction, please wait patiently for it to be verified by Babylon Genesis.
Once registered successfully:
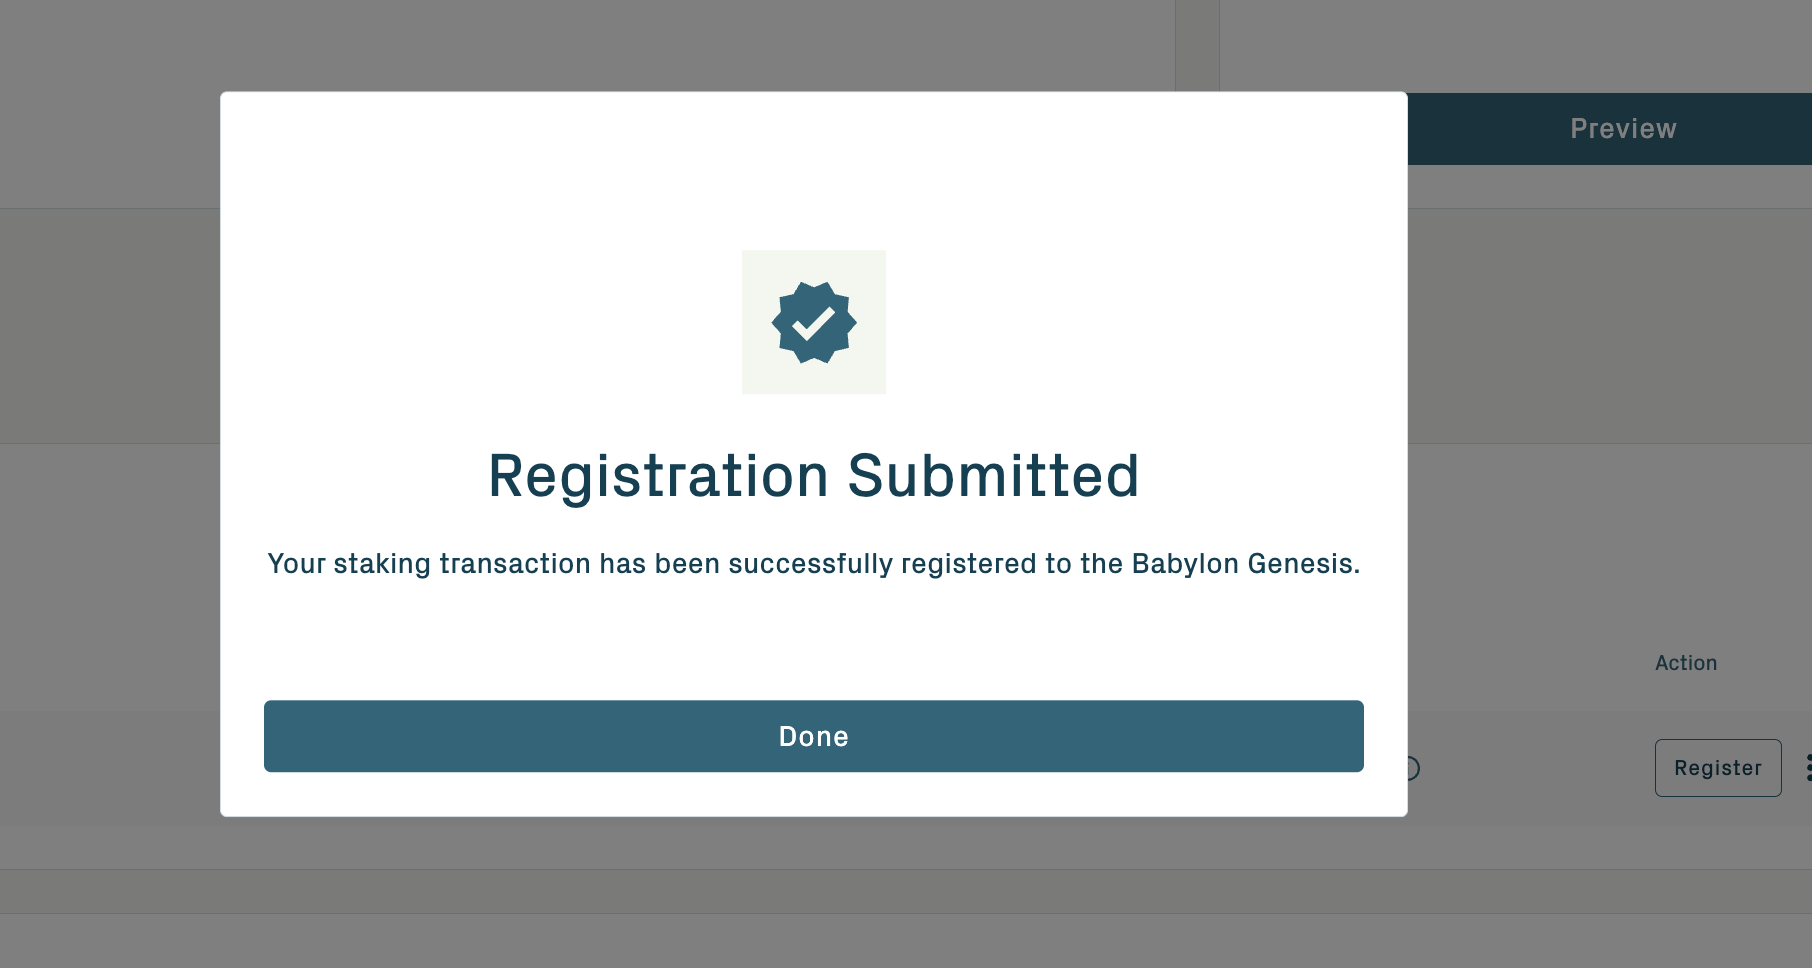
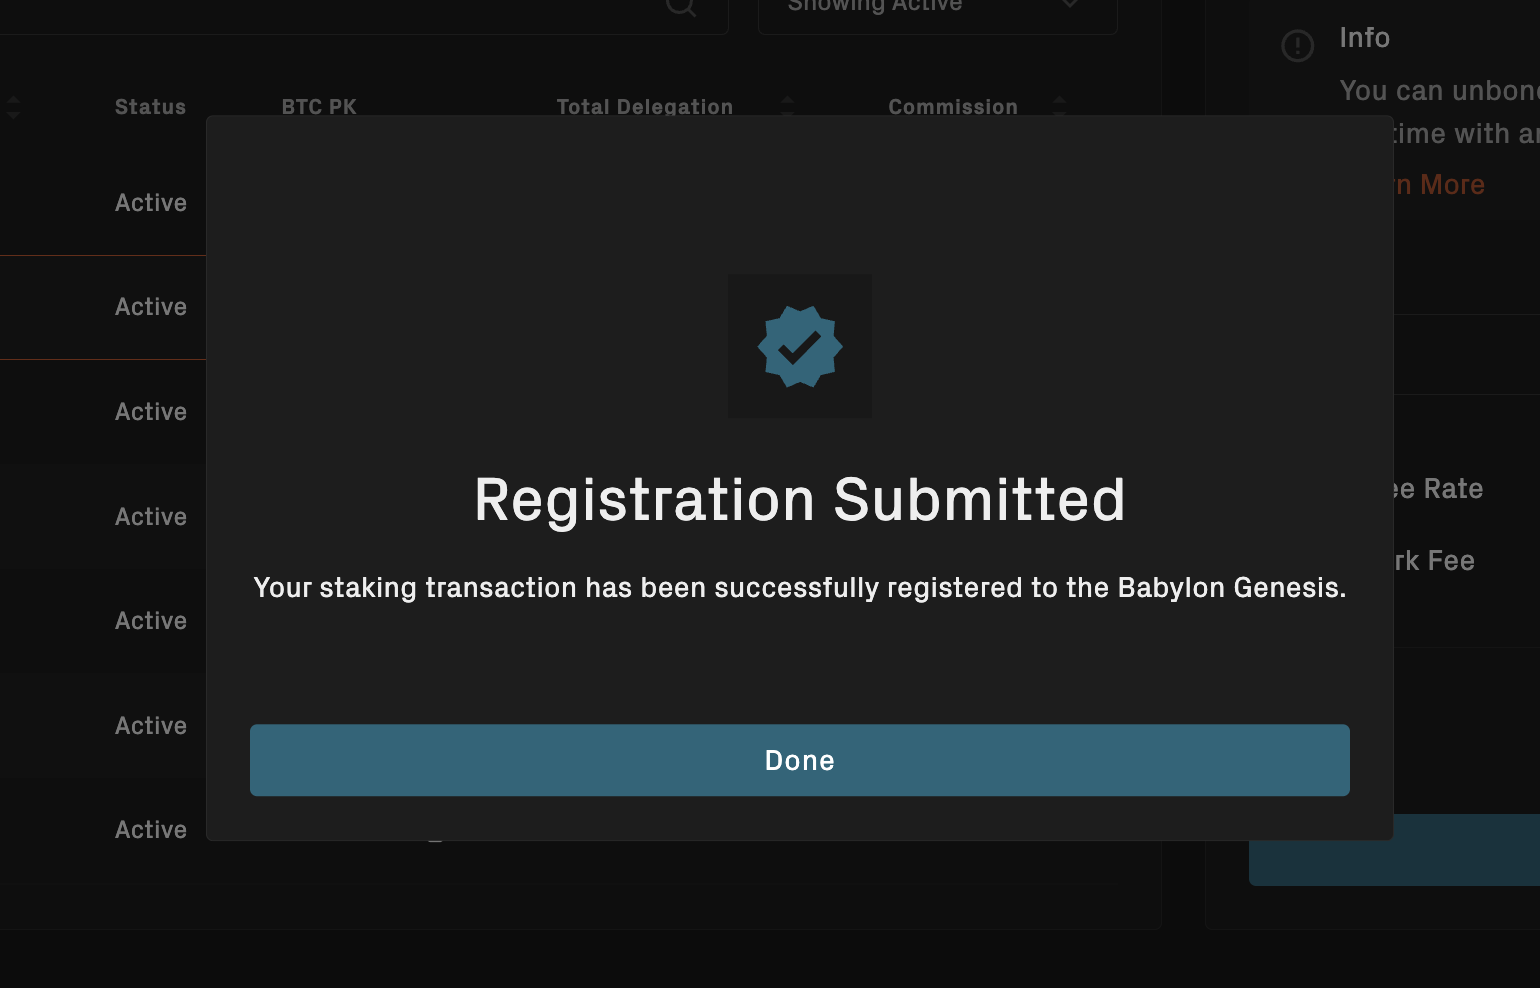
- Your staking transaction is successfully registered on the Babylon Genesis.
- From this point forward, your stake will be subject to penalties, with a penalty rate of 0.1%.
2. For New Stakers
How to Register BTC Staking in Phase 2
Step 1: Connect Your BTC and BABY Wallets
Access the Babylon Staking Dashboard and connect your BTC and BABY wallets.
Step 2: Choose a Finality Provider
Select the Finality Provider to whom you want to delegate voting rights, enter your staking amount, and click "Preview".
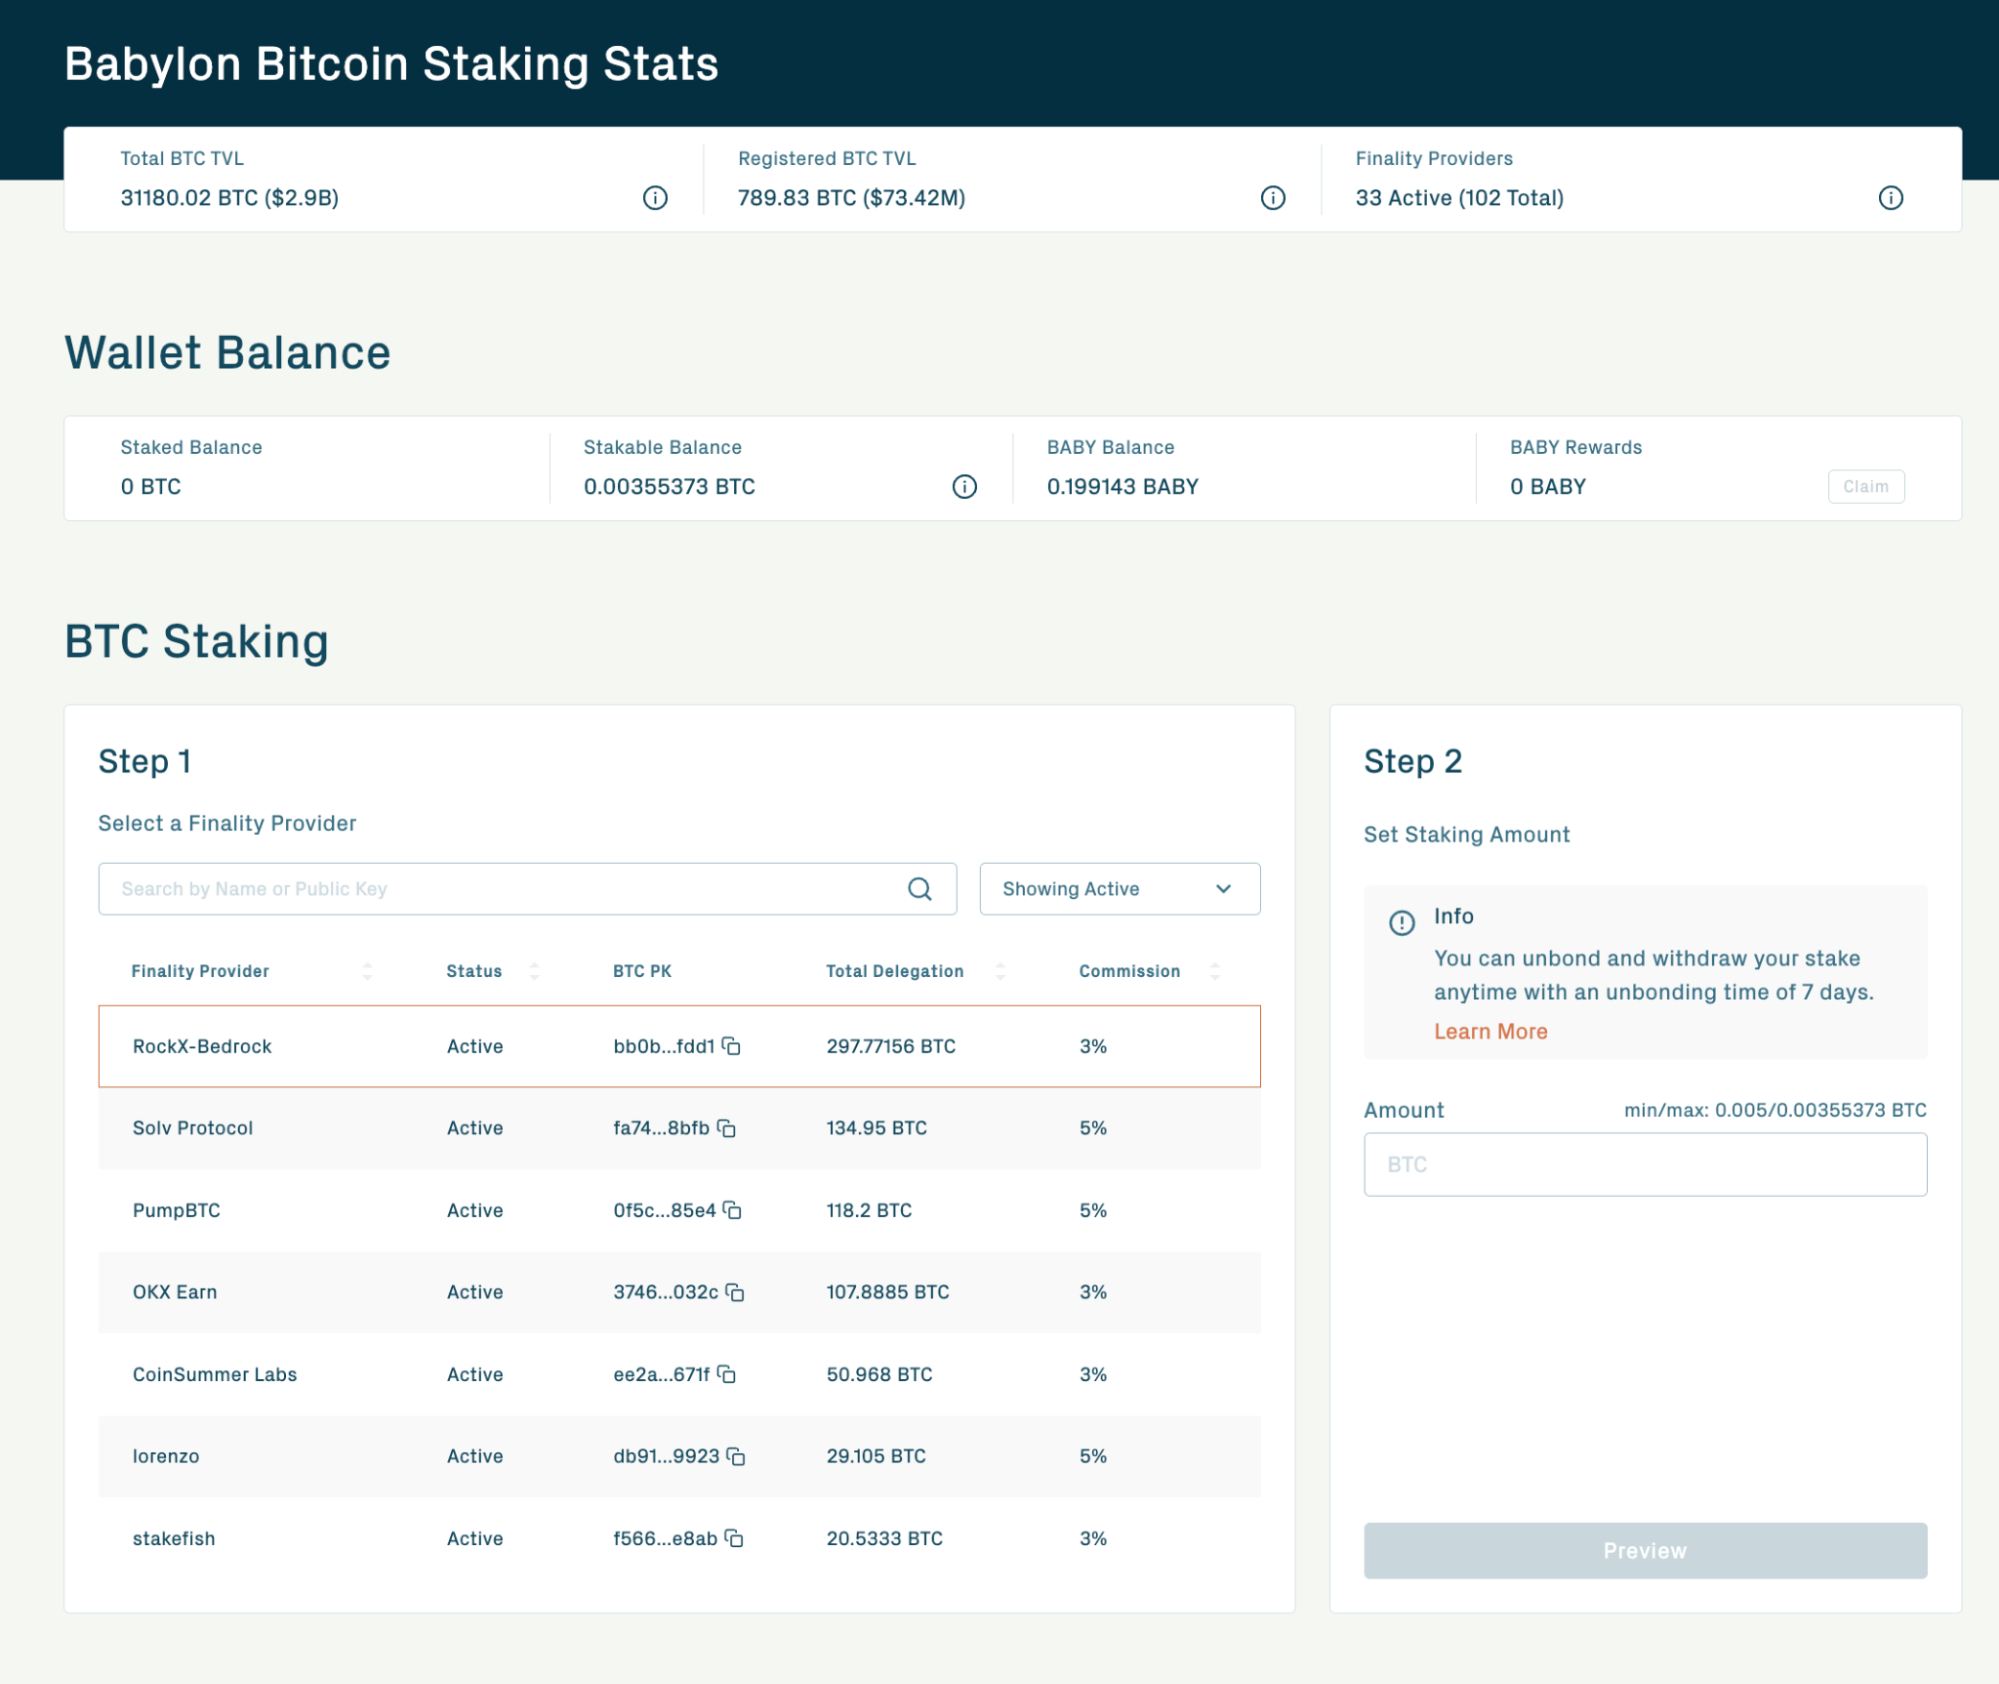
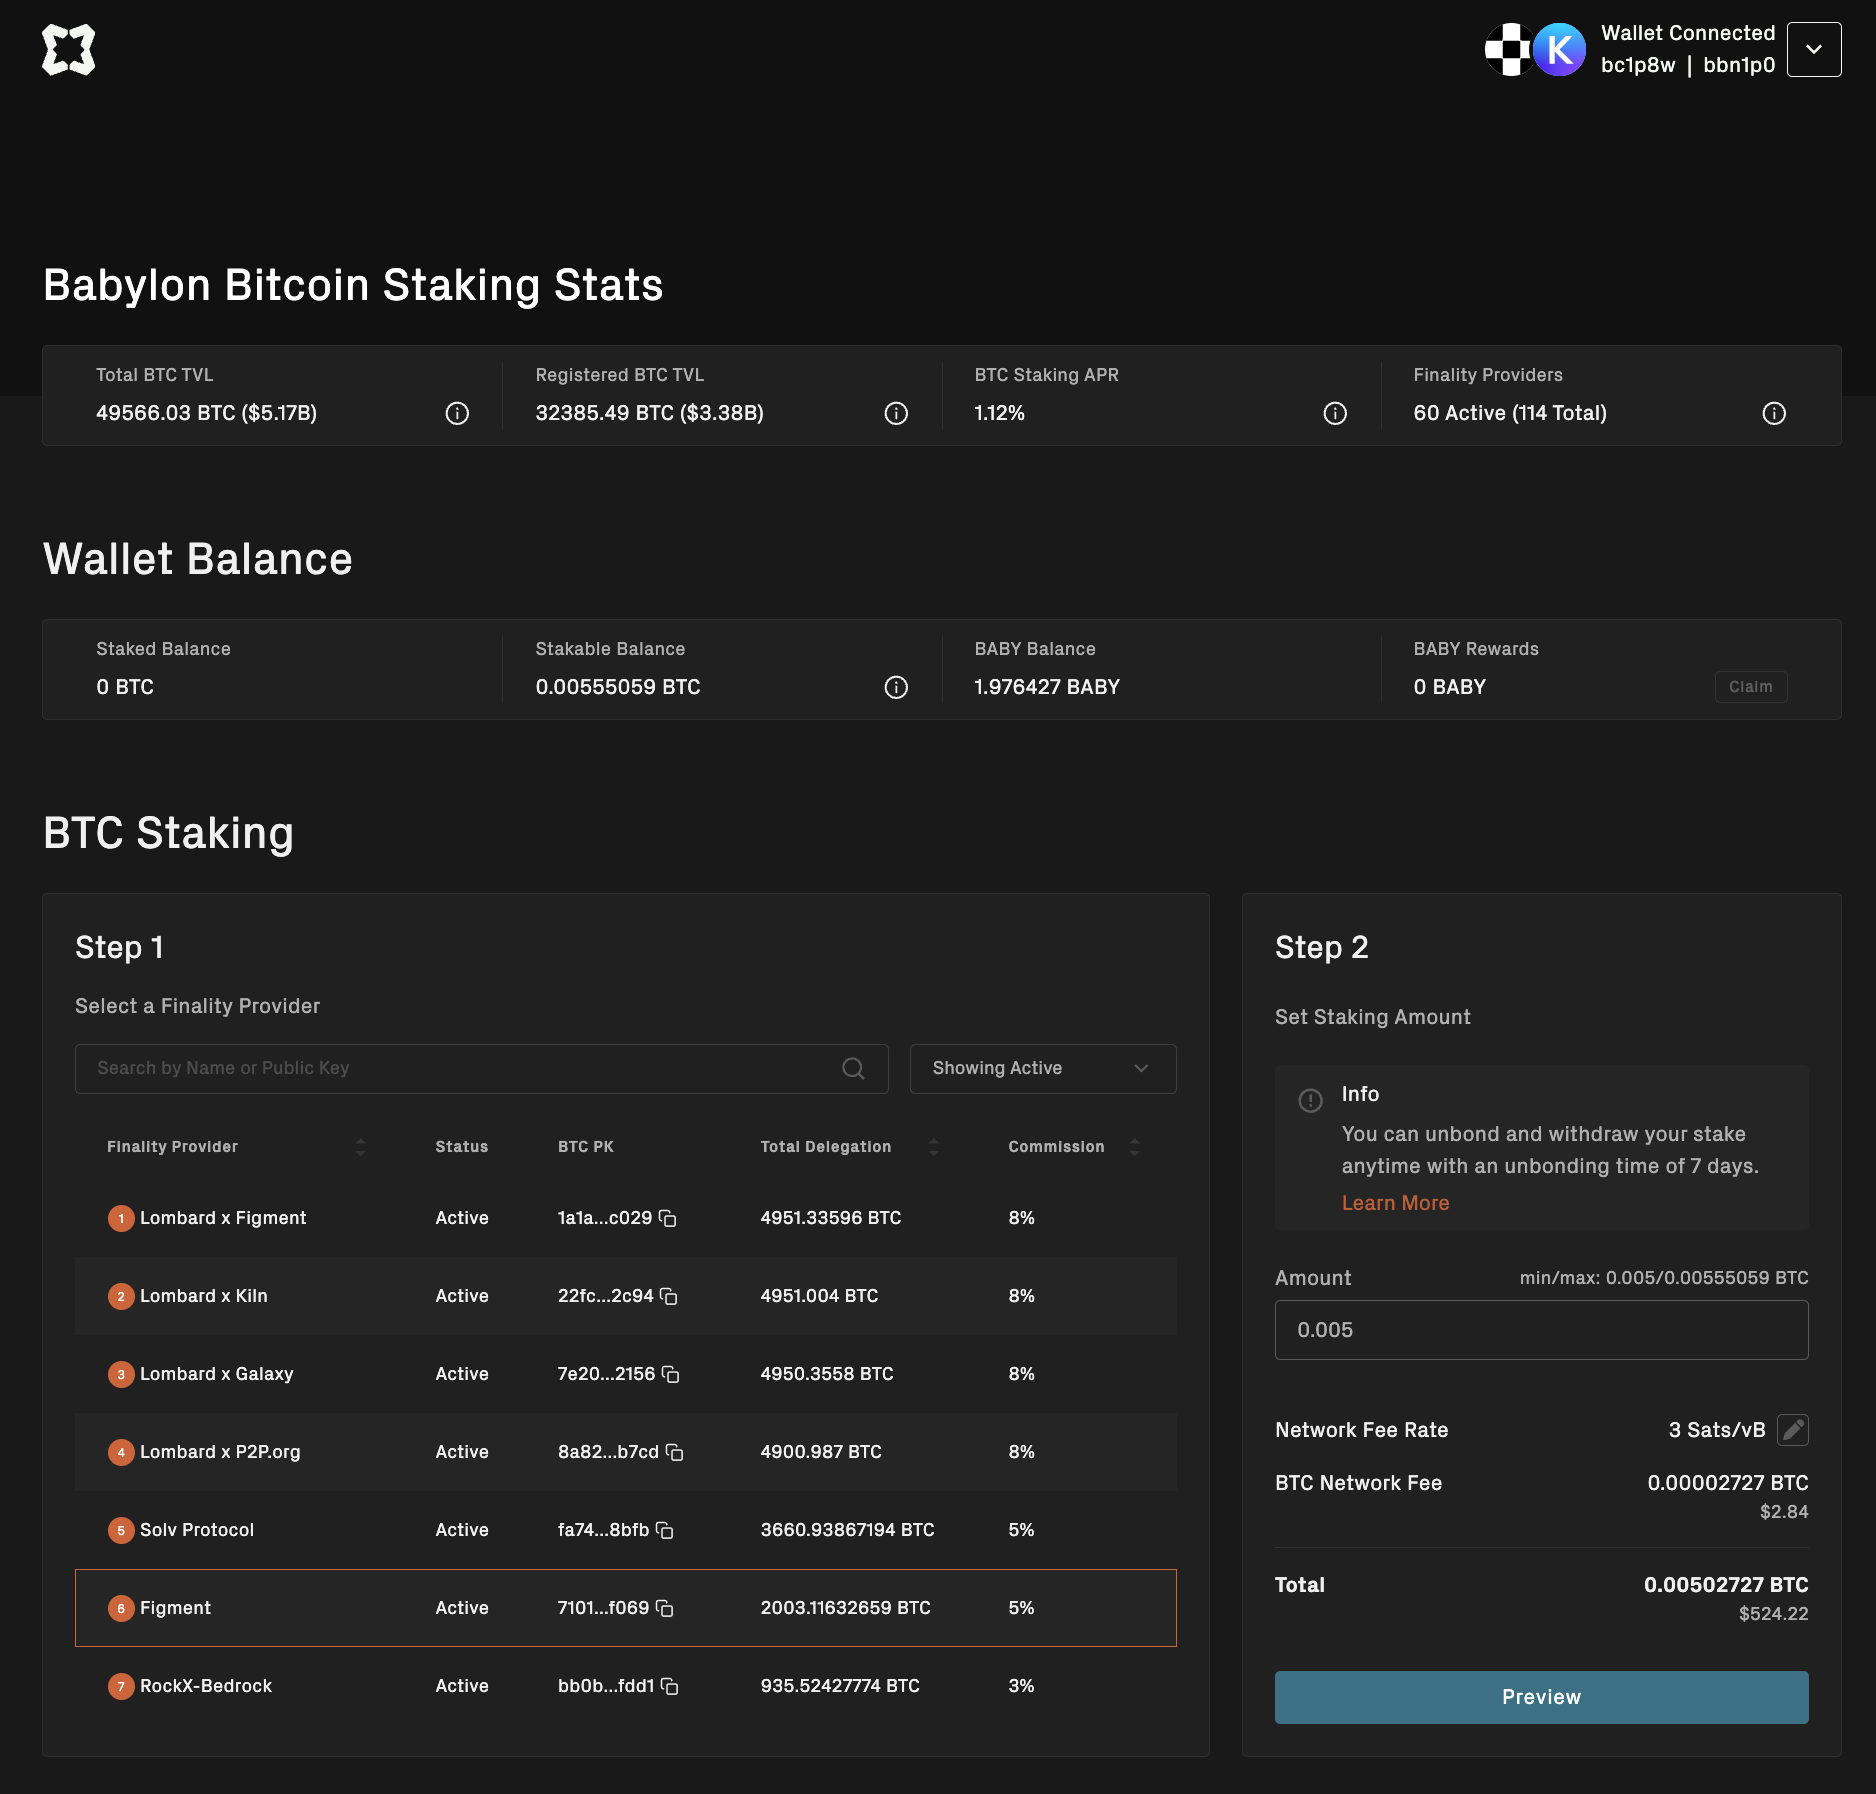
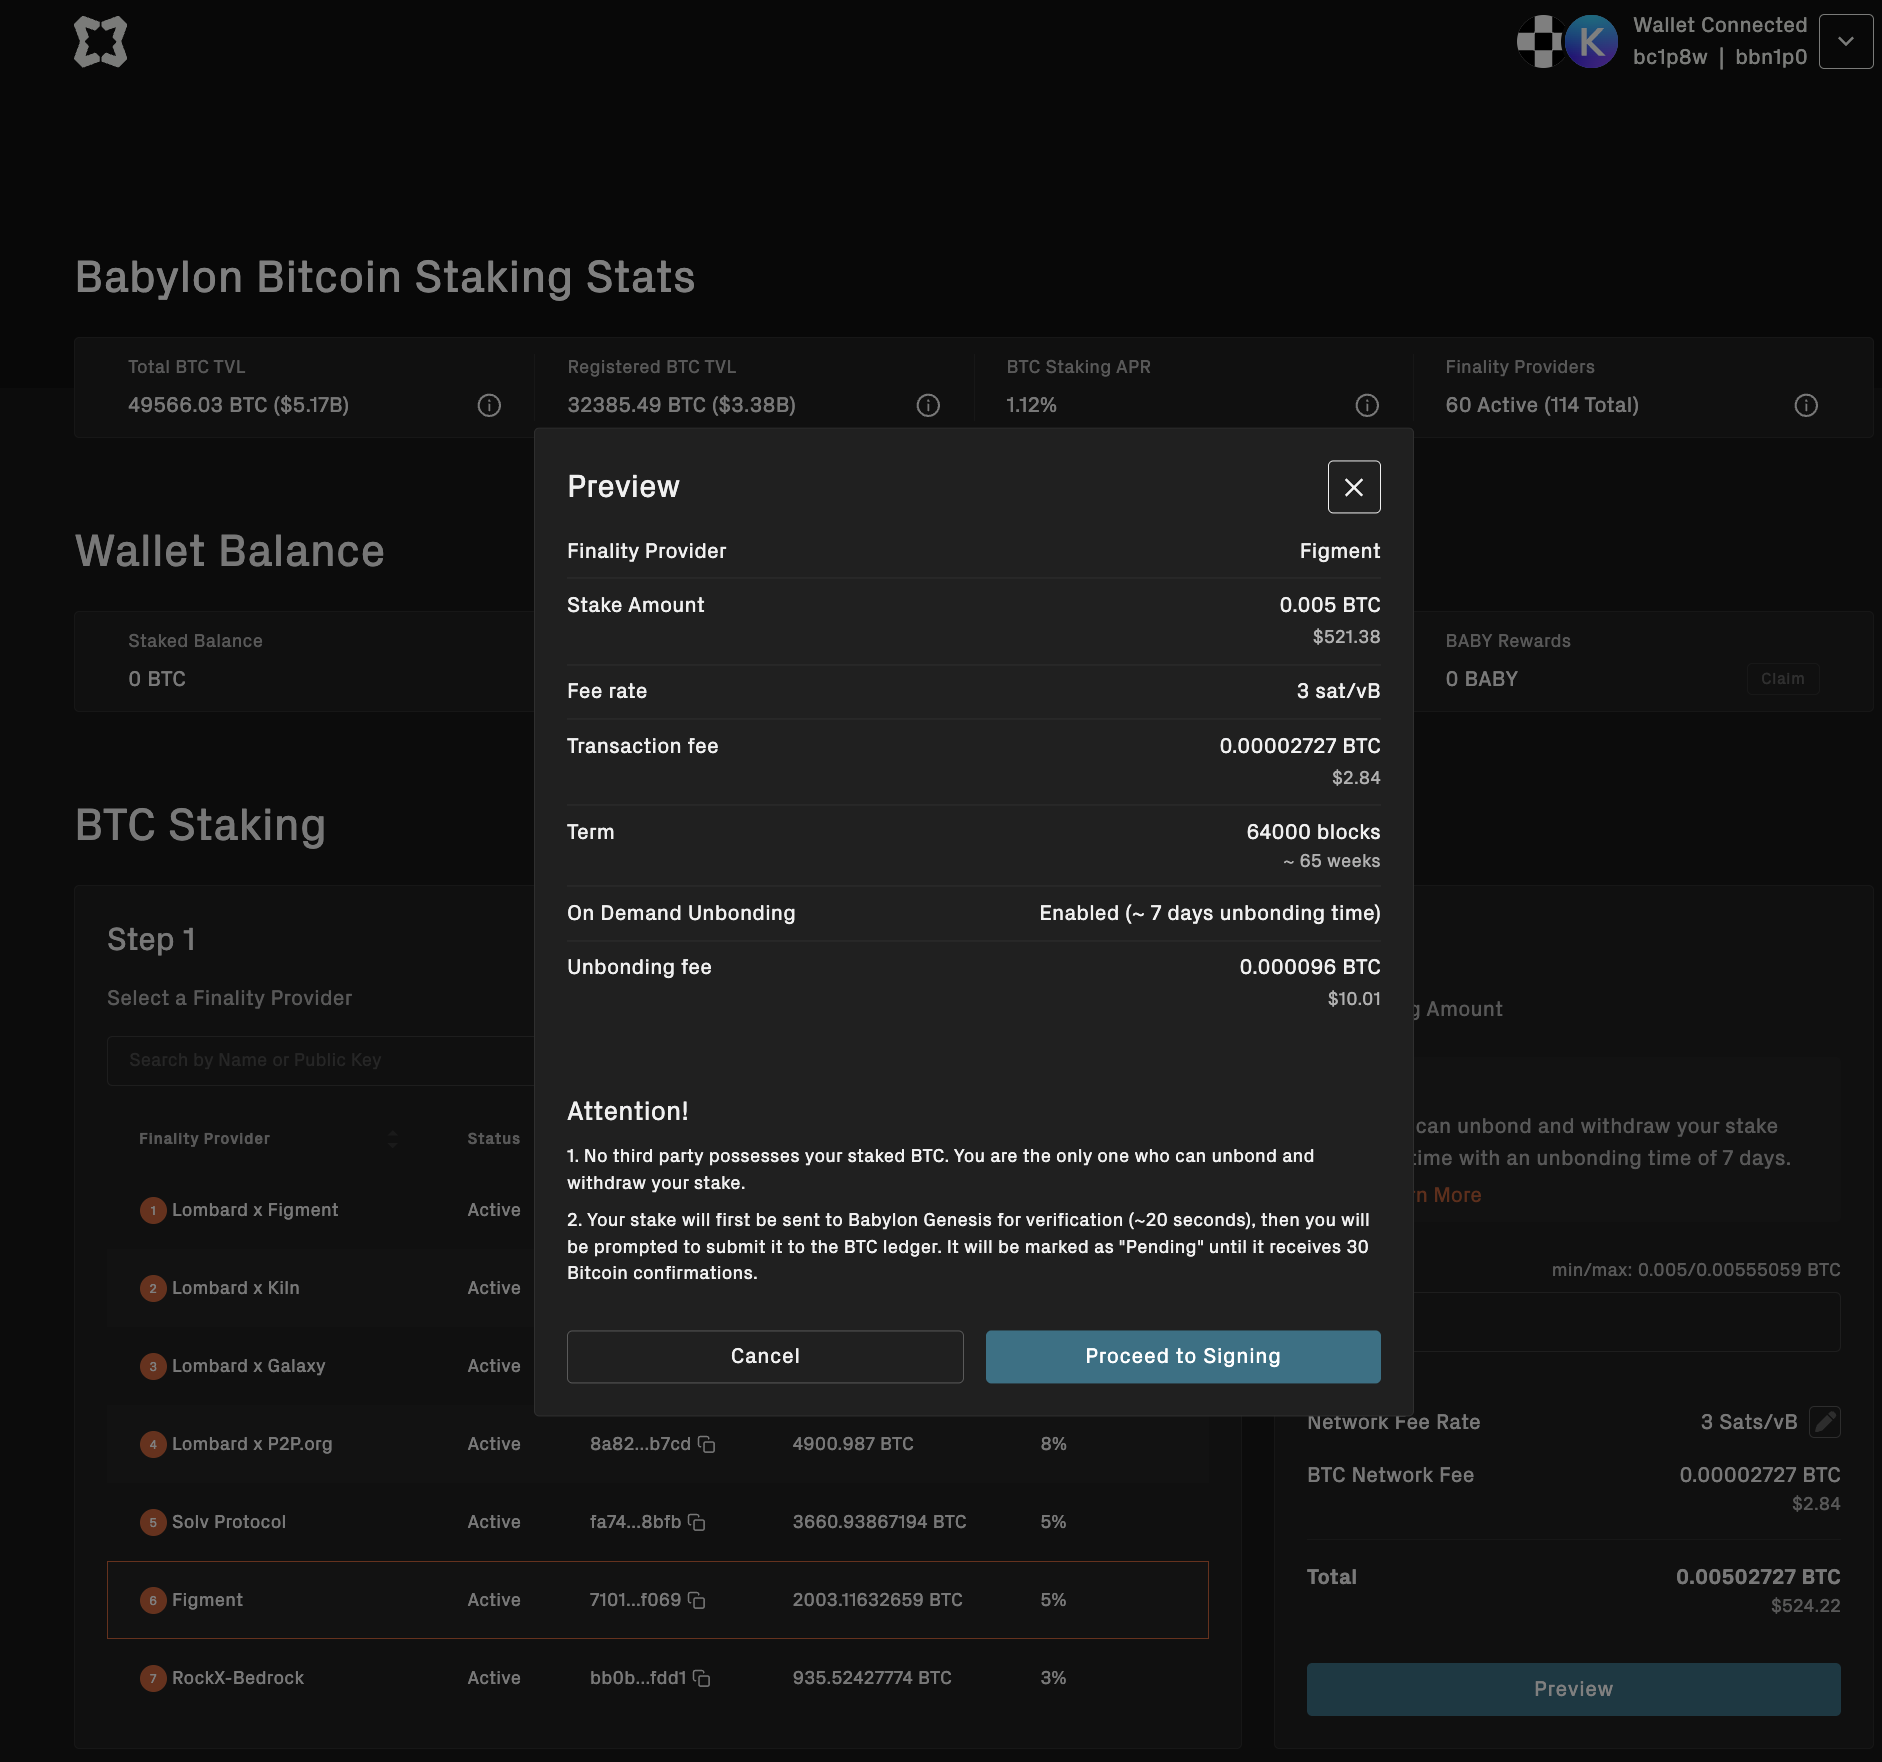
Please note that different Finality Providers charge varying commission rates; lower commissions mean higher staking rewards.
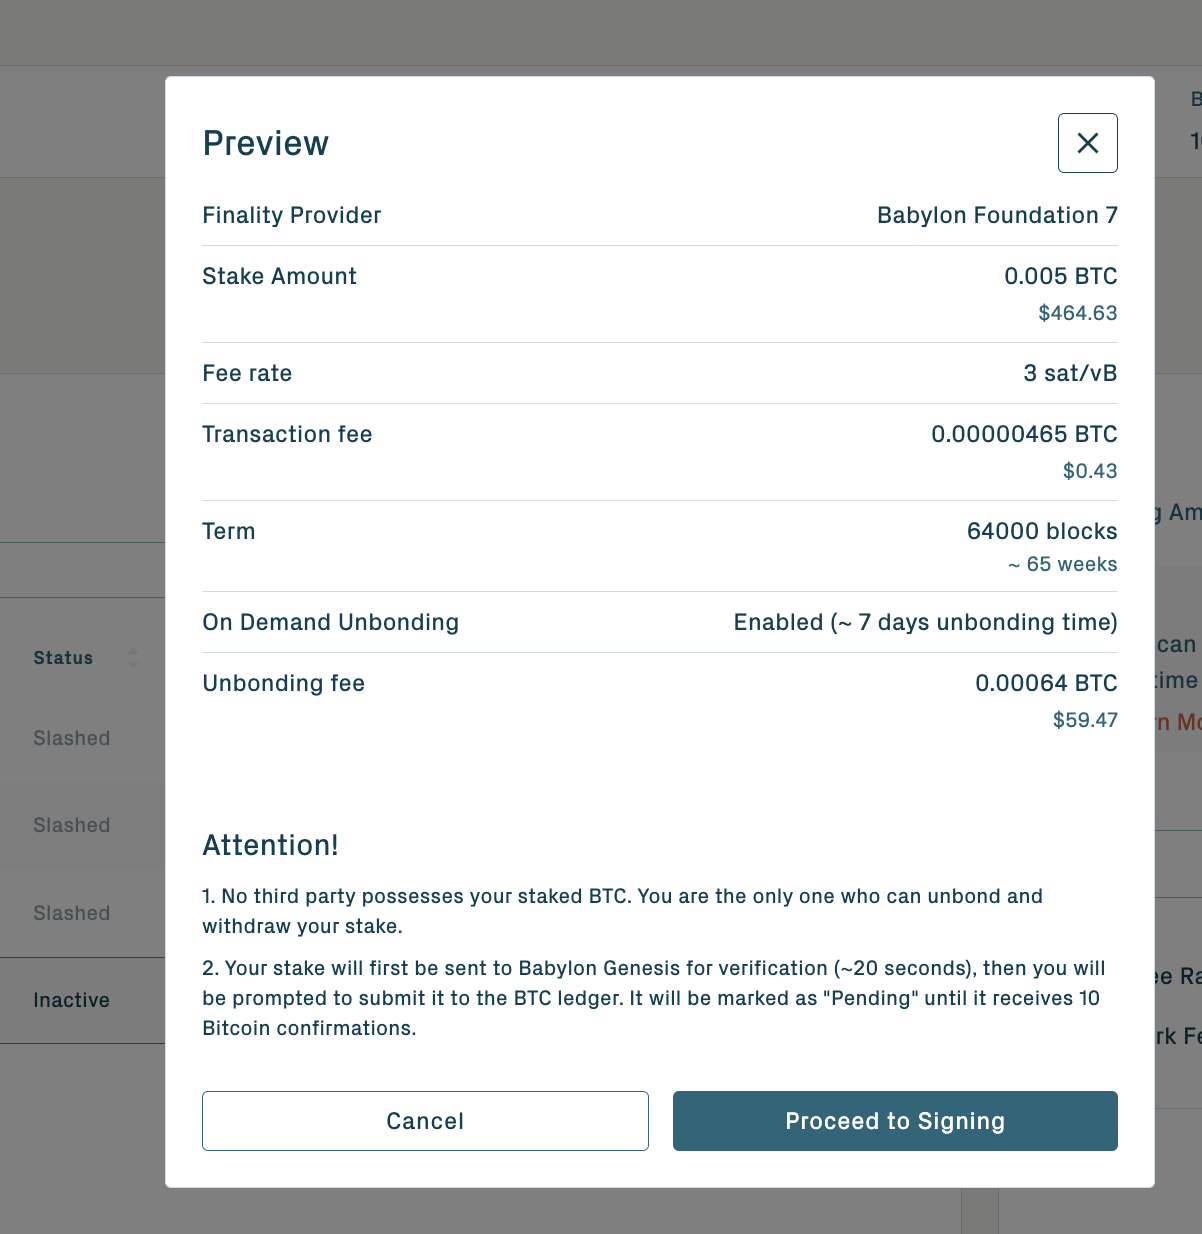
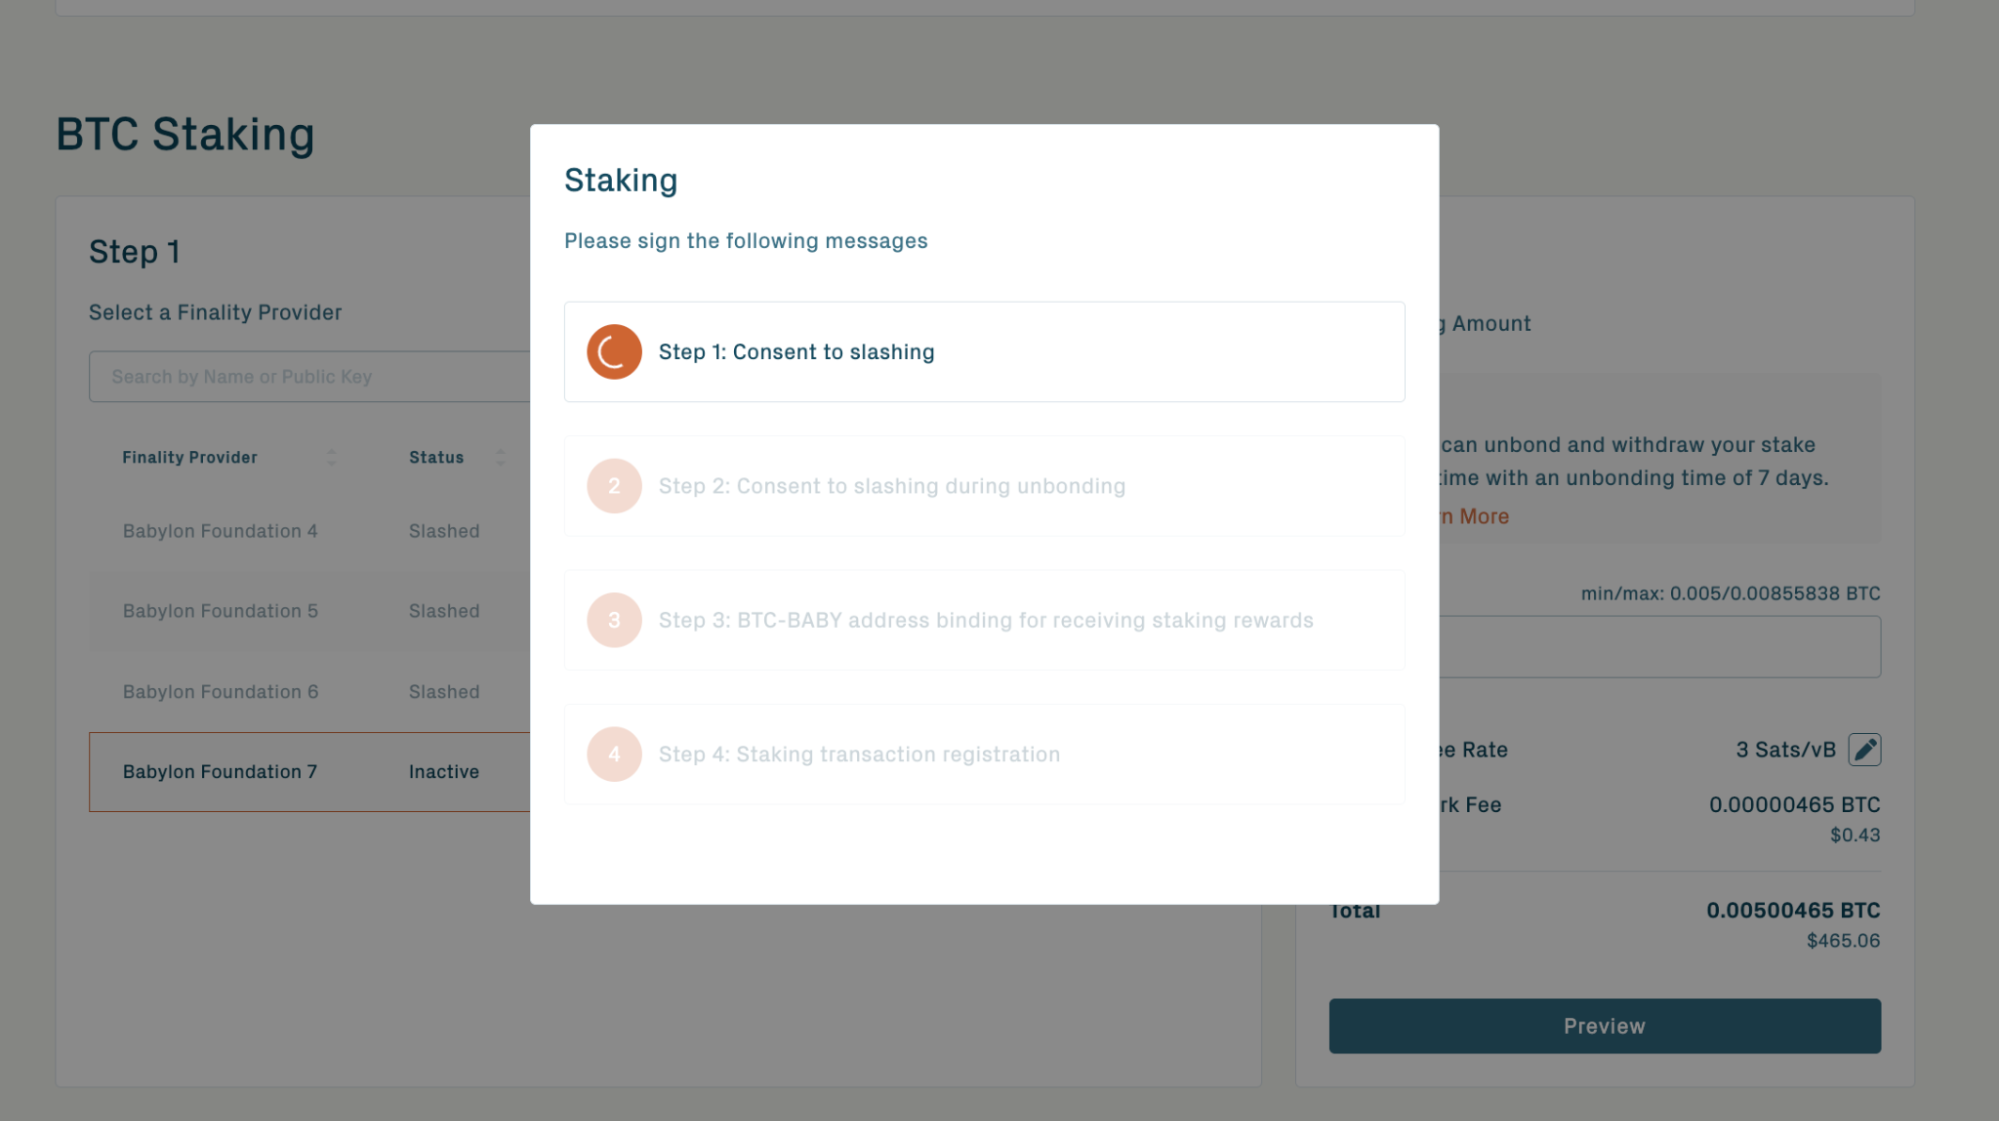
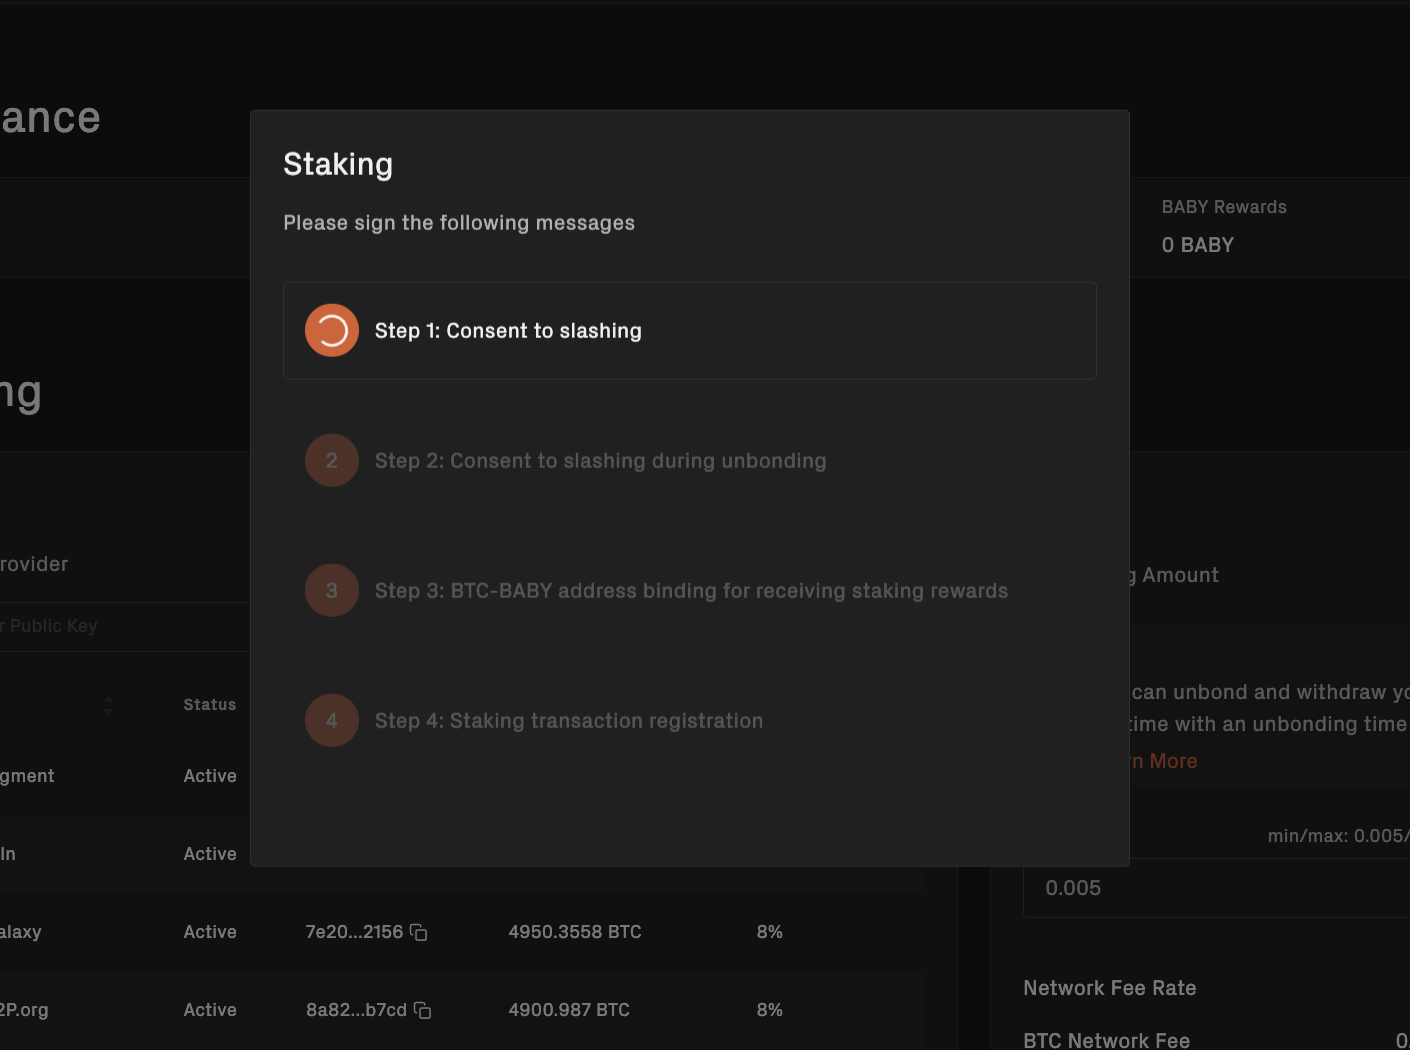
Step 3: Agree to Penalties and Wallet Binding
You will need to agree to the penalty terms and bind your wallet. The transaction will then be sent to the Bitcoin network.
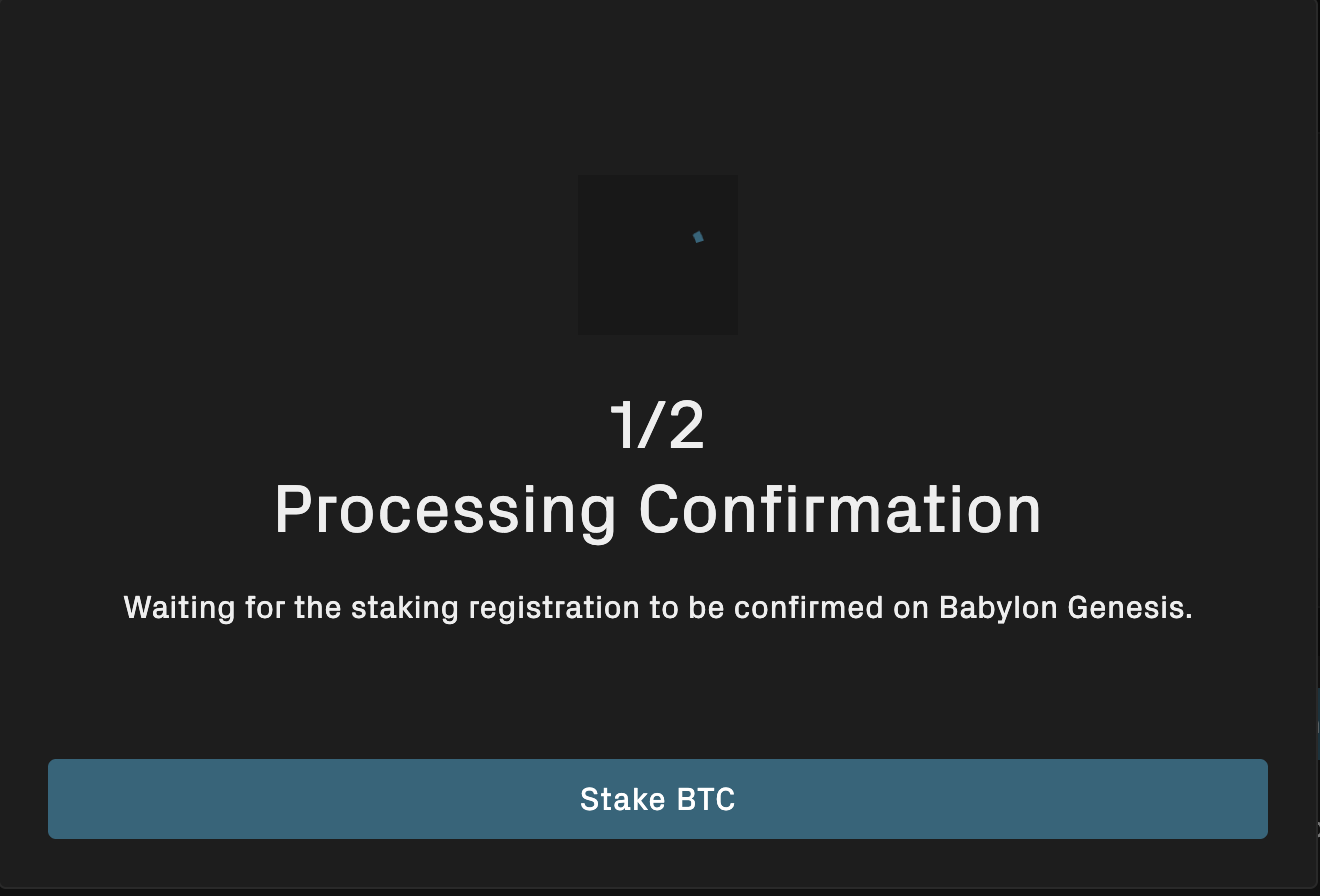
Step 4: Wait for Transaction Confirmation
After your staking transaction is included in the Bitcoin blockchain, you will need to wait for 30 blocks to finalize your staking. During this waiting period, the covenant committee will pre-sign the transactions as part of the slashing mechanism design.
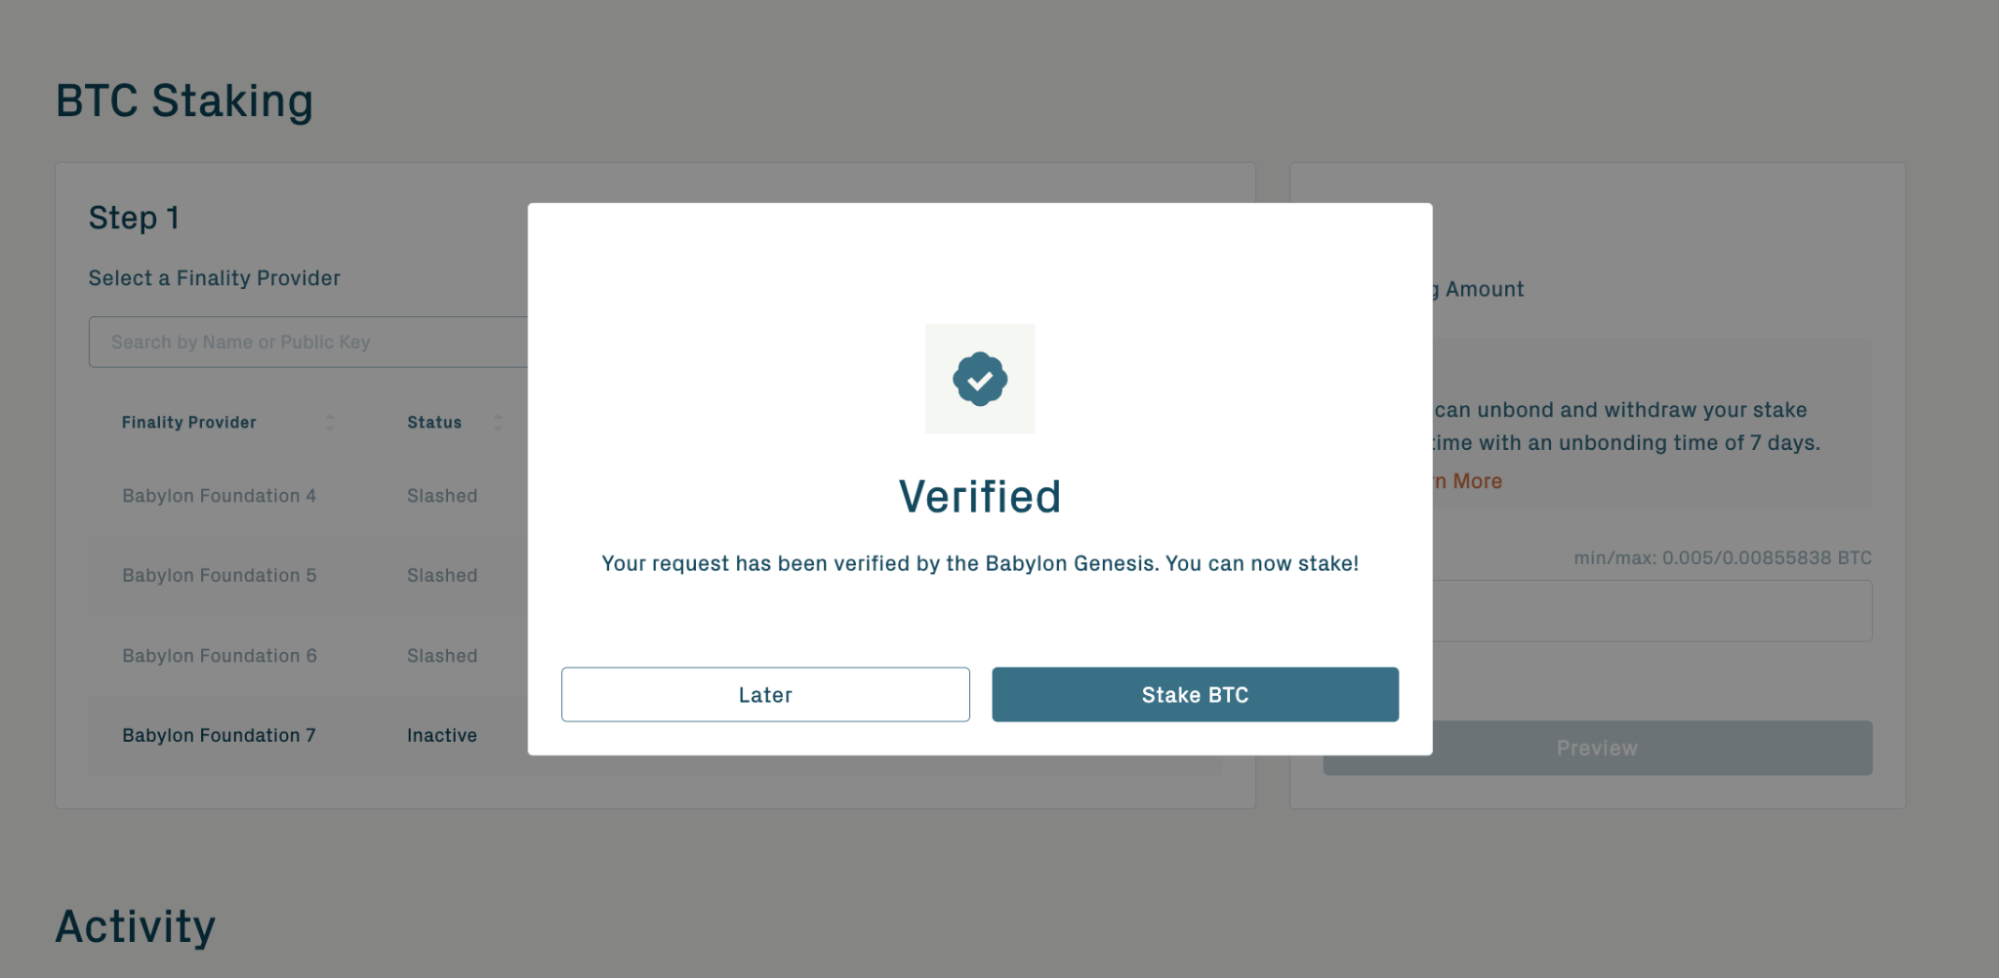
Step 5: Send the Staking Transaction
Once the waiting period is complete, you can click "Stake BTC" and sign the transaction via your BTC wallet. After you see the transaction confirmation screen, your stake will be active.
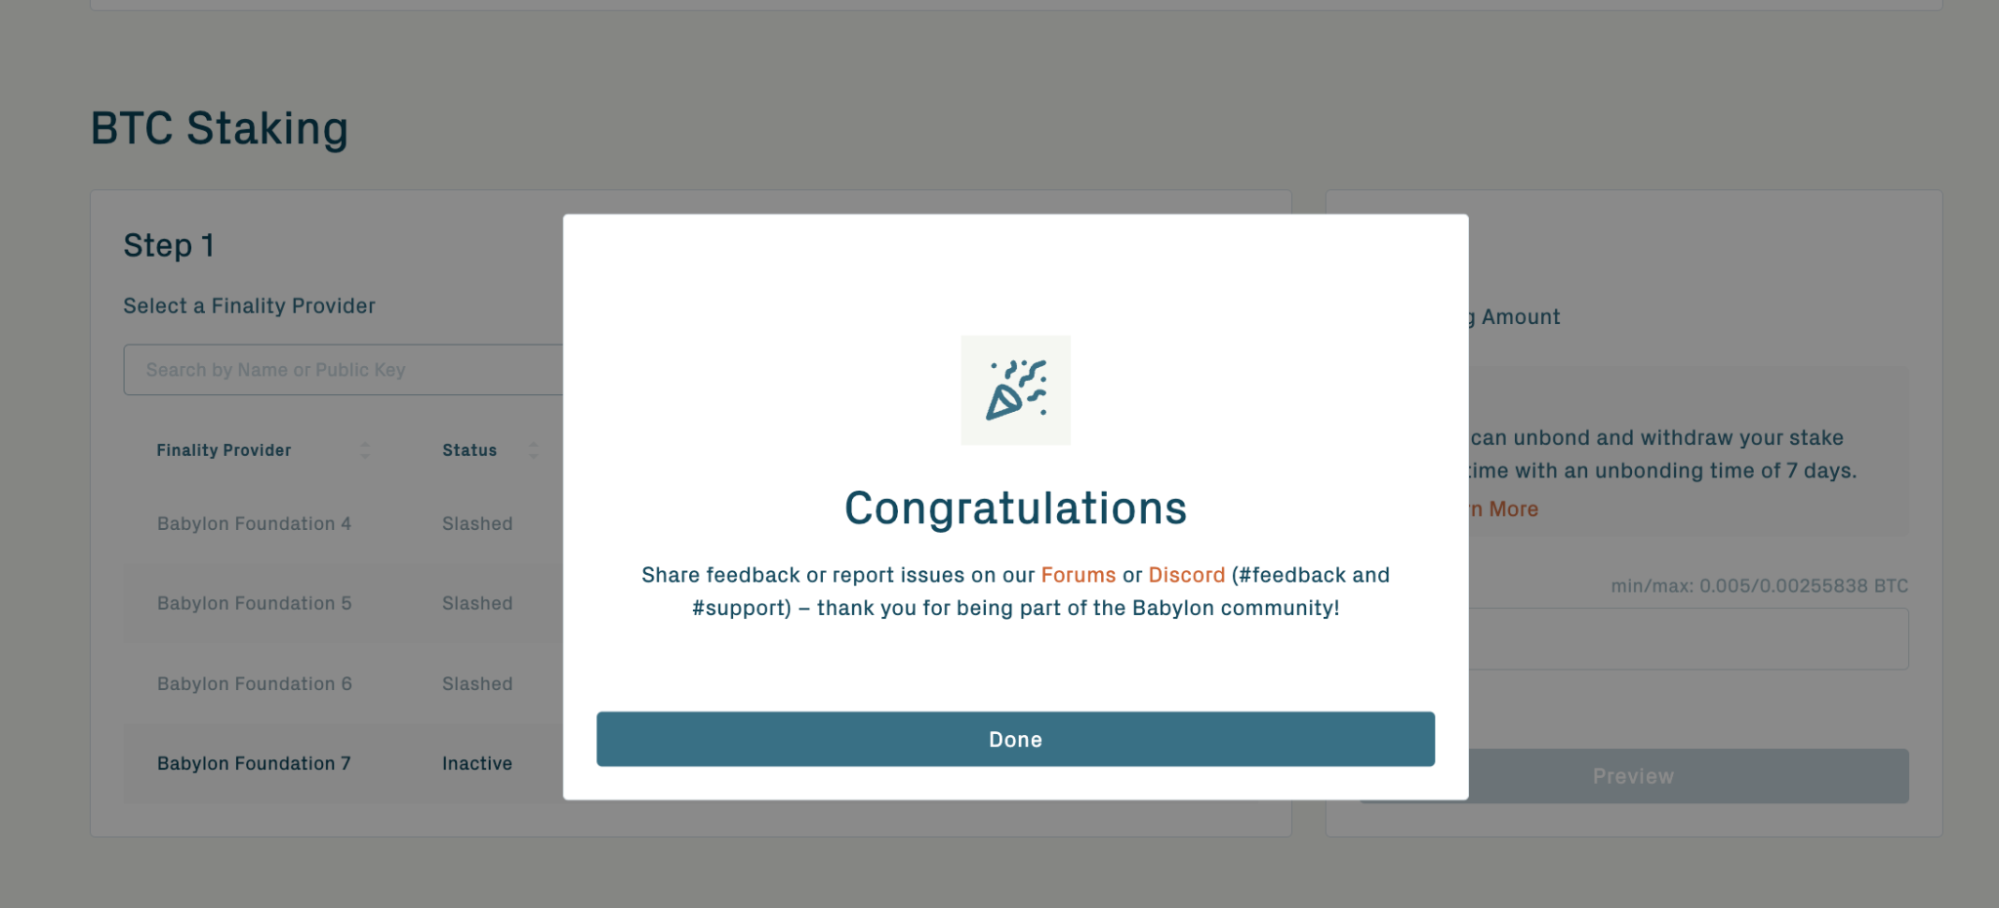
Note: From this point onward, your stake will be subject to a maximum penalty rate of 0.1%.
Compatible Wallets
Browser Extension Wallets
| Wallet Name | BTC | BABY |
|---|---|---|
| OKX | ✅ | ❌ |
| Unisat | ✅ | ✅ |
| OneKey | ✅ | ✅ |
| BitGet | ✅ | ✅ |
| Cactus Link | ✅ | ✅ |
| Leap | ✅ | ✅ |
| Keplr | ✅ | ✅ |
| Cosmostation | ✅ | ✅ |
| Tomo | ✅ | ❌ |
| Fordefi | ❌ | ❌ |
| Xverse | ✅ | ❌ |
| Gate Web3 | ❌ | ❌ |
| Keystone Hardware | ✅ | ❌ |
| Ledger (via Keplr app) Hardware | ❌ | ✅ |
| OneKey (Pro & Classic 1S) Hardware | ✅ | ❌ |
Mobile App Wallets
| Wallet Name | BTC | BABY |
|---|---|---|
| OKX | ✅ | ❌ |
| Unisat | ✅ | ✅ |
| OneKey | ✅ | ✅ |
| BitGet | ✅ | ✅ |
| Leap | ✅ | ✅ |
| Keplr | ✅ | ✅ |
| Cosmostation | ✅ | ✅ |
| Tomo | ✅ | ✅ |
| Xverse | ❌ | ❌ |
| CoinEx | ❌ | ❌ |
| ImToken | ❌ | ❌ |
| Gate Web3 | ✅ | ✅ |
| Coldlar Hardware | ✅ | ✅ |
Where:
- ✅ - indicates that the wallet is supported by the Babylon Staking web app.
- ❌ - indicates that the wallet is not supported.
- Hardware - indicates that the wallet is a hardware wallet.
The above list is not exhaustive and is subject to change. Please check the official documentation of the staking wallets for the latest information.
Staking via CLI
Babylon created the stakers-cli tool to allow users to stake via the command line interface and programmatic control in any operating system.
For details check out BTC Staker