Withdraw & redeem
This page covers both layers of the exit flow: the application-side withdrawal of collateral from your Aave v4 position, and the protocol-side peg-out that moves BTC back to Bitcoin. The application-side steps are specific to the Aave v4 integration; the Bitcoin-side redemption flow is handled by TBV.
Redemption (peg-out) is the reverse of vault creation. It unlocks the bitcoin sitting in the vault's Taproot output and sends it back to your Bitcoin address. This page covers the two paths you can take to redeem, what each step changes on Ethereum and on Bitcoin, and how long the round trip takes.
Two ways to exit
You have two routes to recover your BTC:
- Normal exit. Repay any outstanding debt, withdraw the vault from your borrowing position, and let the Vault Provider drive the Bitcoin claim. This is the common path.
- Depositor self-claim. Broadcast the Bitcoin claim yourself using the Winternitz One-Time Signature (WOTS) key and claimer artifacts committed at vault creation, via the protocol's
watchtowerCLI tool. Use this if the Vault Provider is offline, slow, or refuses to act.
A third path exists but is not under your control: liquidation redemption. If your position is liquidated, the seized vault is redeemed by the liquidator, not by you. See Liquidation risk.
Before you start
Check the following on your position:
- Debt on every borrowed reserve. A full withdrawal requires zero debt on every reserve you have borrowed from (USDC, USDT, WBTC).
- Health factor. A partial withdrawal is allowed only while the health factor stays above 1.0 after the withdrawal.
- Vault status. Each vault must be either
InUse(still in your position) orAvailable(already withdrawn from the position).
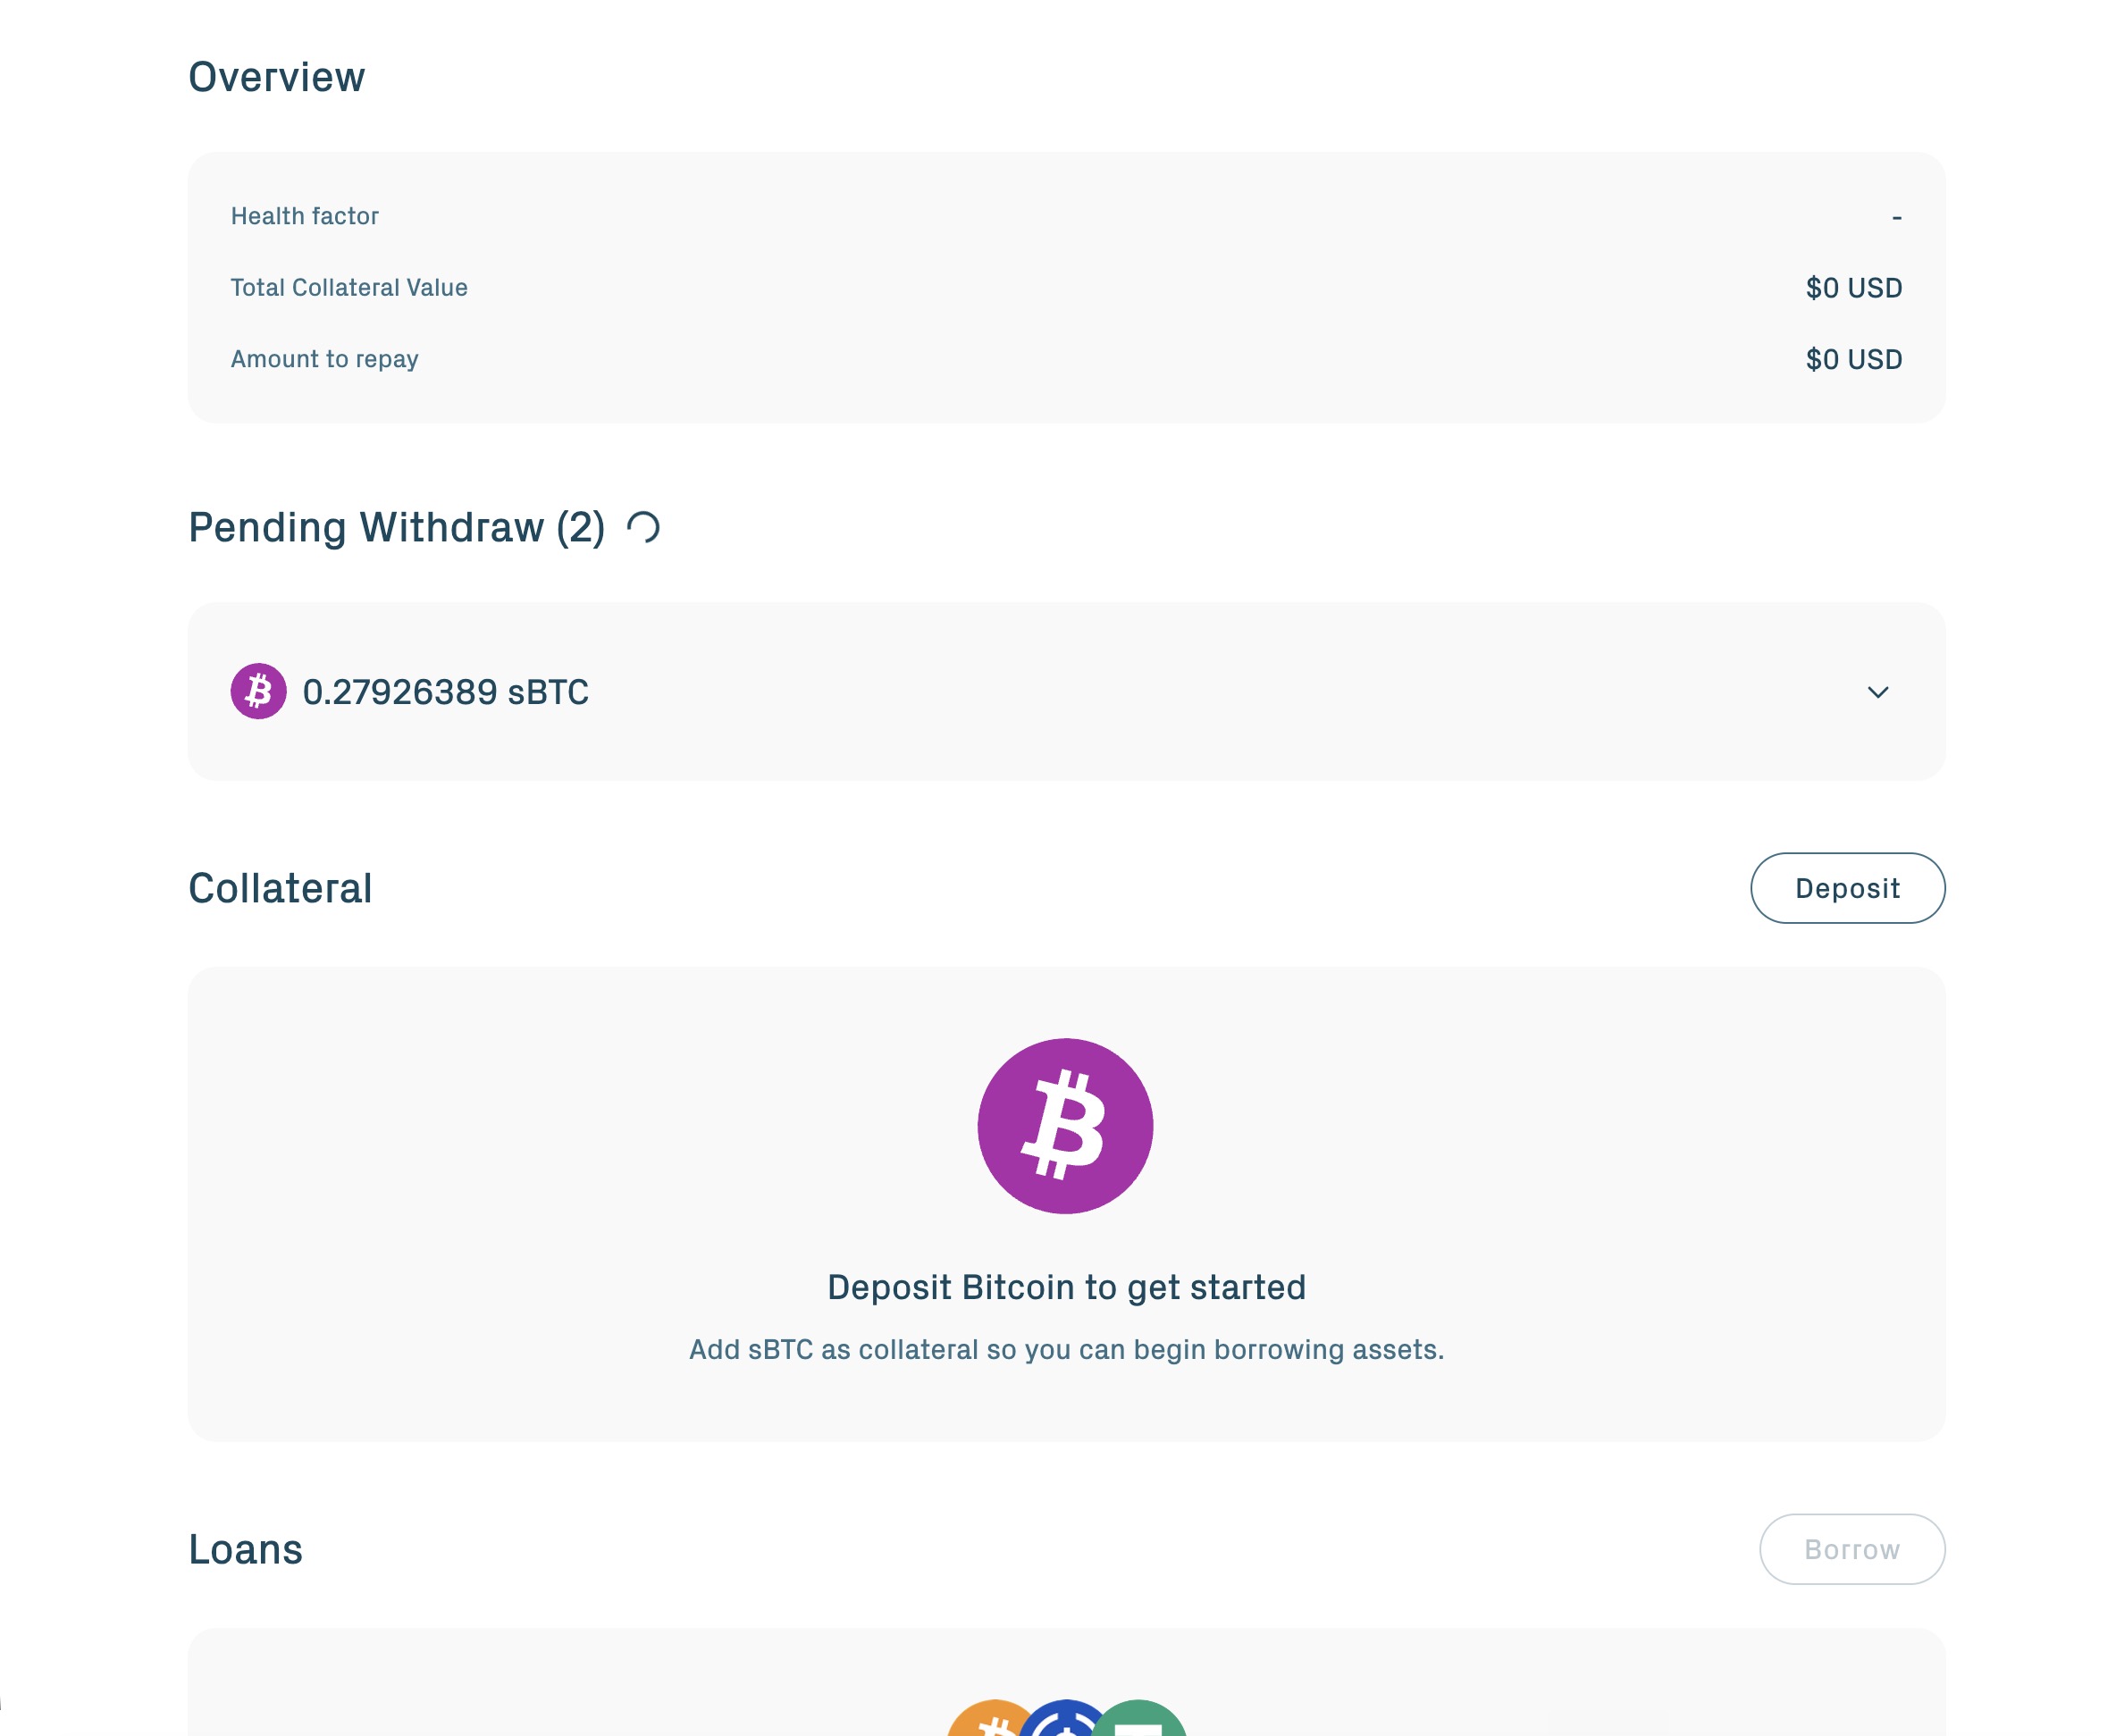
The portal surfaces all three of these on the Loans section. For programmatic access, query getUserAccountData() on the Babylon Core Spoke through your proxy address to read current debt, collateral value, and health factor in one call.
Step 1: Repay your debt
If you have any outstanding debt, repay it before attempting a full withdrawal. For each borrowed reserve:
- Approve the AaveAdapter to spend the repayment token (standard ERC-20 approval).
- Call
repayToCorePosition(borrower, debtReserveId, amount)with the borrower address, the debt reserve ID, and an amount slightly larger than the current debt. Interest can accrue between the moment you read the debt balance and the moment the transaction is mined. Any excess from your repayment is refunded. - Confirm the balance is zero by calling
getReserveTotalDebt(reserveId)on the position proxy for every borrowed reserve.
Clear debt on every reserve you have borrowed from. A single satoshi of remaining debt on any reserve blocks a full withdrawal. For the full repayment flow, see Borrow & repay.
Step 2: Withdraw collateral and start redemption
With debt cleared (full exit) or a healthy buffer left in place (partial exit), call withdrawCollaterals(bytes32[] vaultsToWithdraw) on the AaveAdapter with the list of vault IDs to remove. This step is the handoff from the Aave application layer to the TBV protocol layer: the AaveAdapter releases the vaults, and the TBV protocol takes over the Bitcoin-side redemption from here.
From the portal:
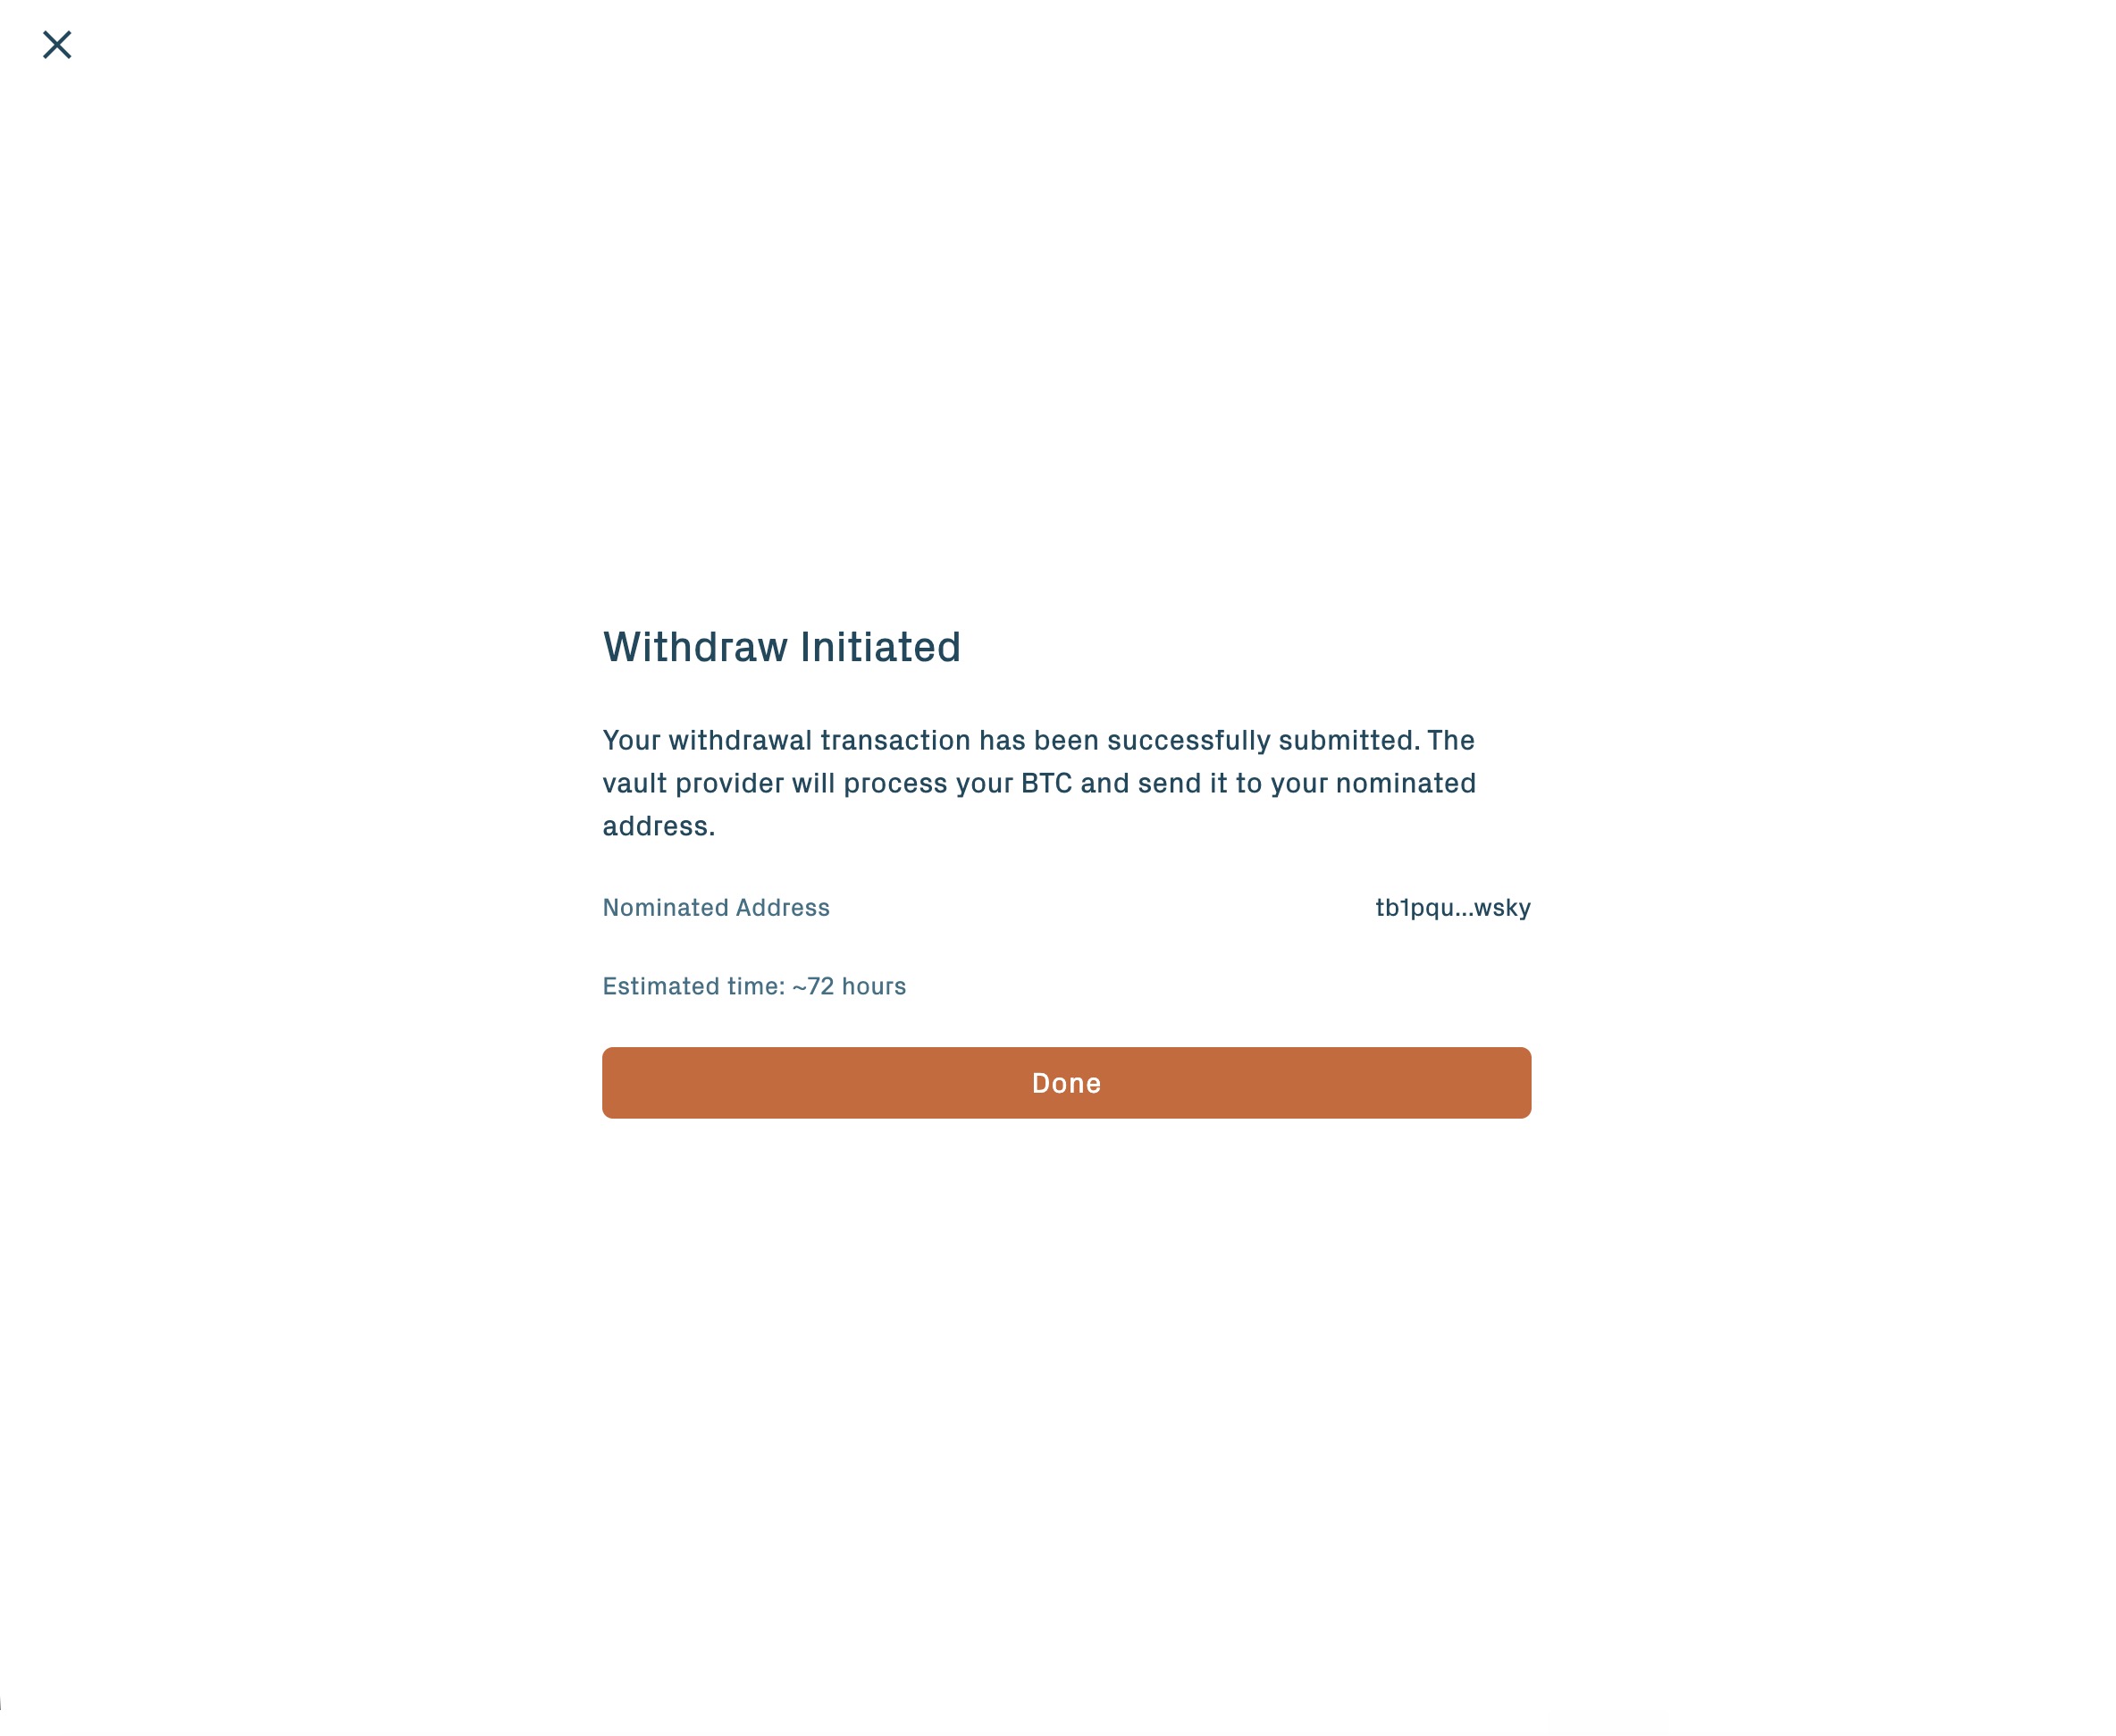
1. Open the Collateral section and click Withdraw. Select the vault you want to withdraw.
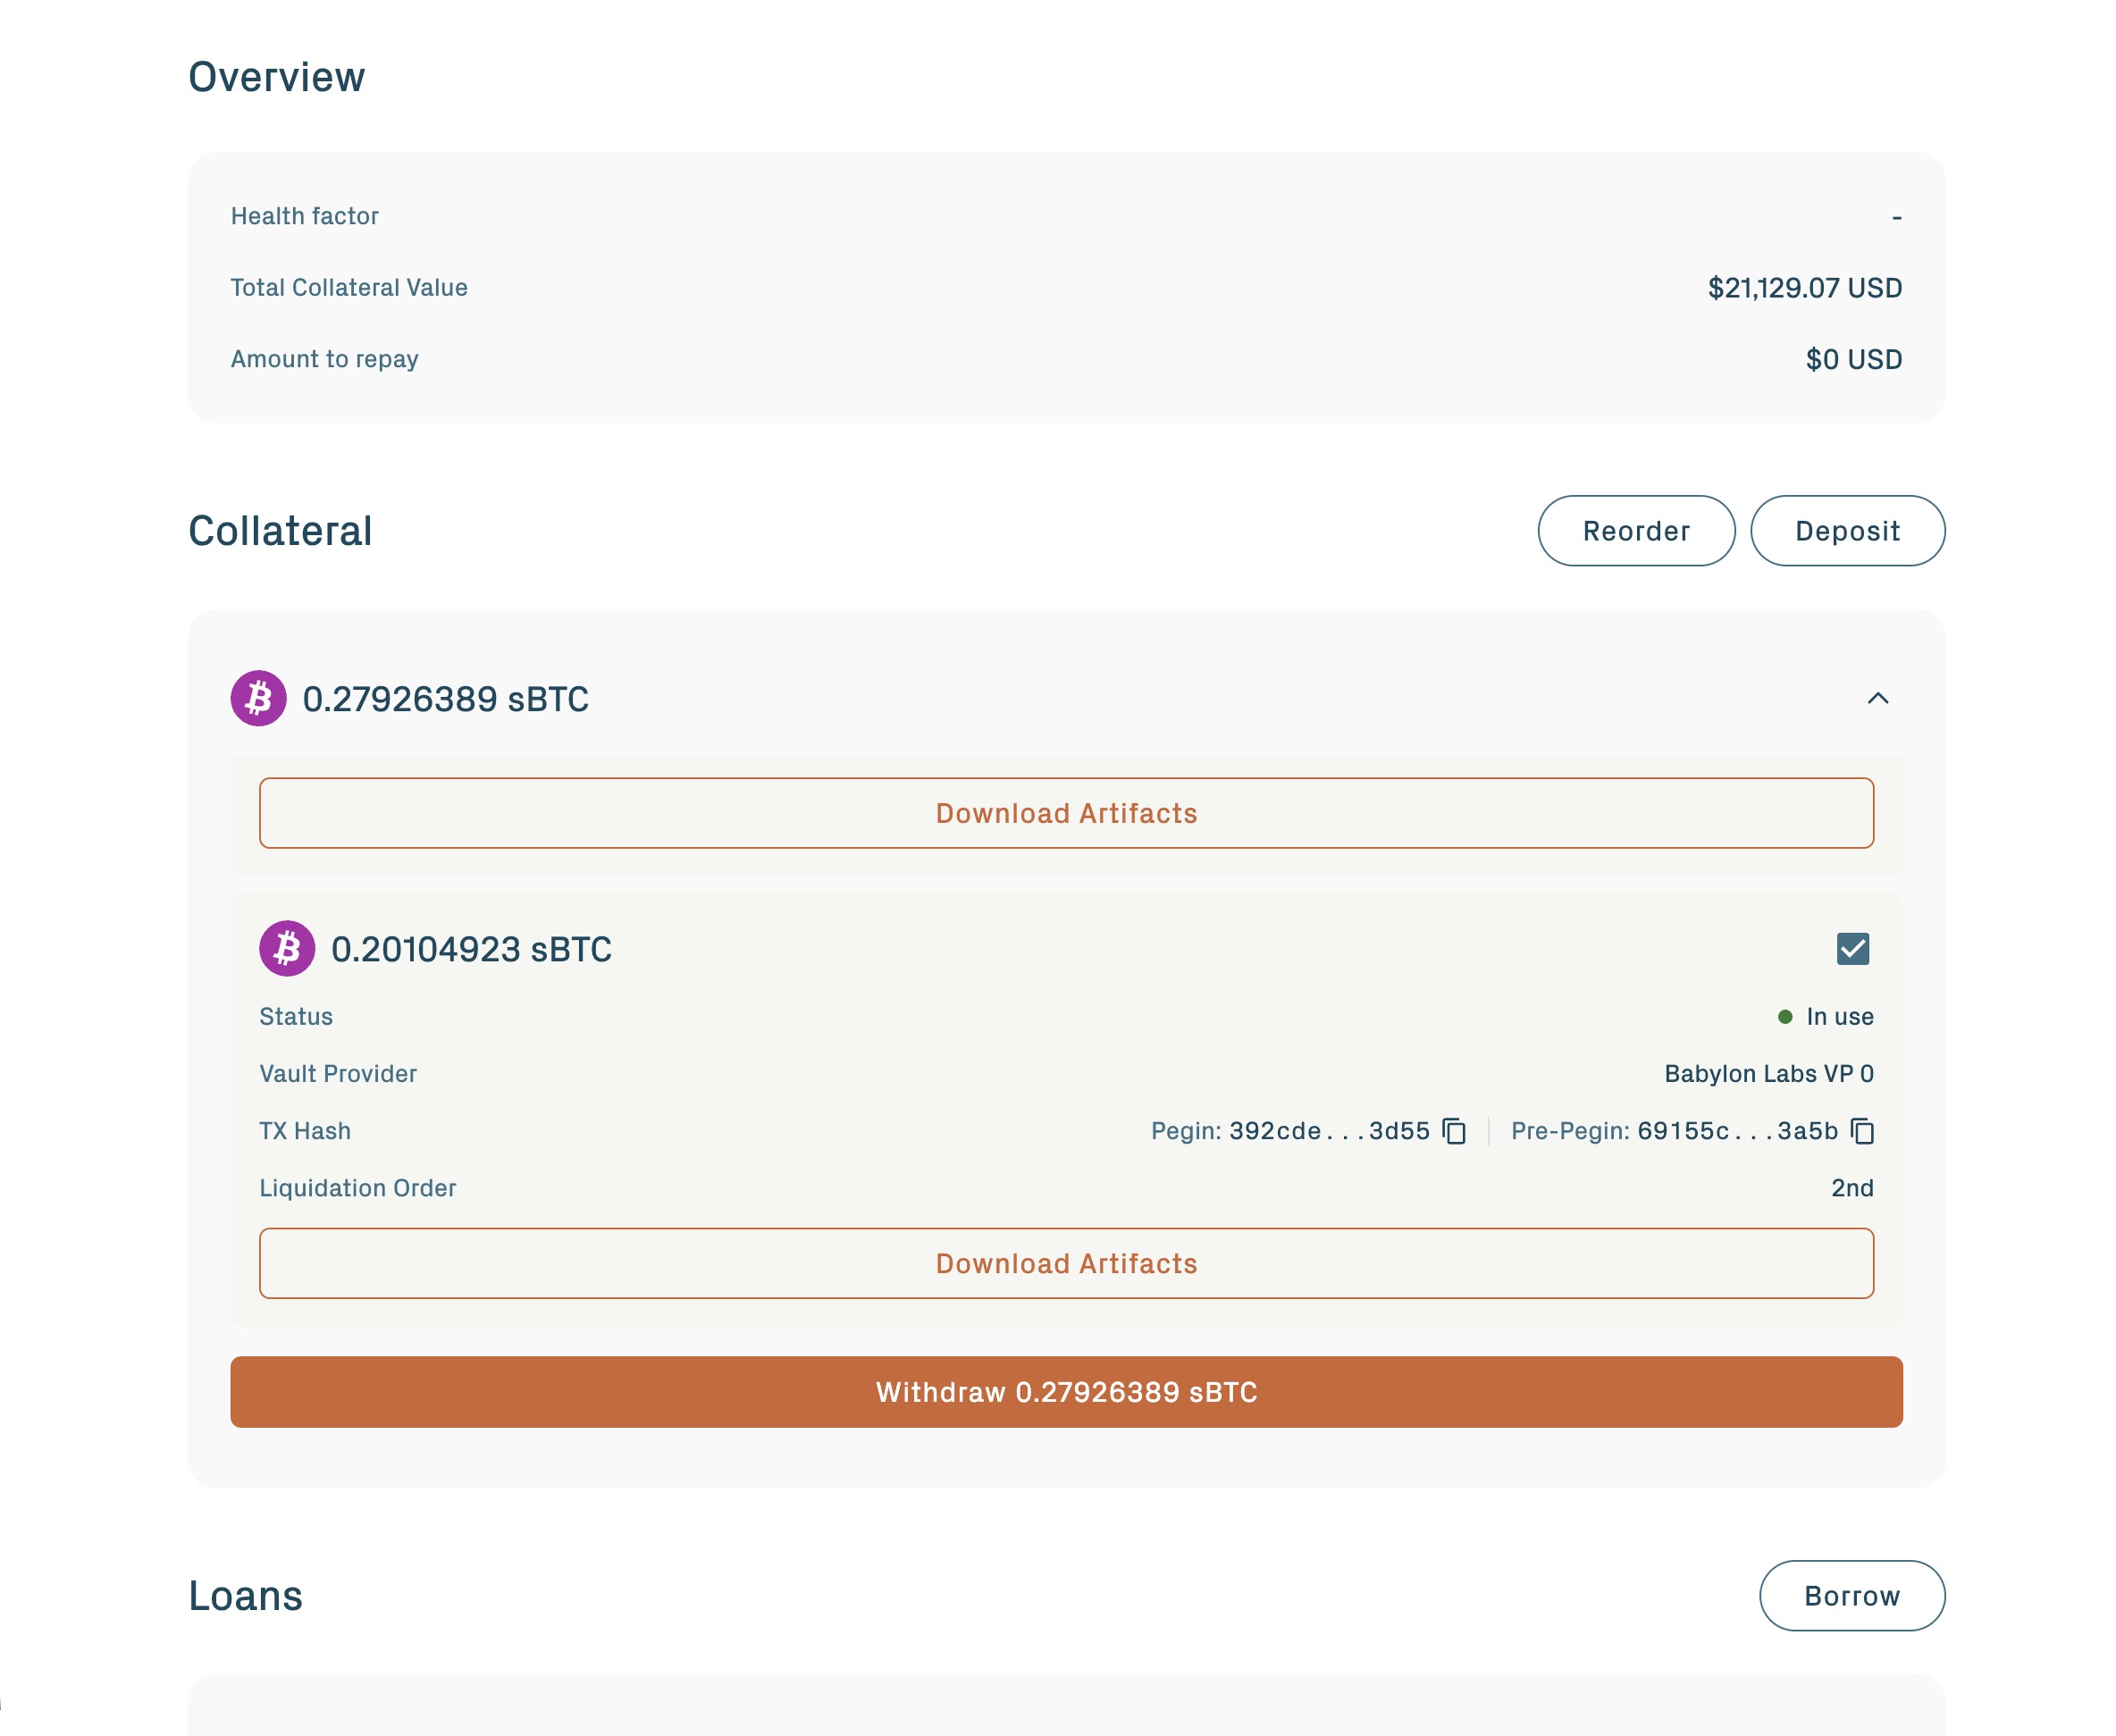
2. Review the withdrawal amount, network fee rate, VP commission, and the nominated Bitcoin address.
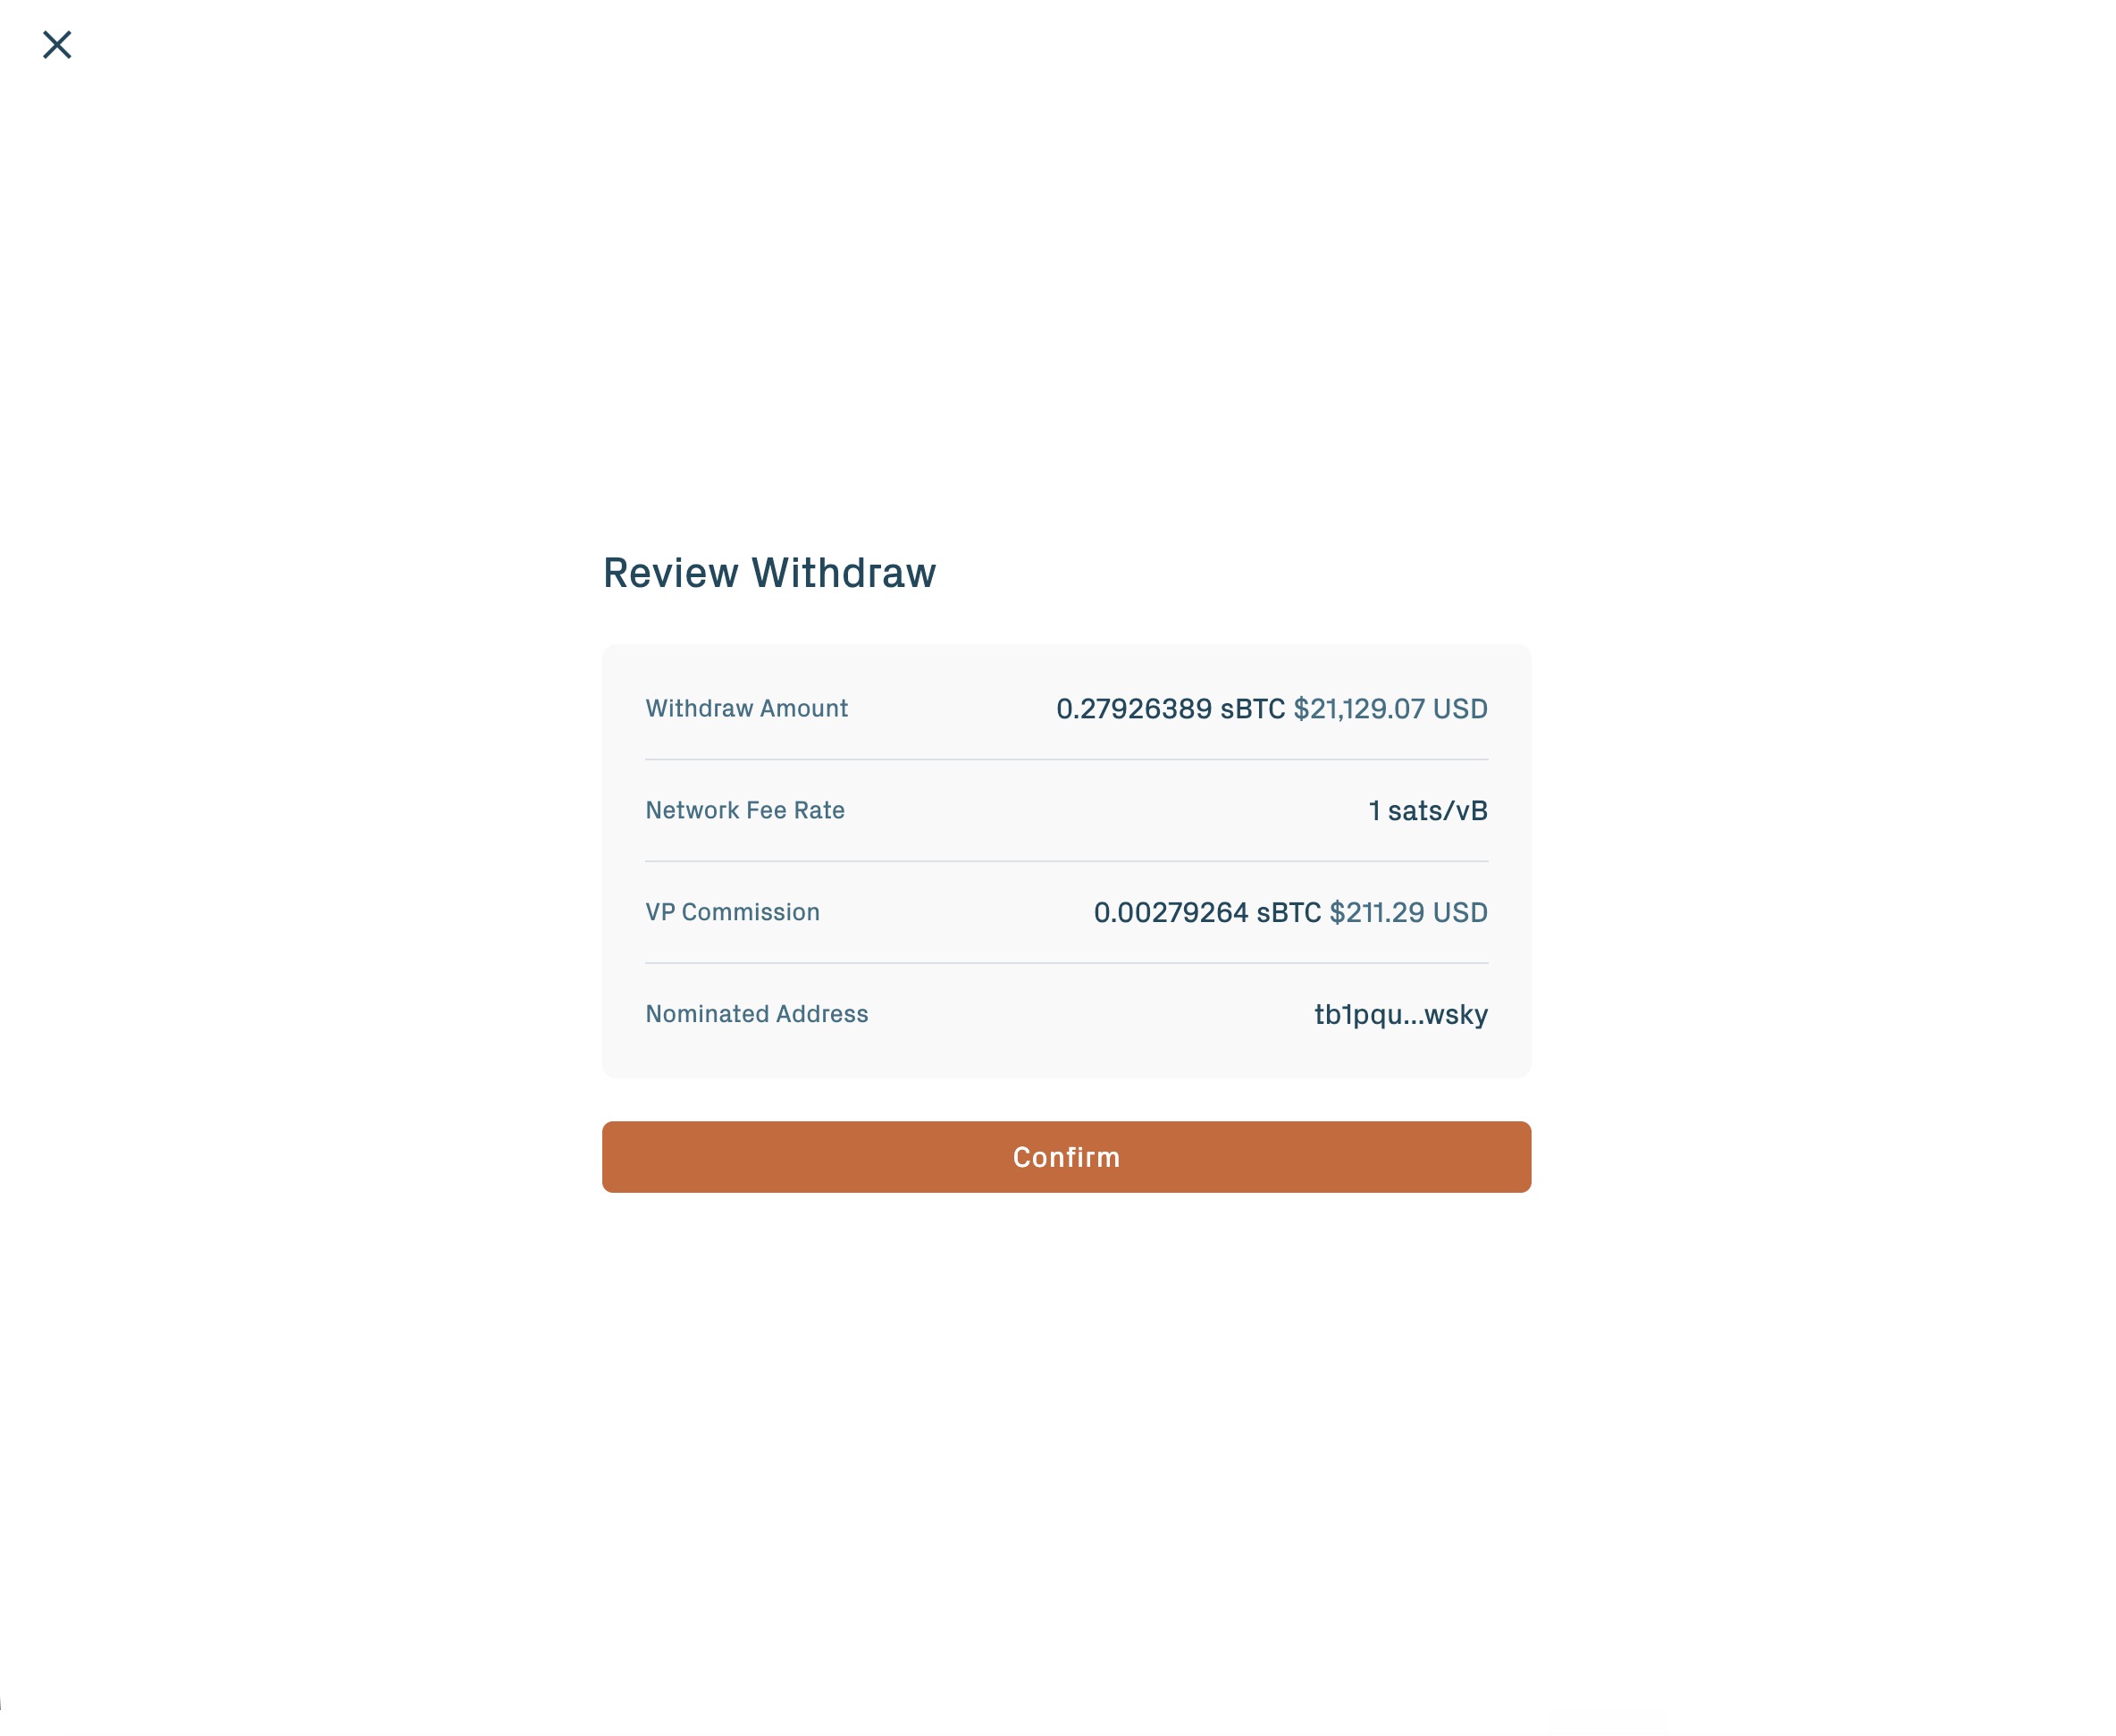
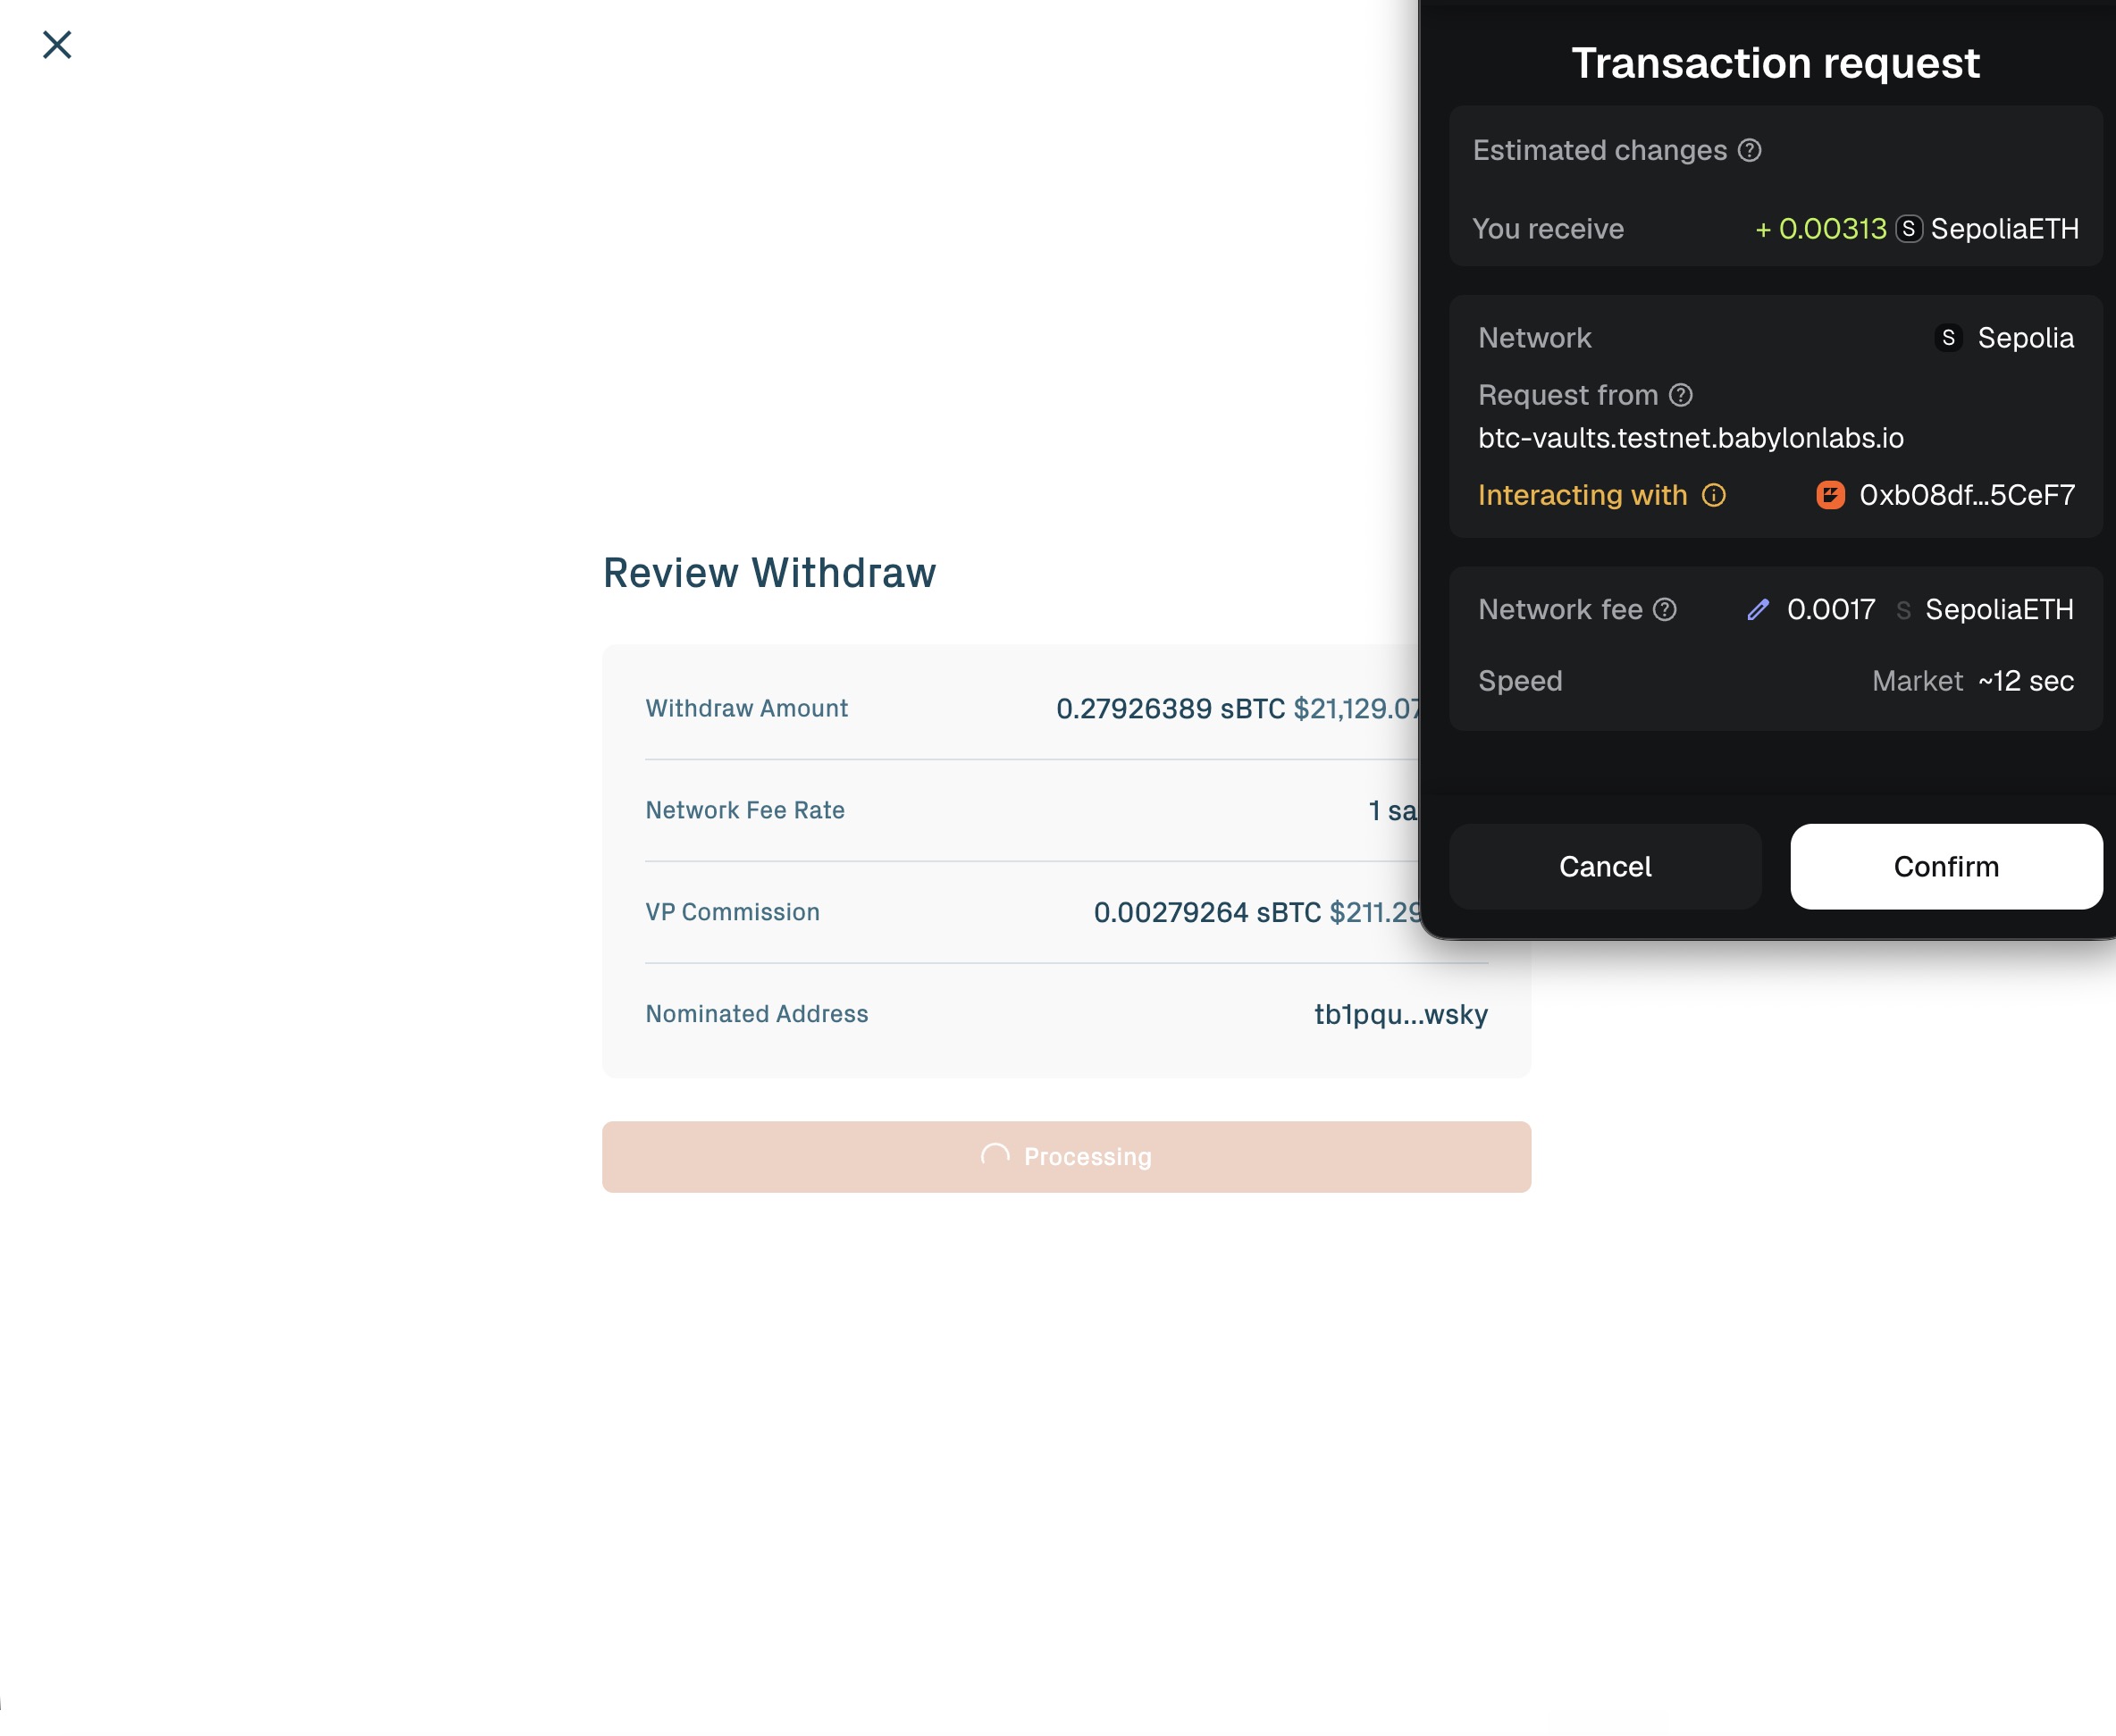
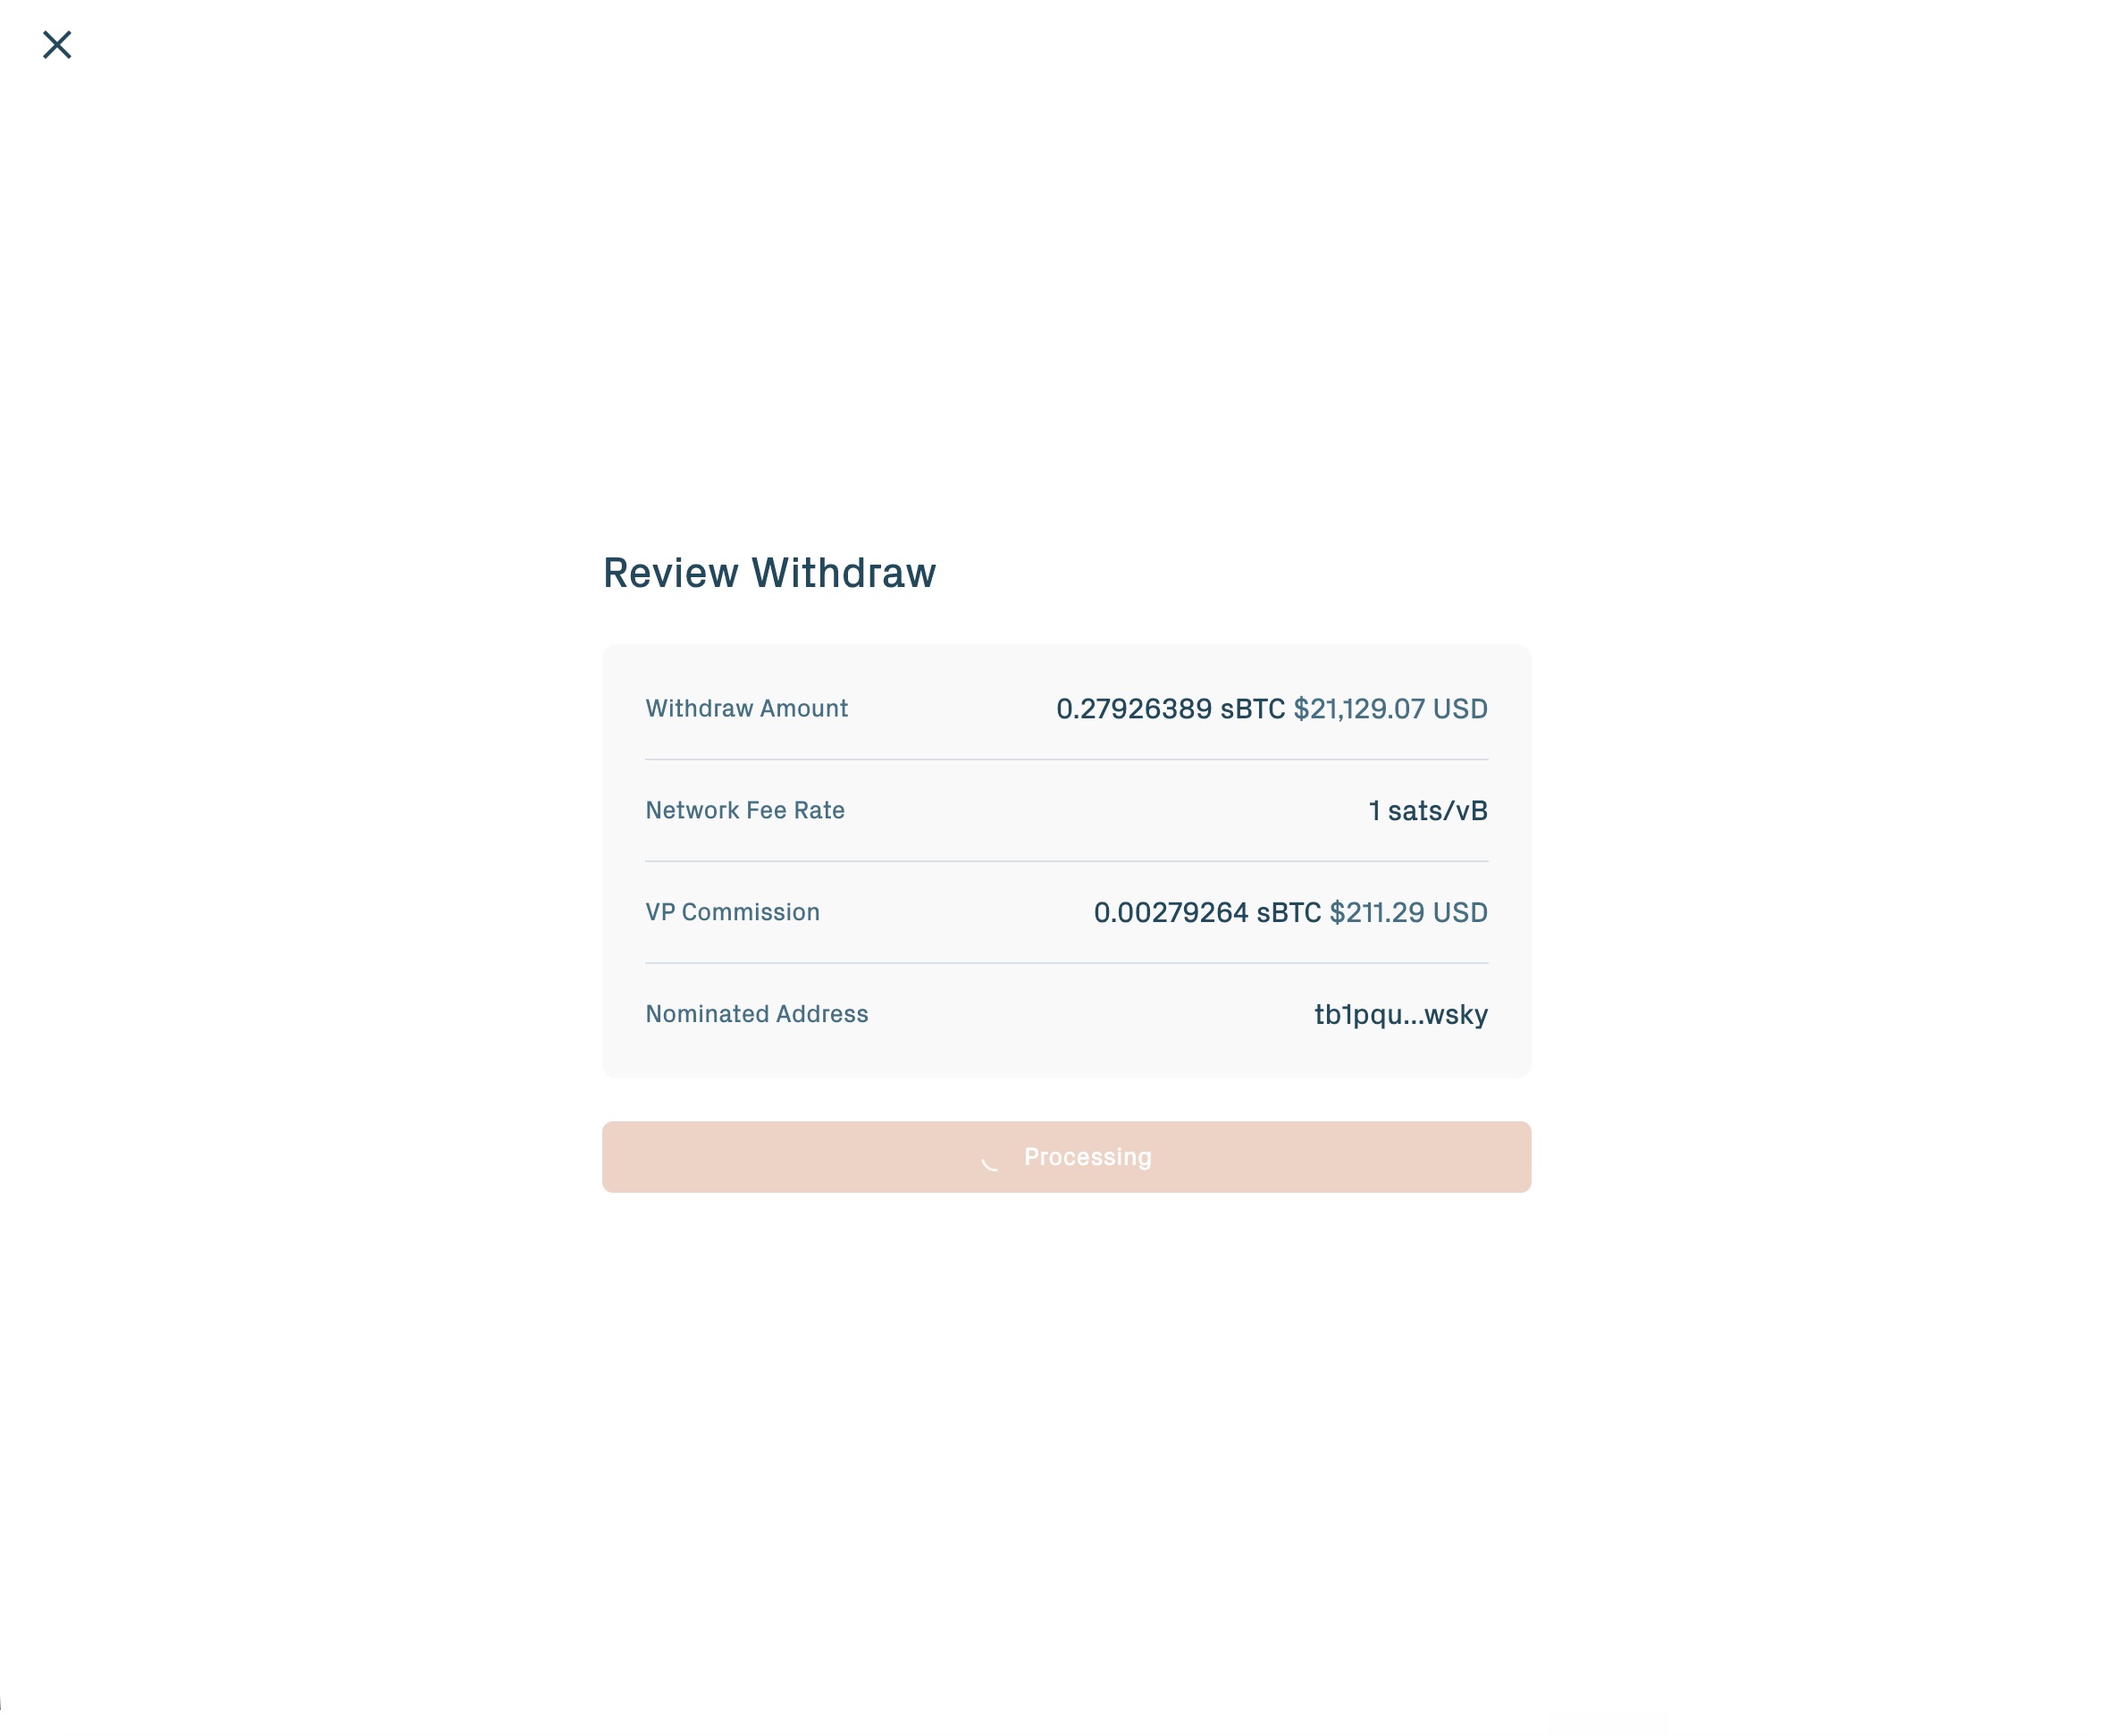
3. Confirm the Ethereum transaction in your wallet.
Partial withdrawal. Pass a subset of your vault IDs. The contract verifies your health factor stays above 1.0 after the listed vaults are removed. If removing them would push the position into liquidatable territory, the transaction reverts. Use partial withdrawal to free up an over-collateralised vault while keeping the position open.
Full withdrawal. Pass every vault in your position. The contract verifies that all debt — principal and interest — is fully repaid on every borrowed reserve.
What this single call does:
- Internal accounting for the withdrawn vaults is cleared.
- Each withdrawn vault transitions from
InUsetoAvailable, then on toRedeemed.withdrawCollateralsalways starts redemption — vaults cannot be withdrawn into Available status and held there for later re-supply. - The contract emits two
VaultClaimableByevents per vault: one naming the Vault Provider's BTC public key as claimer, and one naming your BTC public key. The second event is what enables self-claim.
From the depositor's point of view, withdrawCollaterals is a single transaction that removes vaults from the borrowing position and starts the Bitcoin claim.
Step 3: Wait for the challenge period
After redemption starts on Ethereum, the Vault Provider drives the Bitcoin side. Bitcoin cannot natively verify Ethereum state, so the protocol uses a ZK proof of the burn event, verified on Bitcoin via Babylon's BABE construction. This step is protocol-level — the same flow applies regardless of which application released the vault. The flow on Bitcoin runs in four steps:
- Claim. The Vault Provider broadcasts a claim transaction that spends from the vault's Taproot output. (Automatic; you don't need to do anything.)
- Assert. The Vault Provider broadcasts an assert transaction containing the ZK proof. (Automatic; proof generation runs on the prover service.)
- Challenge window. An Application Vault Keeper or Universal Challenger may dispute the claim during this window, which runs approximately 3 days (
timelockAssert= 432 BTC blocks on the public testnet). In the happy path no challenge is raised. This is a passive wait — nothing for you to do. - Payout. Once the window closes, the Vault Provider broadcasts the payout, releasing BTC to your Bitcoin address. The Vault Provider's commission, set per VP and embedded in the pre-signed payout transactions, is deducted at this step.
If a challenger objects to a legitimate claim, the Vault Provider posts a WronglyChallenged transaction to disprove the challenge. The challenger forfeits a bond and your payout proceeds.
The wall-clock time from withdrawCollaterals on Ethereum to BTC arriving on your Bitcoin address is dominated by the challenge window: plan for around three days.
The payout BTC equals your vault's BTC amount minus the Vault Provider's commission.
The self-claim path (TBV protocol)
The Vault Provider drives most redemptions. You do not depend on the Vault Provider to recover your BTC — the protocol exposes a self-claim path you can always invoke. Self-claim is a protocol-level feature, available to depositors of any application built on TBV.
During vault creation, you committed a WOTS public key hash on Ethereum, shared the full WOTS public key with the Vault Provider, and downloaded a set of claimer artifacts (transaction graph, BABE session data per challenger, verifying key). The Vault Provider generated a parallel set of pre-signed Bitcoin transactions naming the depositor as authorized claimer. The PegIn transaction also produced a small "depositor claim output" controlled solely by your Bitcoin key. All of these sit dormant unless you need them.
When to self-claim
- The Vault Provider is offline, slow, or unresponsive after a
VaultClaimableByevent has been emitted for your BTC public key. - The Vault Provider refuses to act on your redemption.
- You want to drive the Bitcoin claim yourself rather than wait.
What you need
- WOTS keypair file for the specific vault you are redeeming. Each vault has its own WOTS key; that key can be used exactly once. The portal stores the file alongside your wallet; you can export it from the portal's keys section for offline backup.
- Claimer artifacts downloaded at peg-in: transaction graph JSON, verifying key, and per-challenger BABE session artifacts.
- The
watchtowerCLI tool — a command-line program the protocol ships for the self-claim path. It is idempotent (commands can be retried safely) and no long-running daemon is required.
How to self-claim
- Confirm that a
VaultClaimableByevent has been emitted for the vault with your BTC public key as the claimer. - Run the
watchtowerCLI with your WOTS keypair file, the claimer artifacts, and the vault ID. The tool broadcasts the Claim, Assert, and Payout transactions on your behalf. - The Assert transaction uses your WOTS key to commit the ZK proof. (The proof itself is generated by an SP1 prover service; the tool coordinates this or accepts an externally-generated proof.)
- Wait through the challenge window, approximately 3 days on the public testnet. Universal Challengers will verify the proof; if your claim is valid, the payout completes on schedule.
- Once the window closes, the tool broadcasts the Payout. Your BTC arrives at the address committed at vault creation.
Backups and recovery
The self-claim path is the protocol's bottom-line safety net. Back up both inputs at peg-in:
- Export the WOTS keypair file from the portal and store it alongside your seed phrase. Each vault needs its own WOTS file.
- Download the claimer artifacts and store them in a place you'll still have access to in 6 months. Cold storage is acceptable.
If you lose the WOTS file or the artifacts (but not both), self-claim is no longer possible for that vault, but the standard path (Vault Provider drives the claim) still works — you only need the self-claim fallback if the VP is also unresponsive.
If you lose both the WOTS file and the artifacts, and the Vault Provider is also unresponsive, recovery requires Security Council intervention. Contact the team via the channels listed on Community & support for the escalation procedure.
What happens to vaultBTC
vaultBTC is an accounting token. It exists only while your BTC is backing a borrowing position.
- When you withdraw a vault, the corresponding vaultBTC is burned in the same transaction.
- Total vaultBTC supply always equals BTC currently held as active collateral across all positions in the integration.
- vaultBTC cannot be transferred to an arbitrary address. It moves only between authorized protocol contracts. It does not exist on any secondary market.
Timeline summary
| Stage | Layer | Where | Duration |
|---|---|---|---|
| Repay debt on each borrowed reserve | Aave v4 application | Ethereum | Minutes |
| Withdraw collateral; burn vaultBTC; start redemption | App → protocol handoff | Ethereum | One transaction |
| Bitcoin claim and assert broadcasts | TBV protocol | Bitcoin | Minutes to hours |
| Challenge window | TBV protocol | Bitcoin | ~3 days |
| Payout to your BTC address (minus VP commission) | TBV protocol | Bitcoin | Confirms once mined |
The Ethereum-side actions complete in minutes. The Bitcoin-side challenge window dominates wall-clock time.
What can go wrong
Withdrawal reverts with insufficient health factor. The vault subset you specified would drop the health factor below 1.0. Repay more debt first, or withdraw fewer vaults.
Withdrawal reverts with non-zero debt. A full withdrawal requires zero debt on every borrowed reserve. Query getReserveTotalDebt(reserveId) on every reserve you have ever borrowed from, including a small buffer for interest accrued since the last query. Very small repayments may not reduce principal due to rounding; repay with a buffer.
The Vault Provider does not initiate the Bitcoin claim. Move to the self-claim path. The pre-signed transactions for depositor-as-claimer are already in place; no cooperation is needed.
A challenge is raised against your claim. If the claim is legitimate, the claimer (Vault Provider or you, in self-claim) broadcasts WronglyChallenged to disprove the challenge. The challenger forfeits a bond. The payout proceeds.
You cannot find the vault ID or position details. Look up the position in the TBV Testnet app's Collateral or Loans section. Programmatically, query getPosition() on the AaveAdapter with your address, or look up the vault registry by your depositor address.