Quickstart
This walkthrough goes through the Aave v4 integration — the first supported DeFi use case for TBV on the public testnet.
This page is the full happy path end to end: connect a wallet, deposit signet BTC, borrow stablecoins, repay, redeem. About 5 minutes of clicking, plus a ~2-hour wait for Bitcoin confirmations during peg-in and a ~3-day challenge window during redemption. Each step links to the matching deep page for full detail.
A Trustless Bitcoin Vault (TBV) locks BTC on the Bitcoin Network and makes it usable as collateral on Ethereum without bridges or wrapping. The TBV Testnet app drives a full peg-in, borrow, repay, and peg-out cycle end to end.
The public testnet runs on signet, a Bitcoin test network. The BTC and stablecoins involved have no monetary value. Some flows are still under active development; report issues to the team via the channels listed in Community & support.
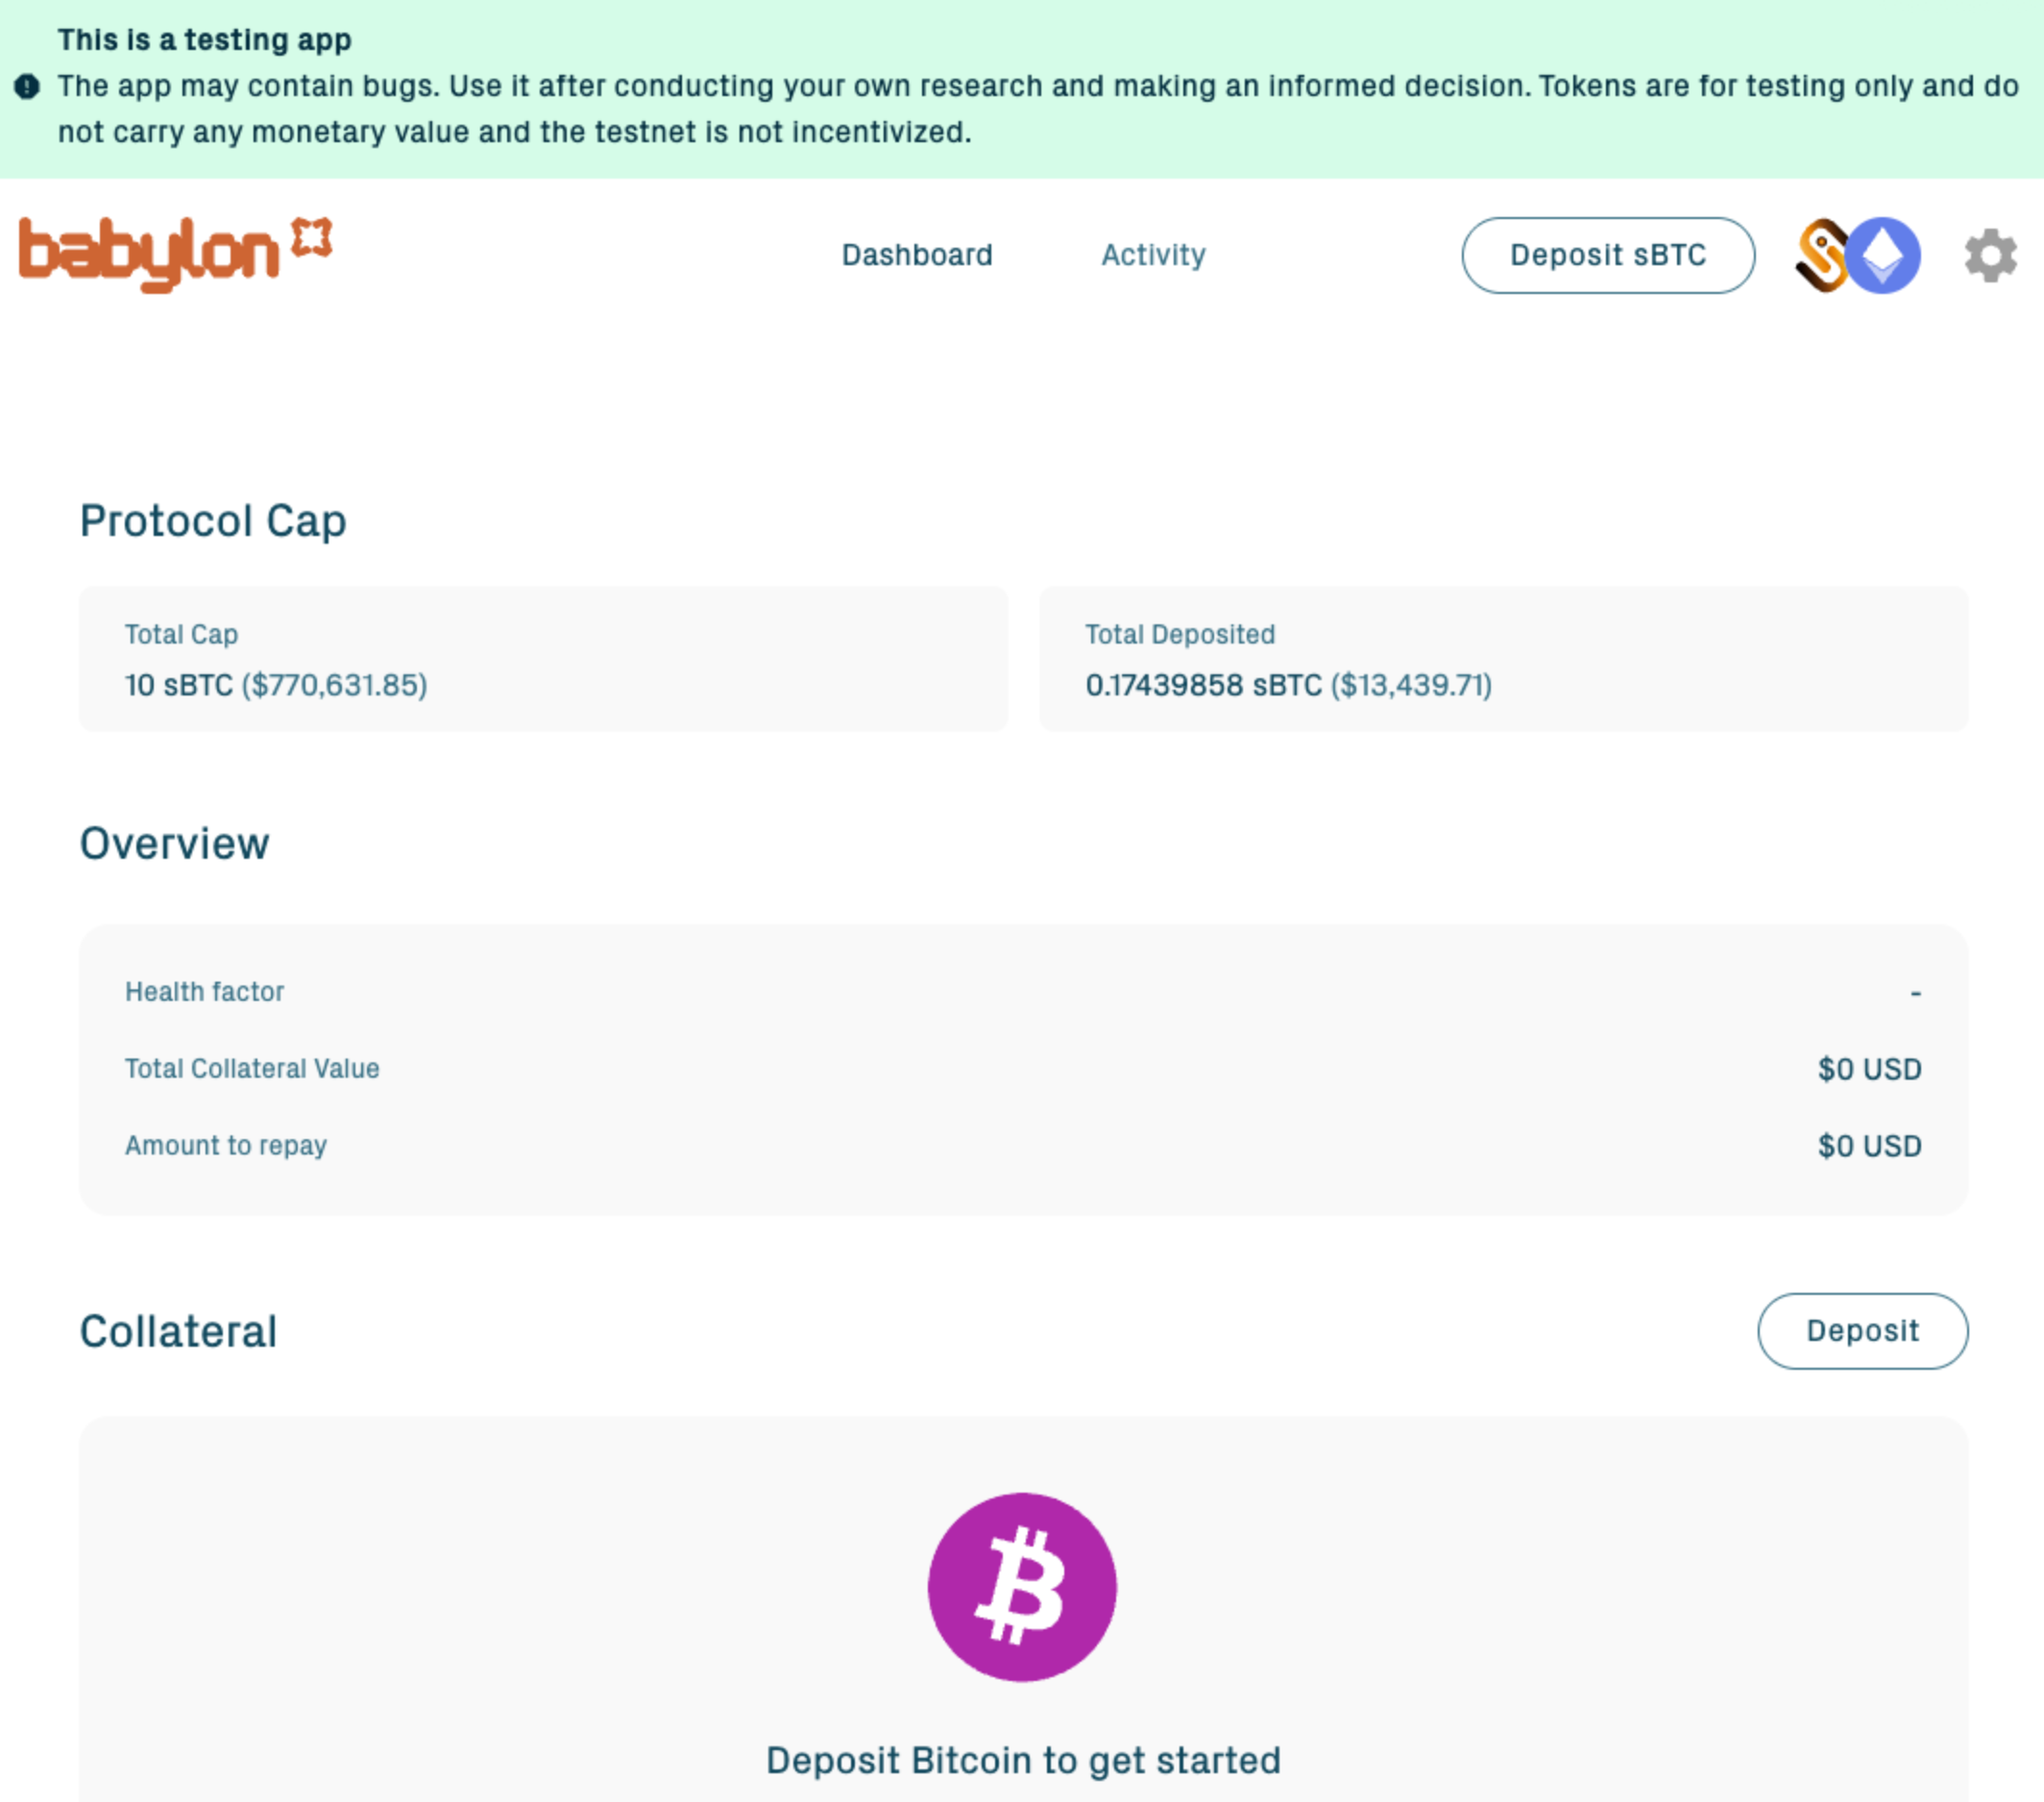
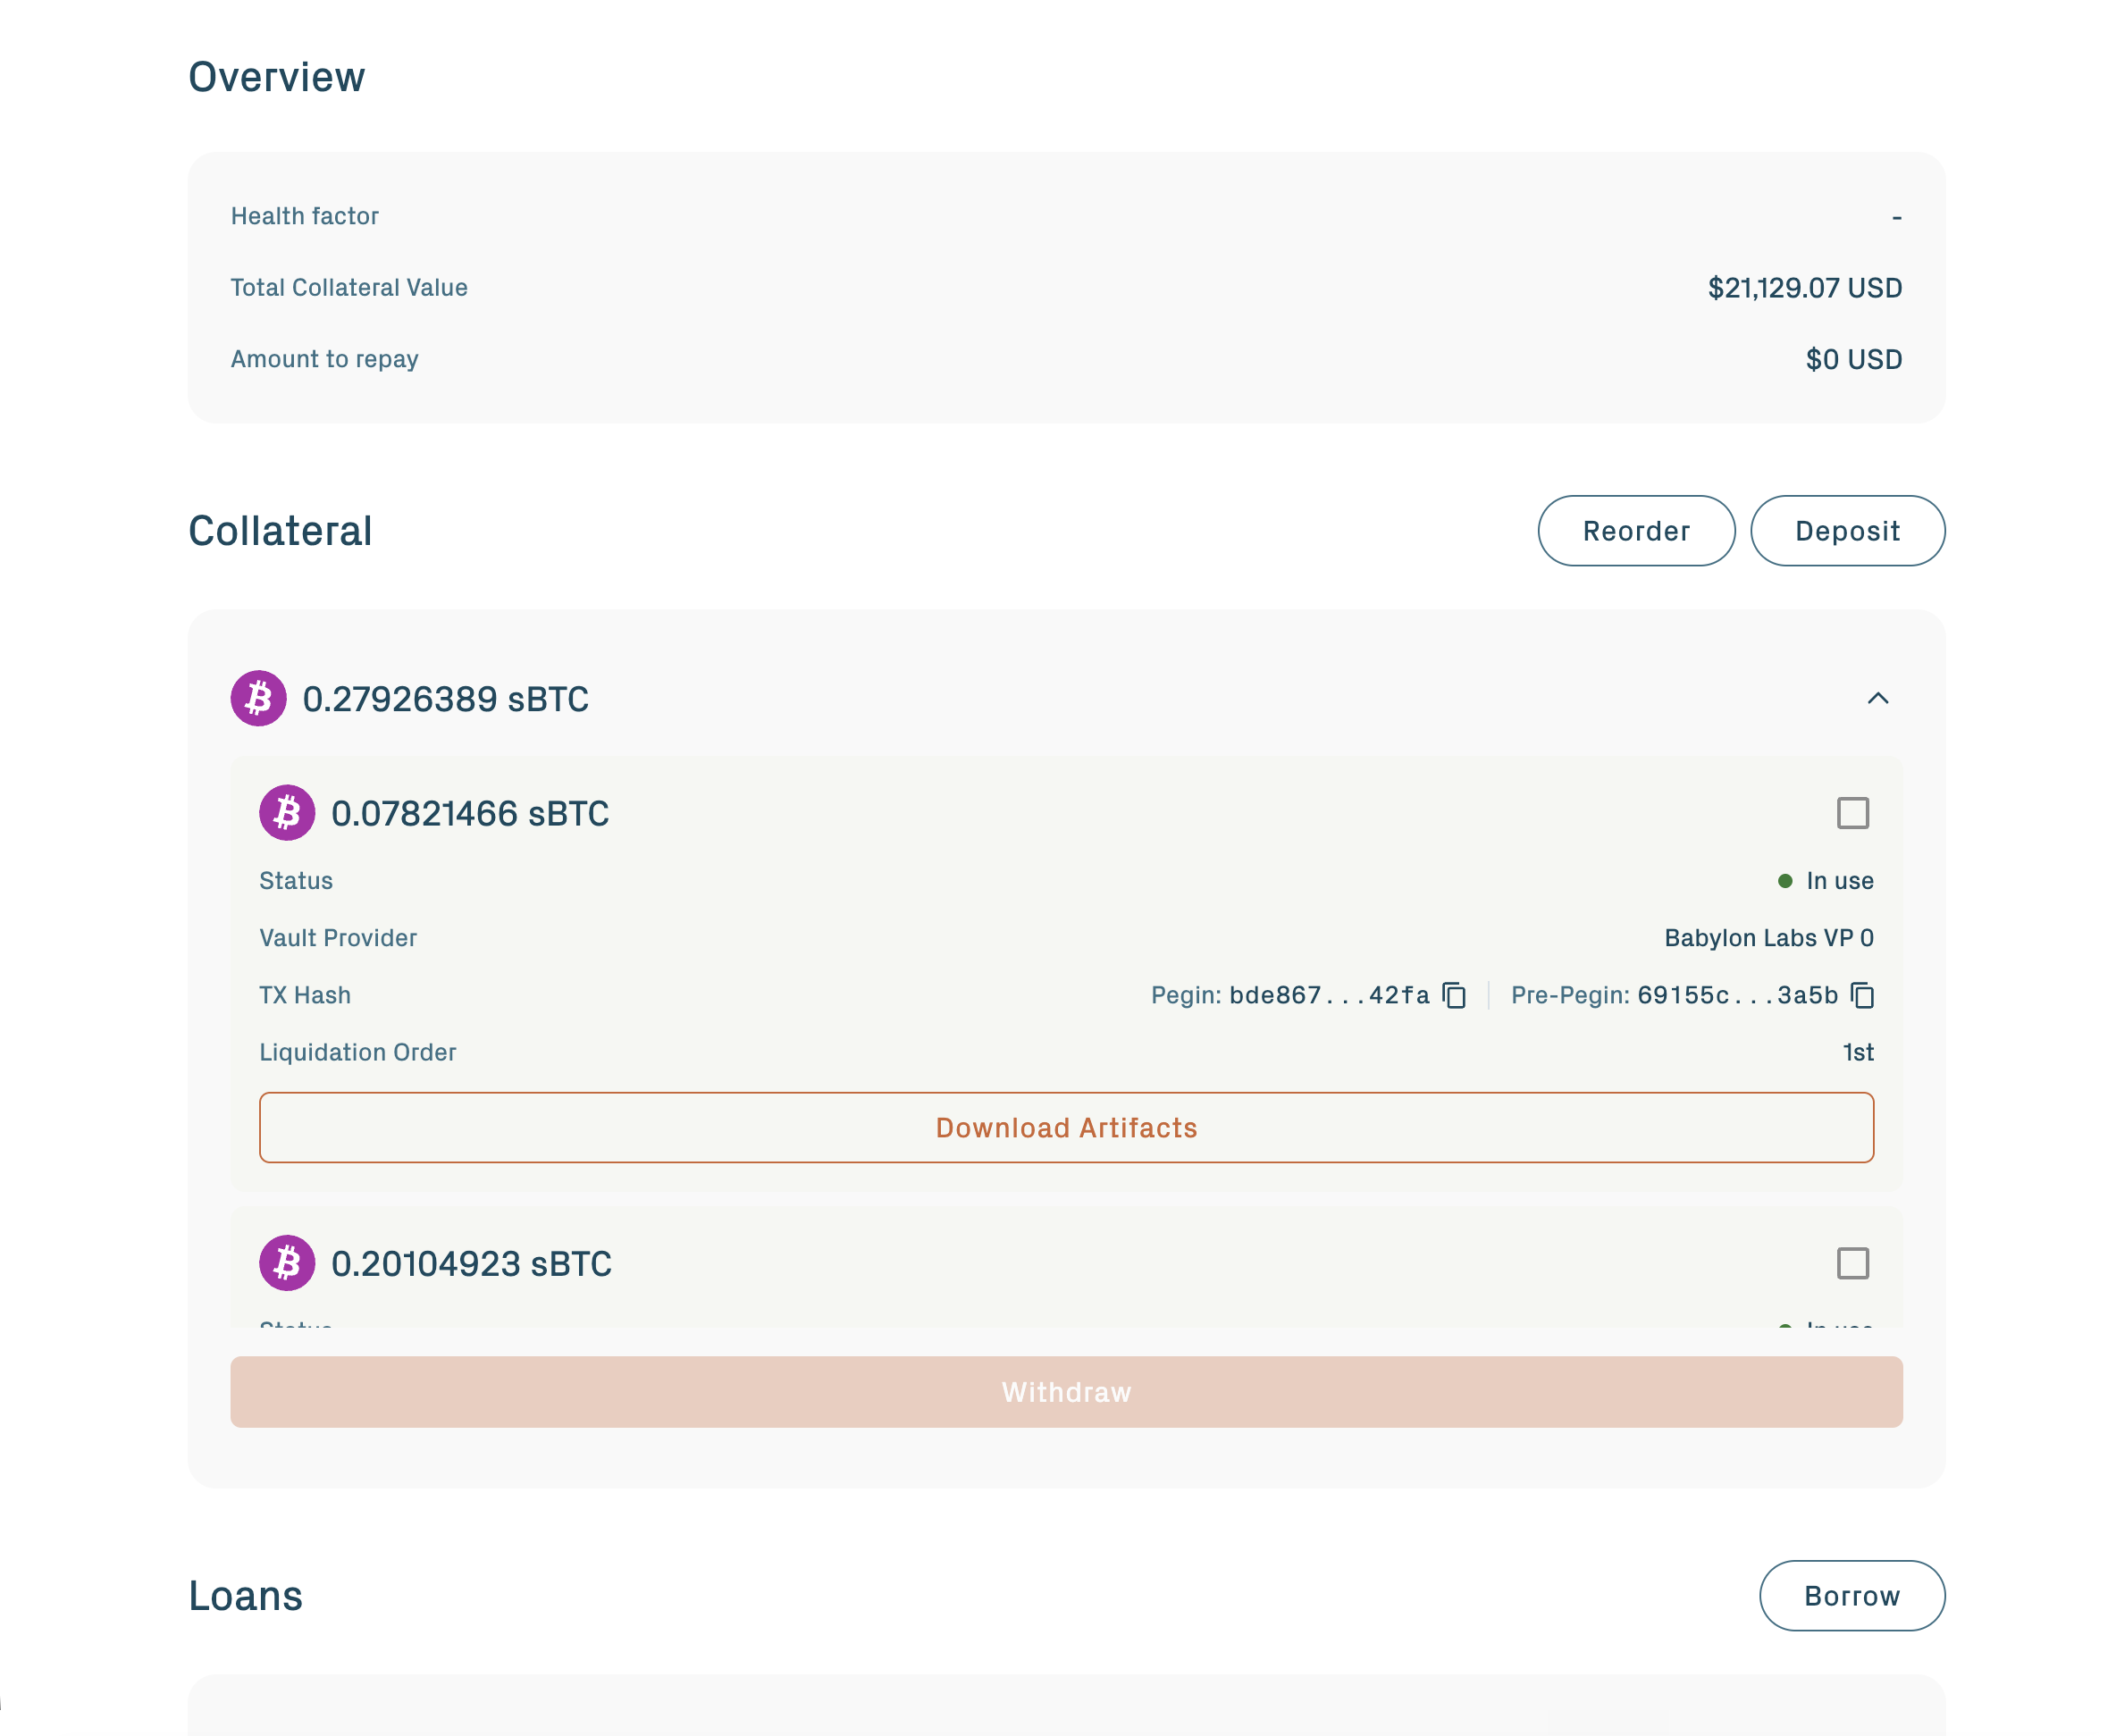
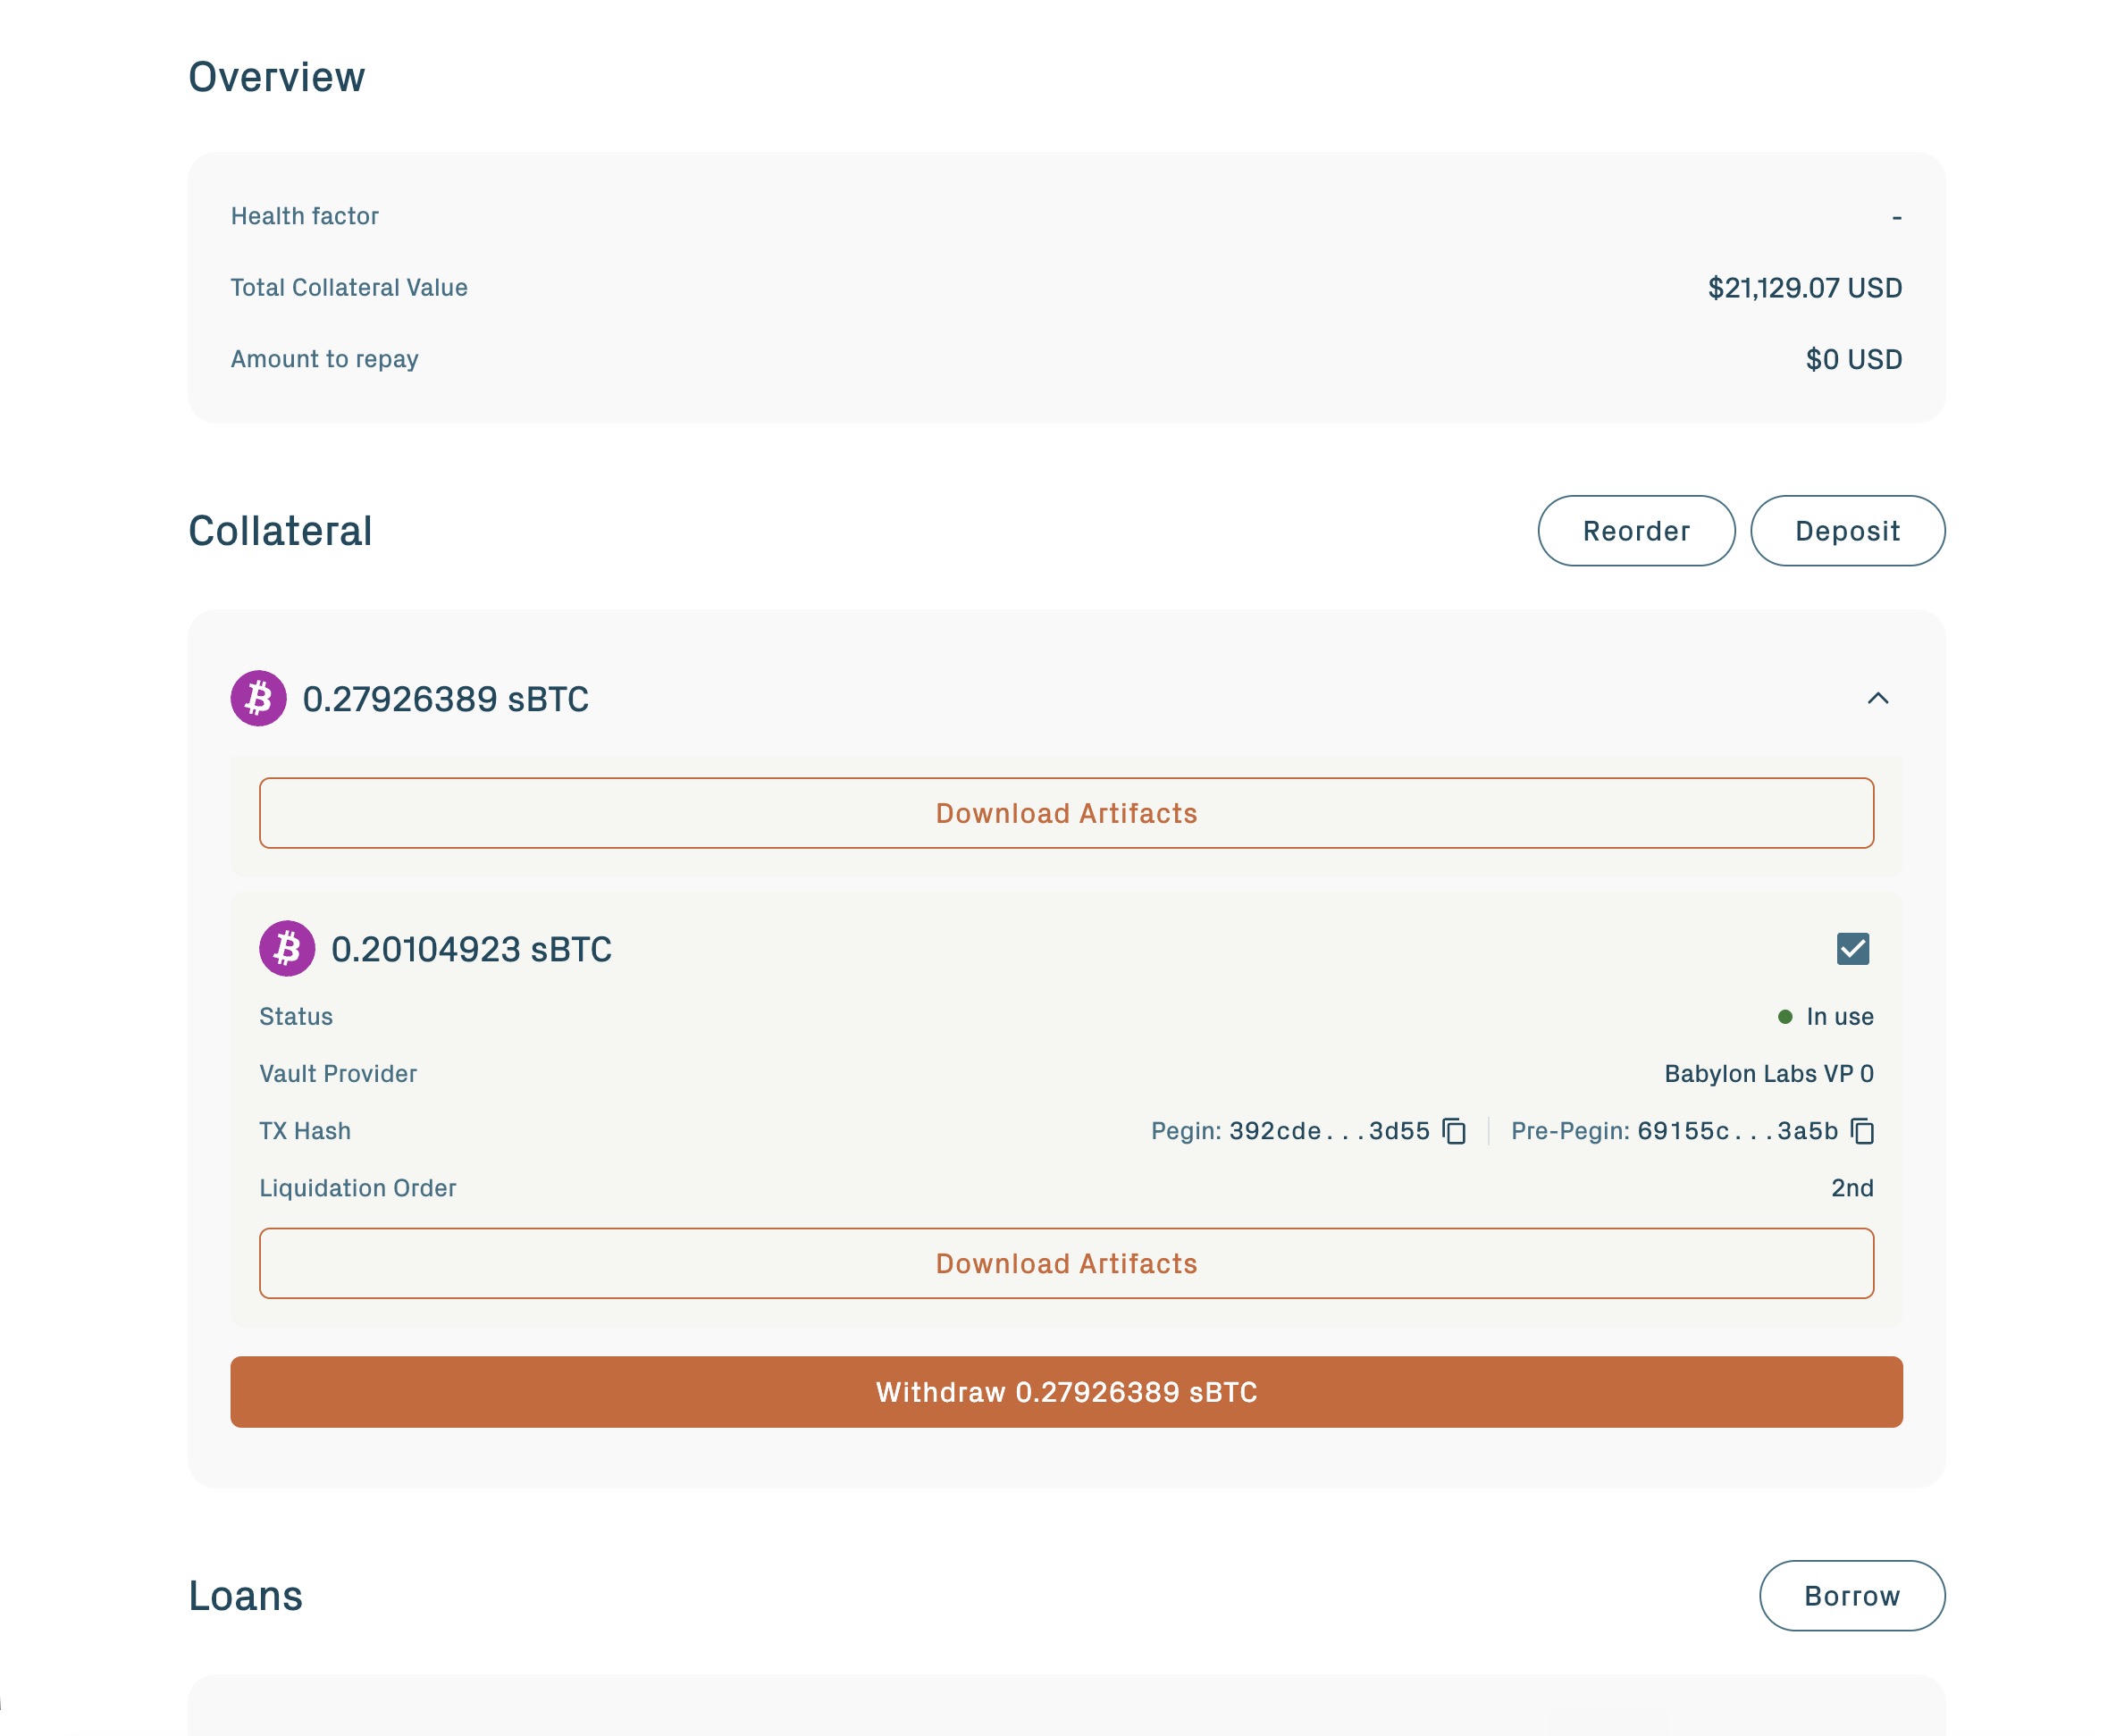
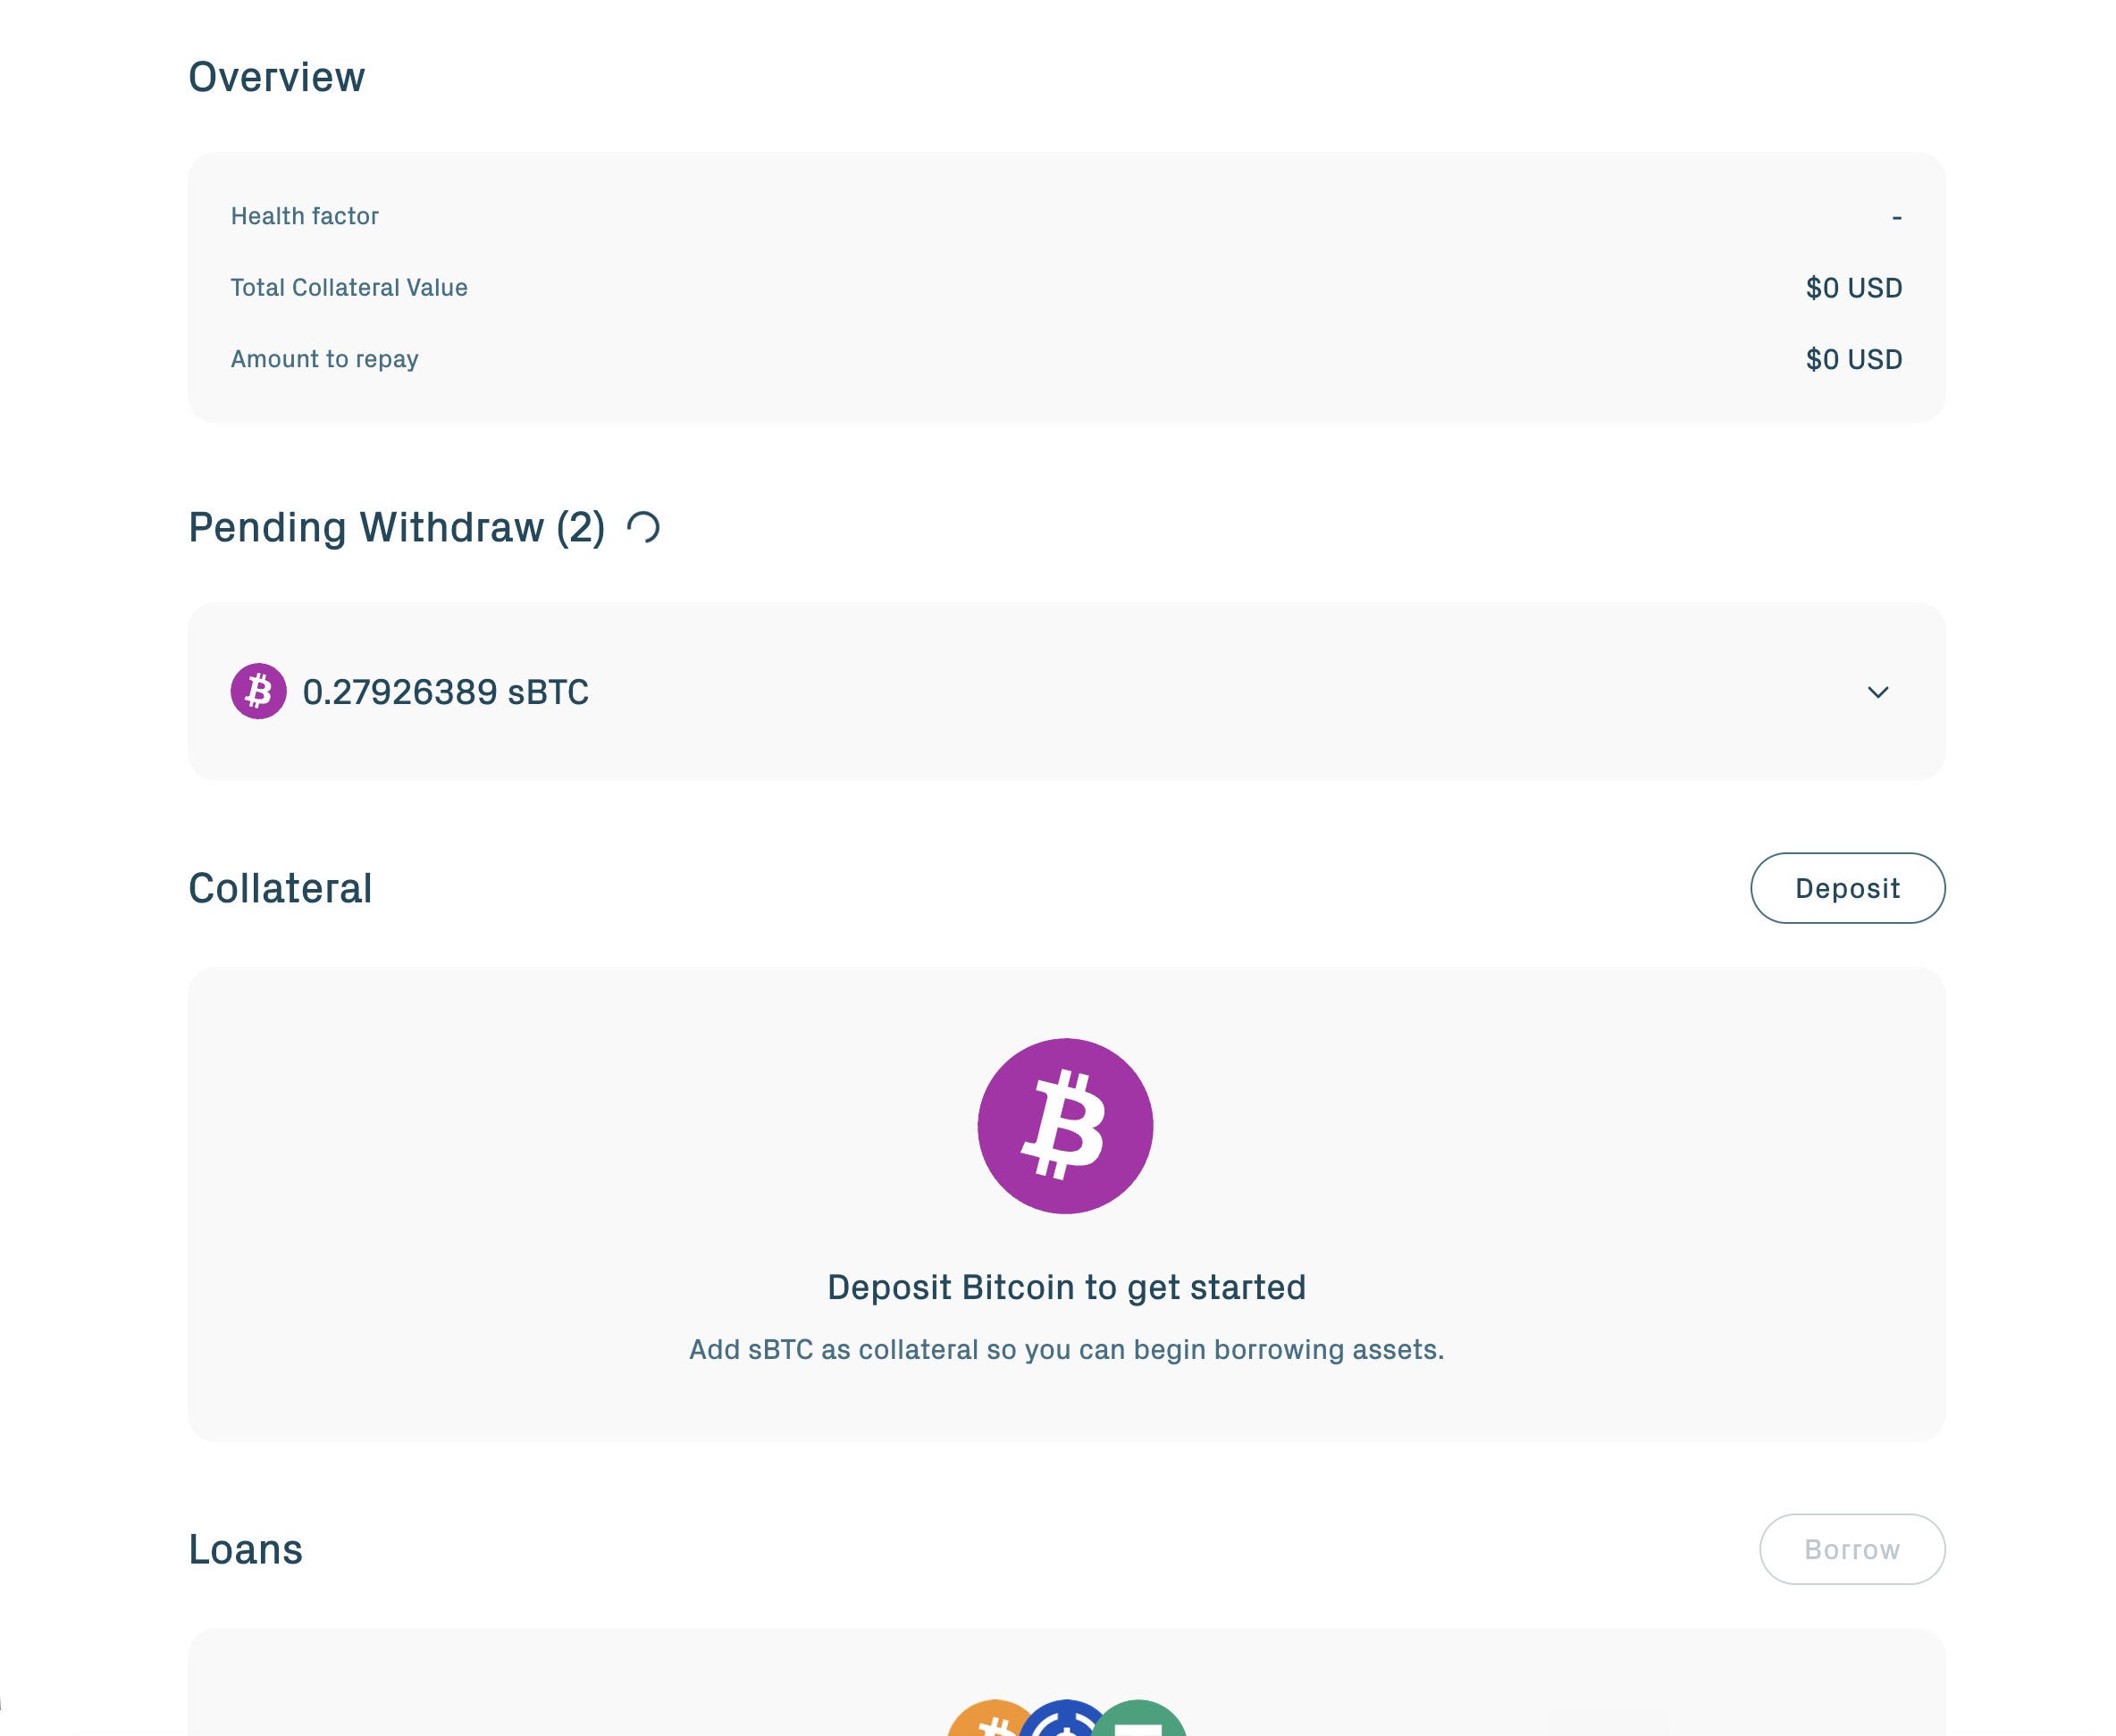
Each address and each position is capped on the Aave application. See Protocol parameters for the live numeric limits.
Before you start
You need:
- A UniSat Bitcoin wallet that supports signet.
- An Ethereum wallet on Sepolia.
- Signet BTC to deposit. Get it from the faucet listed in Setup.
- A small amount of Sepolia ETH for gas. The same page lists the faucet.
For the full list of supported wallets, network and RPC details, and faucet URLs, see Setup.
Step 1: Open the TBV Testnet app
Navigate to the TBV Testnet app URL listed in Setup.
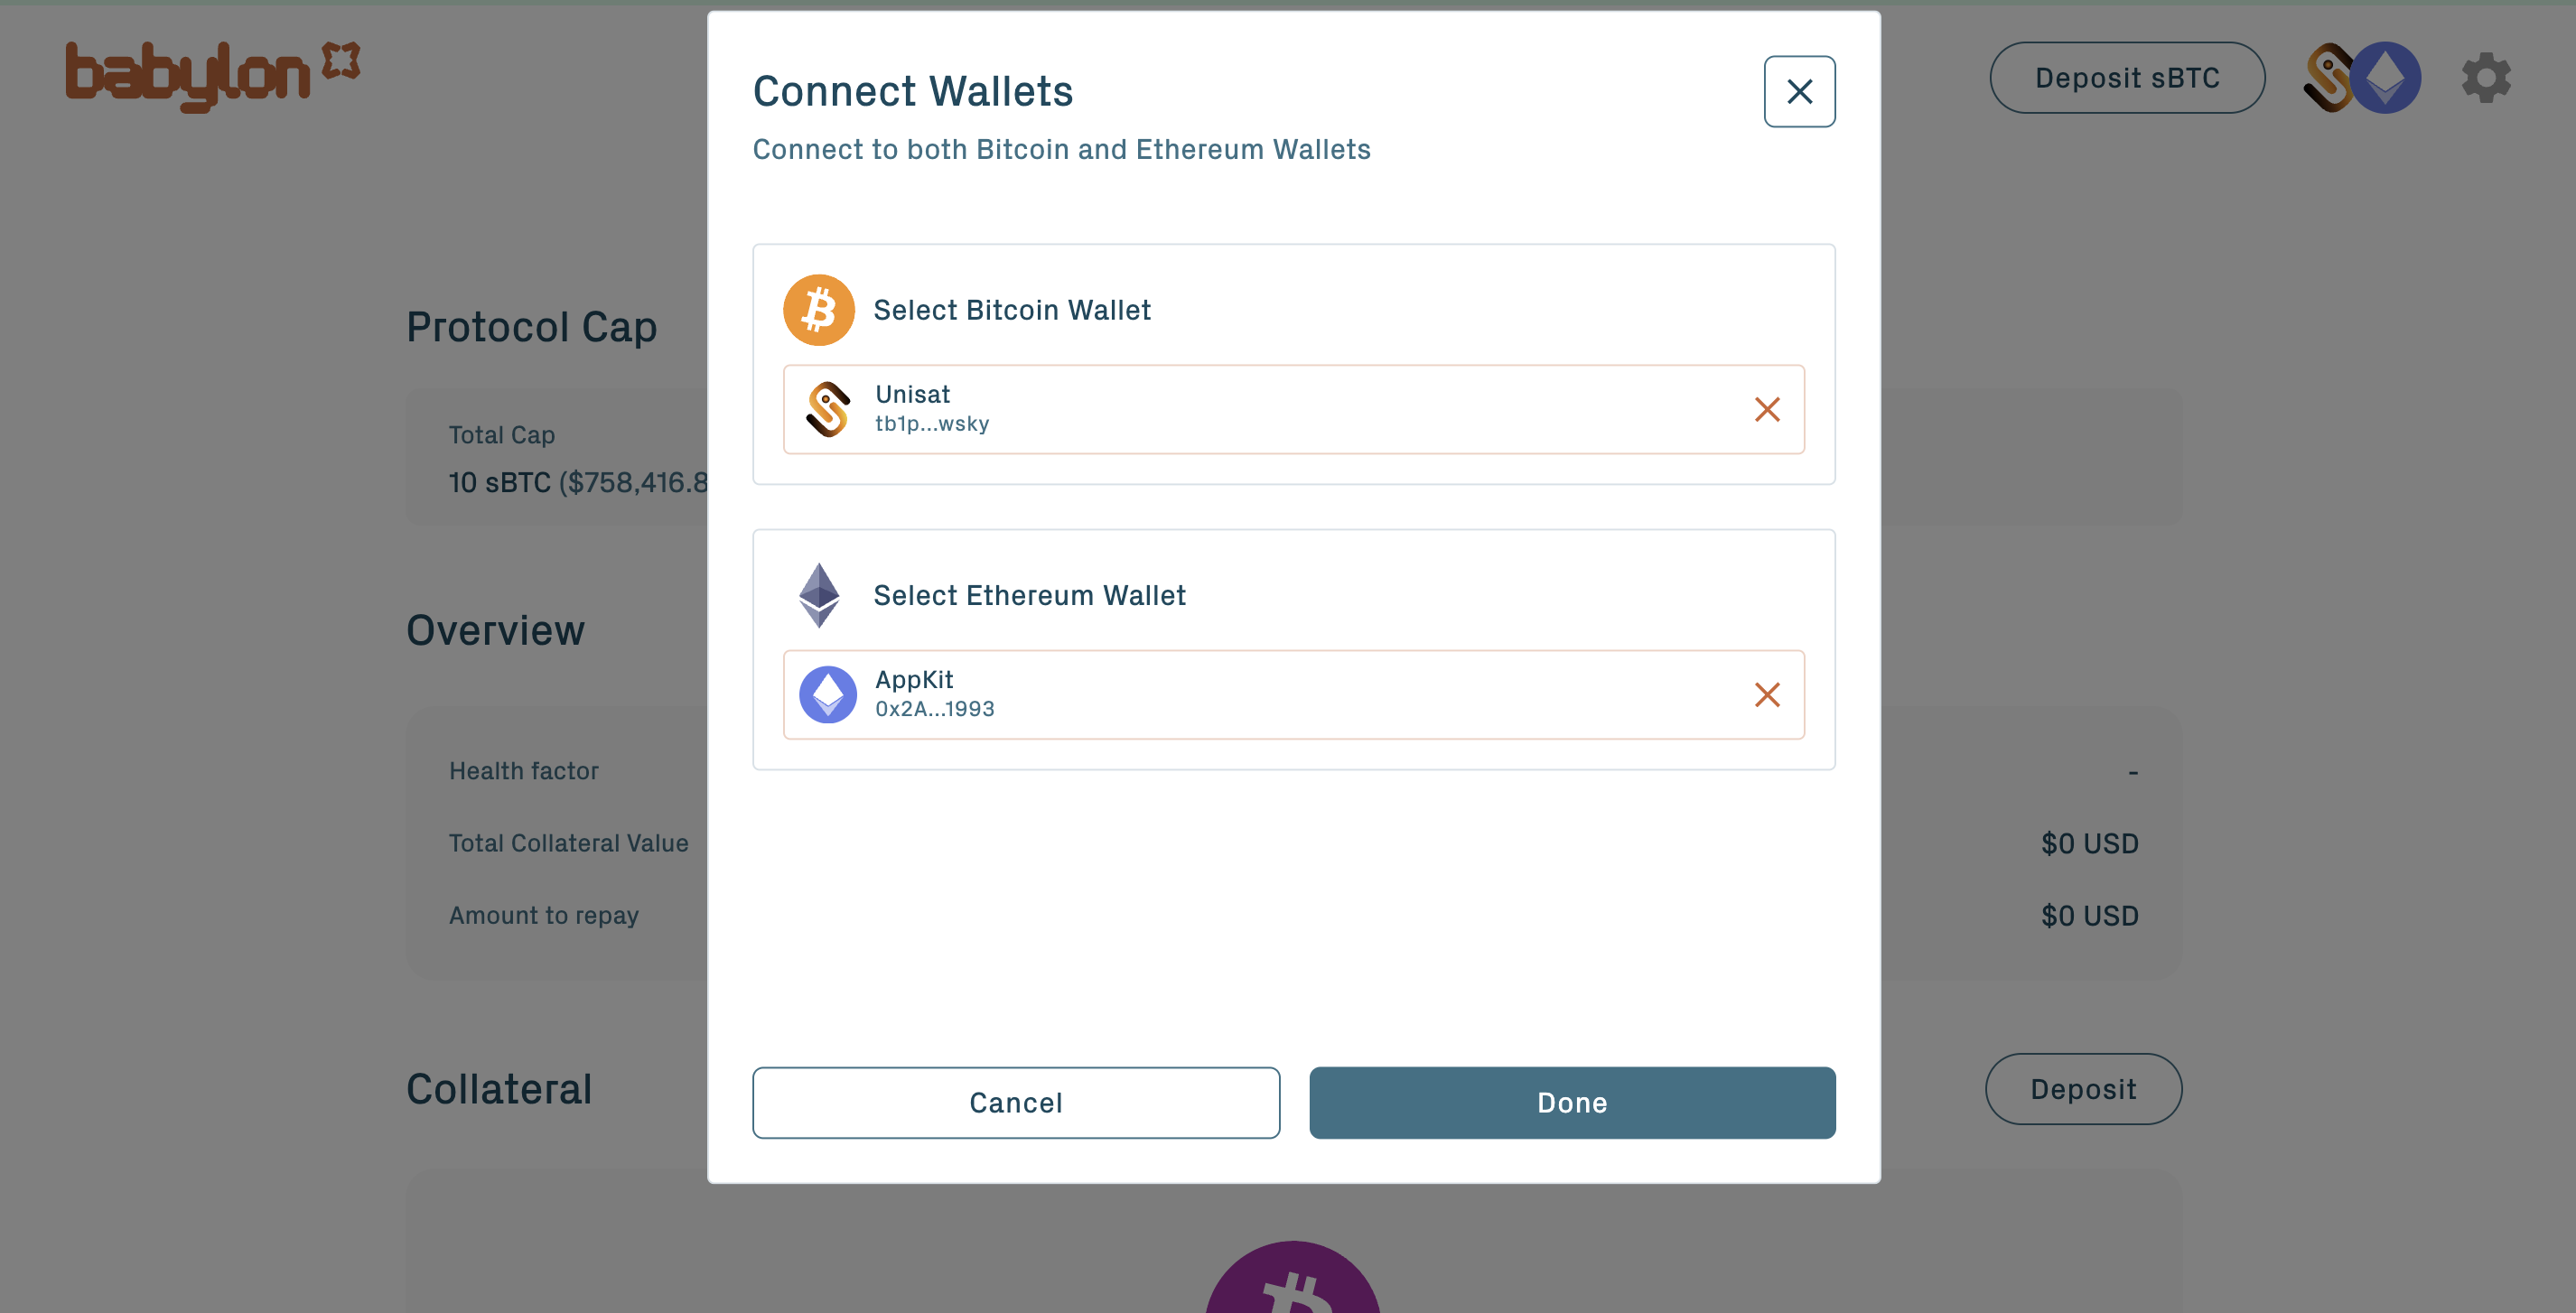
Step 2: Connect wallets
Click the Connect button at the top of the app or on any card.
Important: the Bitcoin wallet must be set to Taproot (P2TR) address type before connecting. If a different address type was set initially, switch in the wallet and re-fund from the signet faucet, because different address types do not share balance.
The wallet picker then opens. Select a Bitcoin wallet using a Taproot address type and an Ethereum wallet to sign the on-chain calls.
Step 3: Create a vault (peg-in)
A peg-in moves BTC into a vault on Bitcoin and registers it on Ethereum. The BTC stays on Bitcoin throughout, locked in a Taproot output. Nothing is bridged or wrapped.
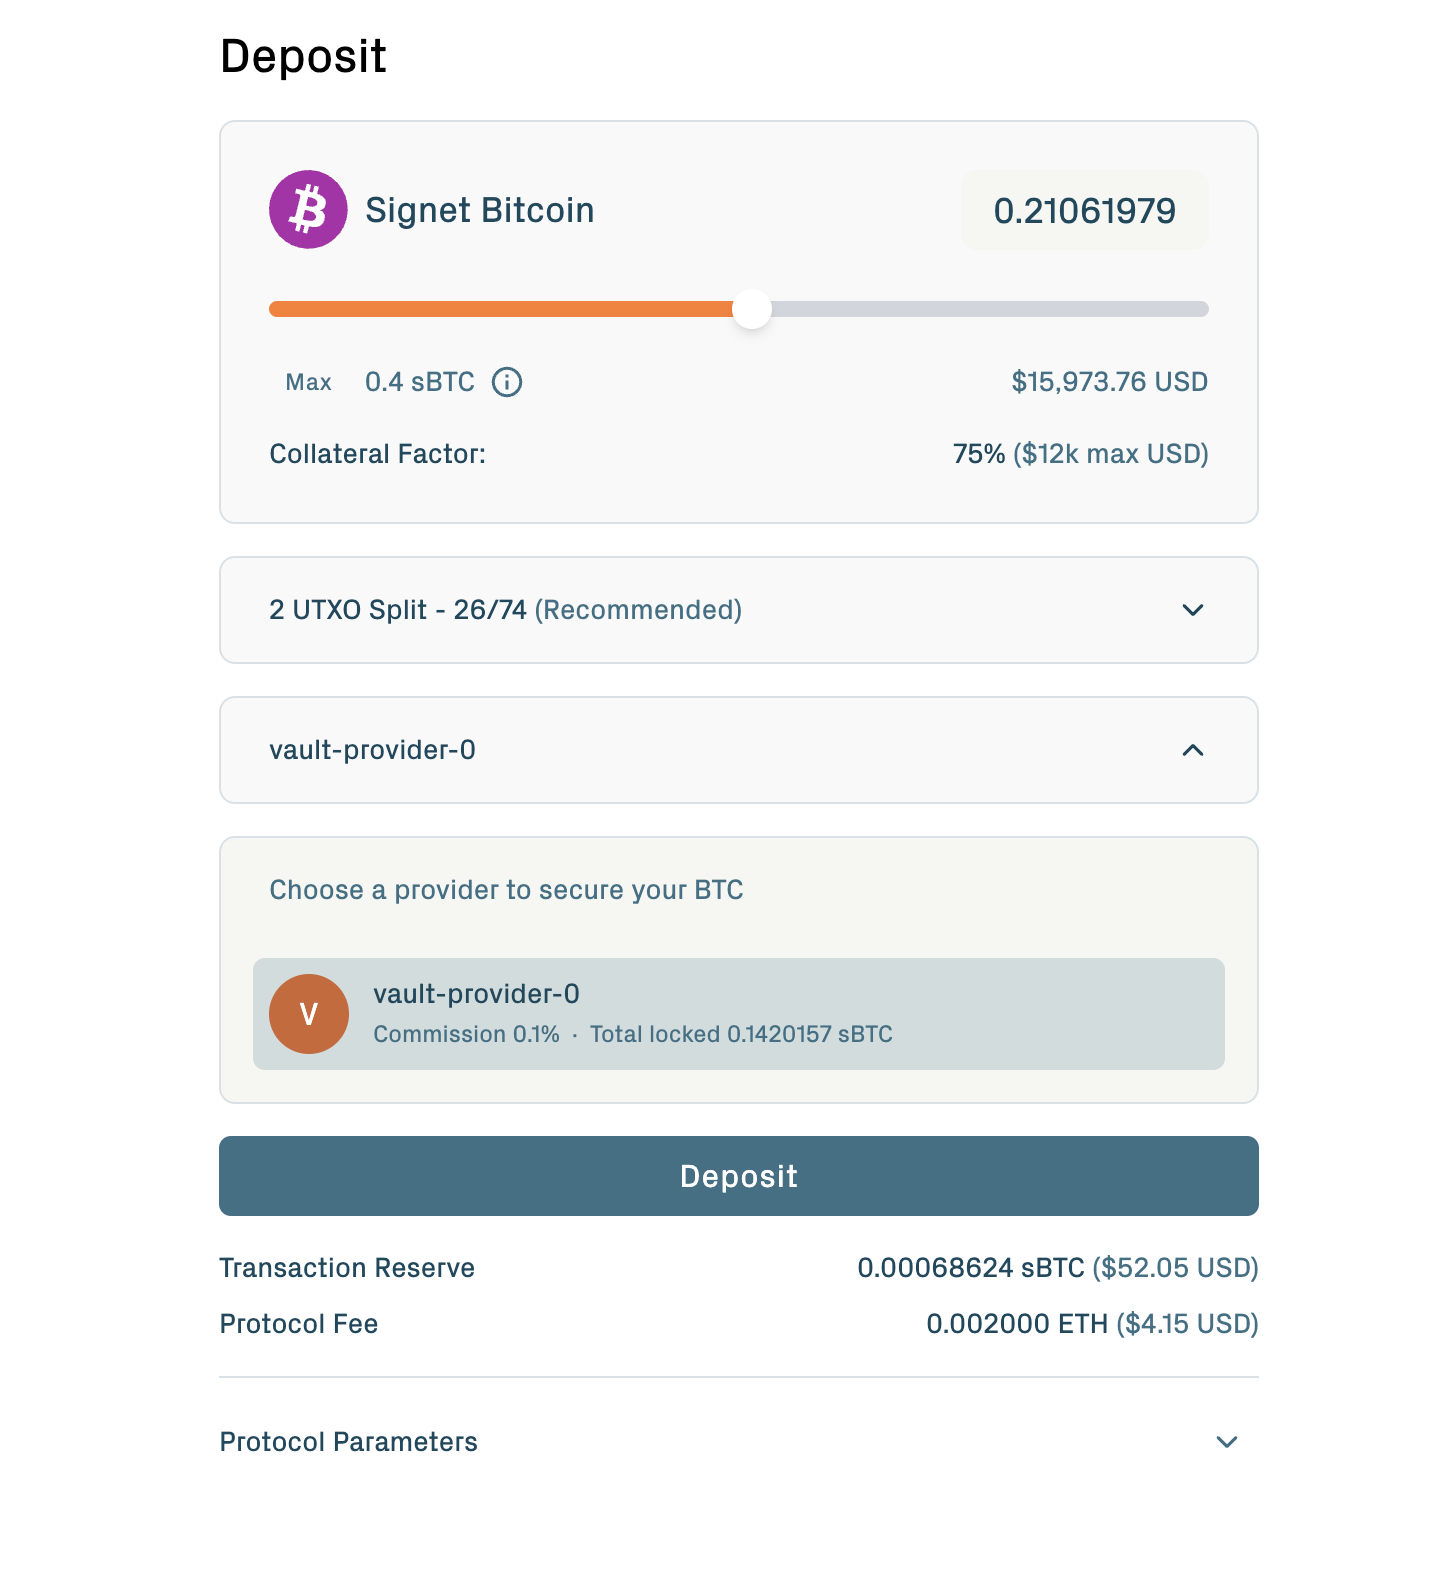
From the Collateral section, click Deposit. Then:
1. Enter the amount in BTC within the public-testnet caps. See Protocol parameters.
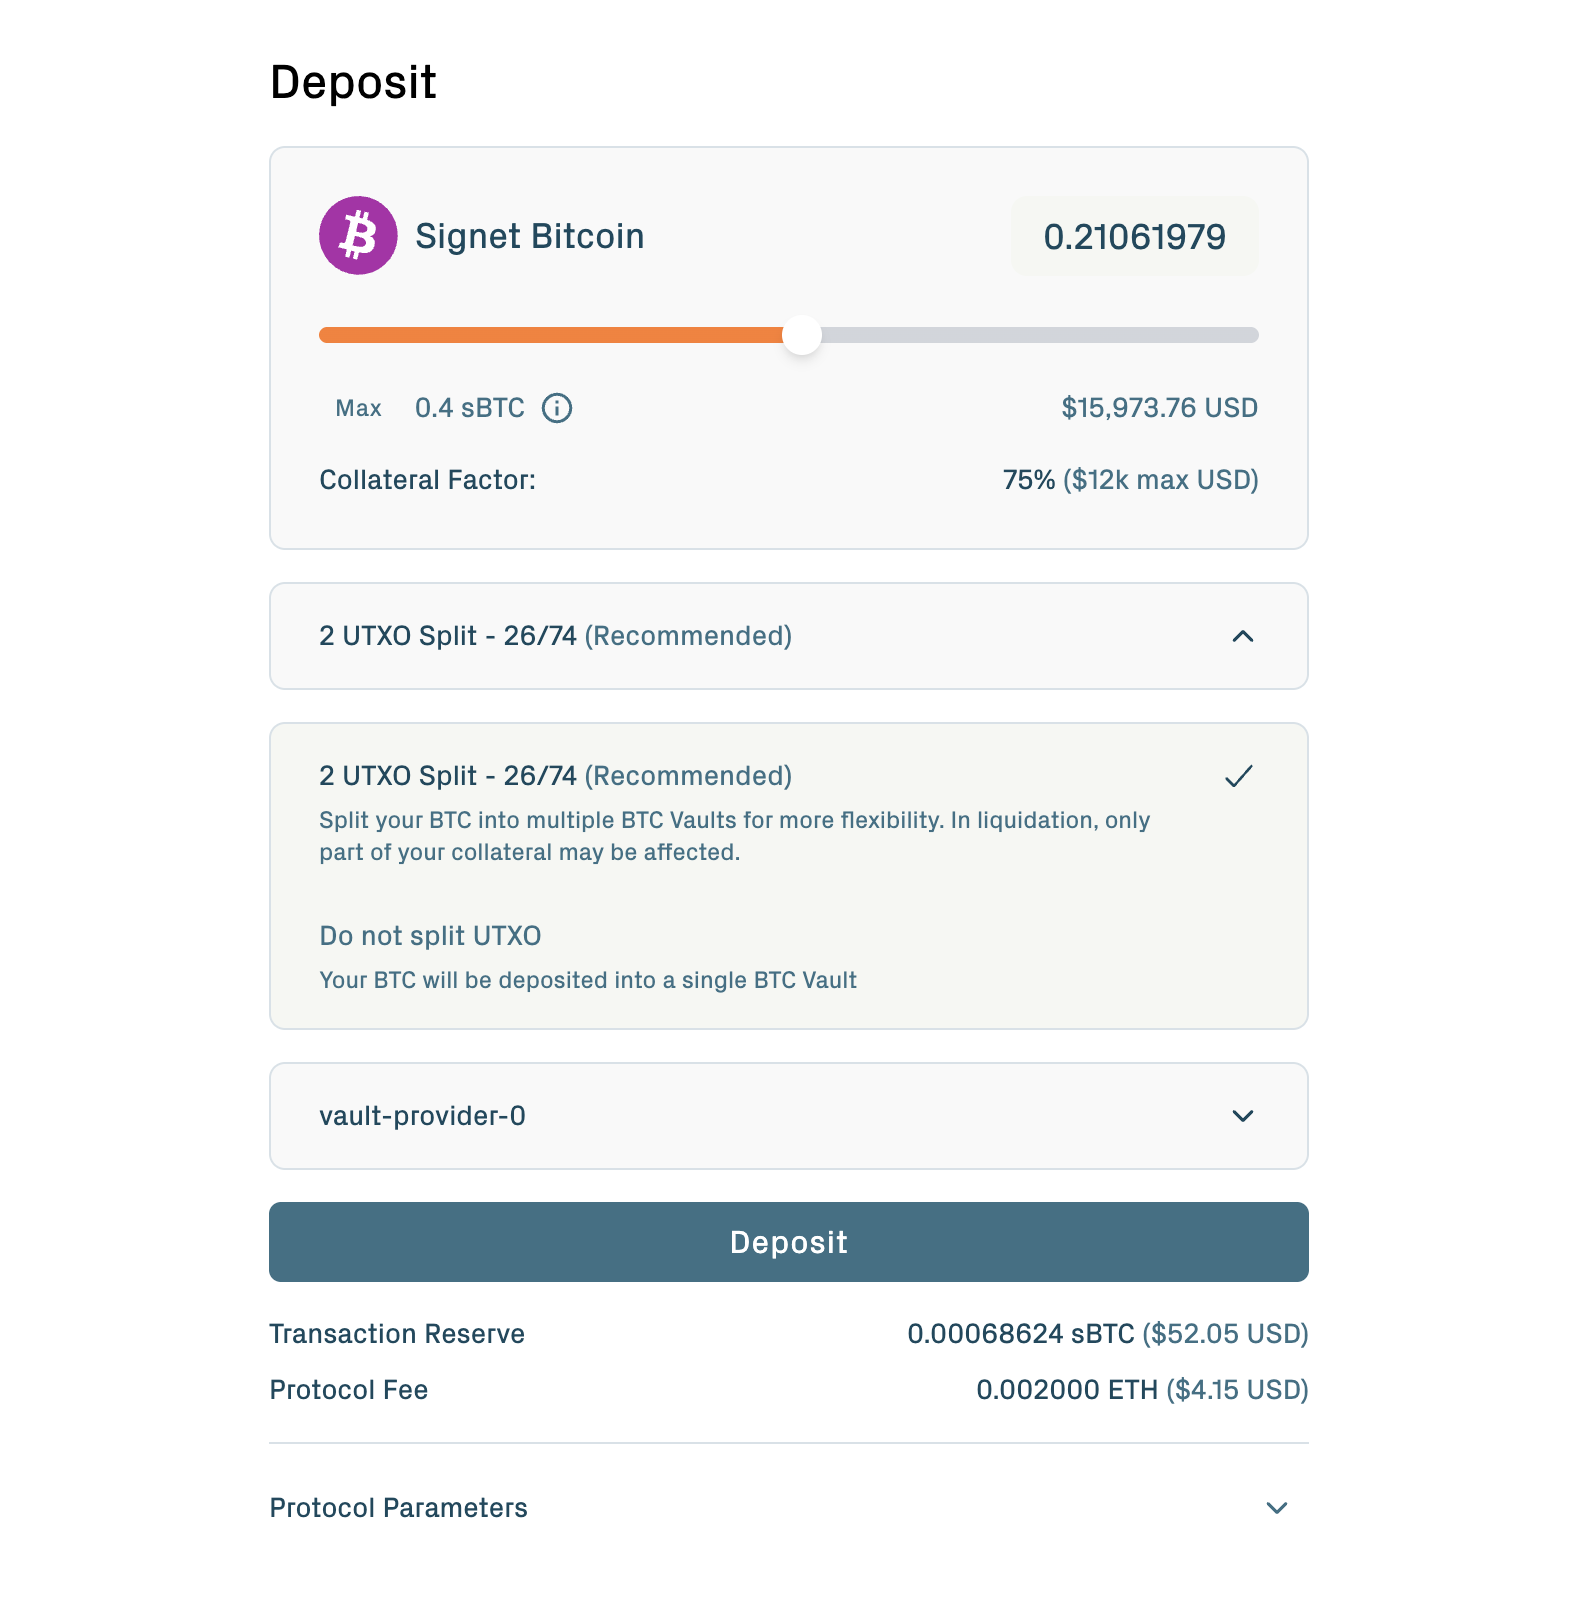
2. Select a Vault Provider from the dropdown.
3. Confirm the Bitcoin and Ethereum transactions.
The app then runs the off-chain setup automatically: authentication, signature collection, acknowledgments. The full walkthrough is on Create a vault.
The app recommends splitting your deposit into two vaults: a sacrificial vault sized to cover the protocol's expected seizure amount (placed first in liquidation order), and a protected vault holding the rest (placed second). At current public-testnet parameters, the sacrificial vault is the larger of the two. For the order-change UI, see Reorder BTC vaults.
When the vault reaches Verified status, the app prompts you to Activate. Click it. The vault transitions to Active, and the protocol automatically supplies it as collateral to your borrowing position.
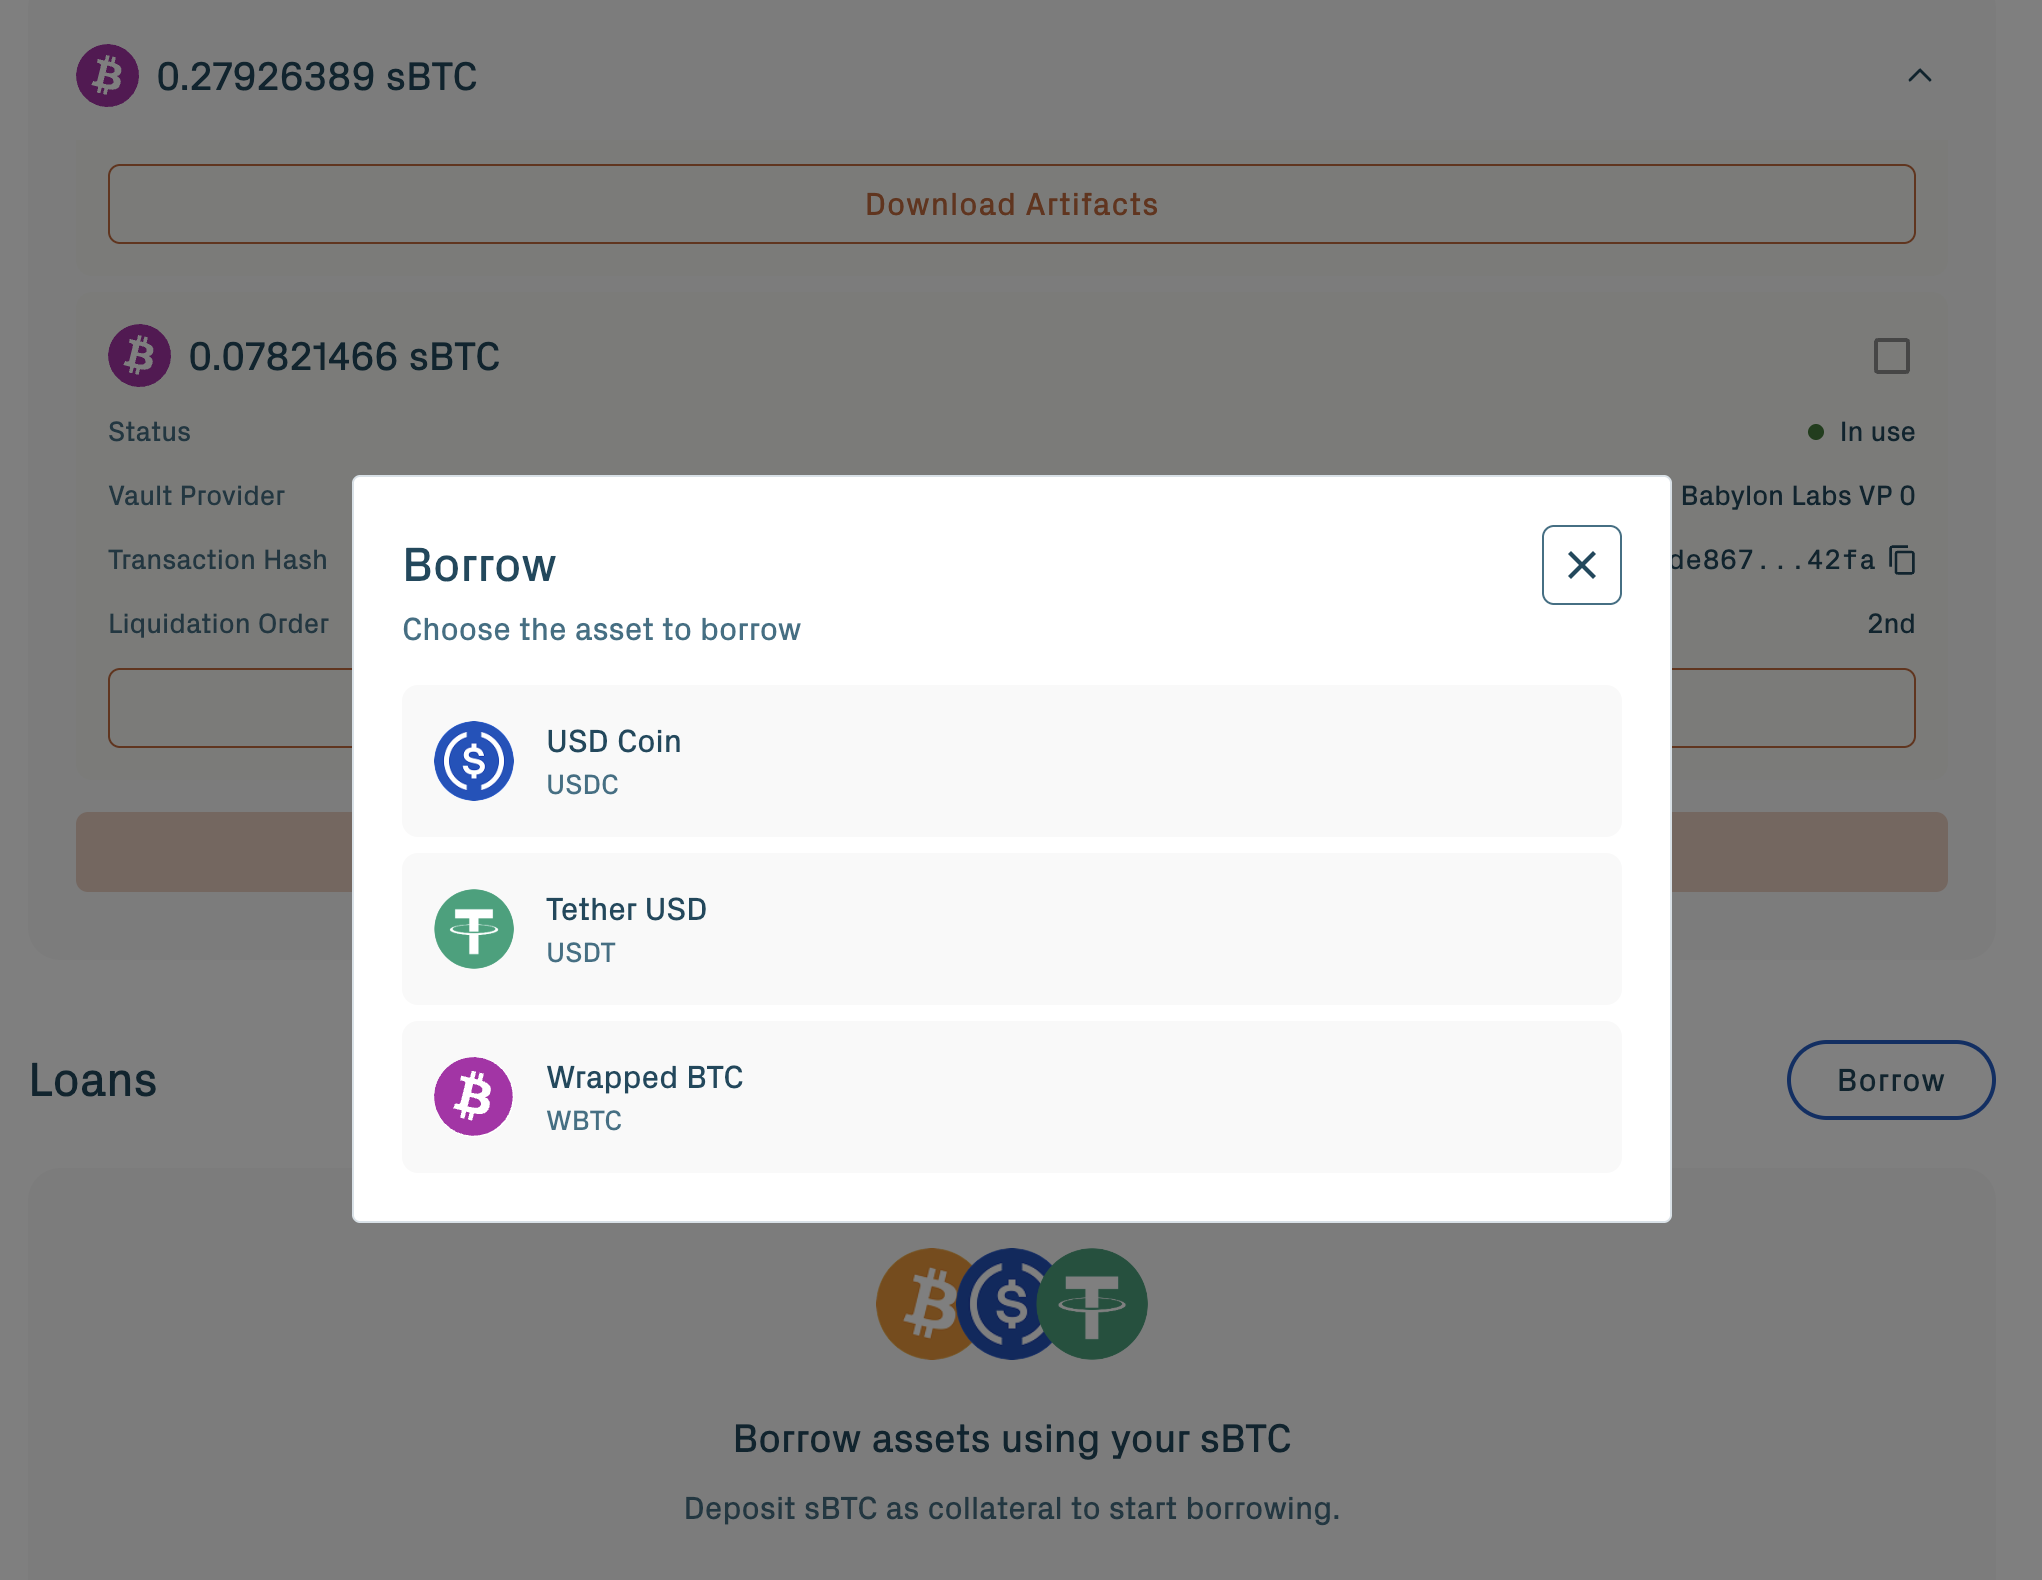
Step 4: Borrow stablecoins
Your vault is already supplied as collateral on the integrated Aave v4 market — minted and supplied automatically when you activated. From this step on, you are interacting with the Aave v4 application layer; the underlying vault on Bitcoin sits unchanged.
Open the Loans section and click Borrow:
1. Select an asset: USDC, USDT, or WBTC.
2. Enter the amount and sign the borrow transaction.
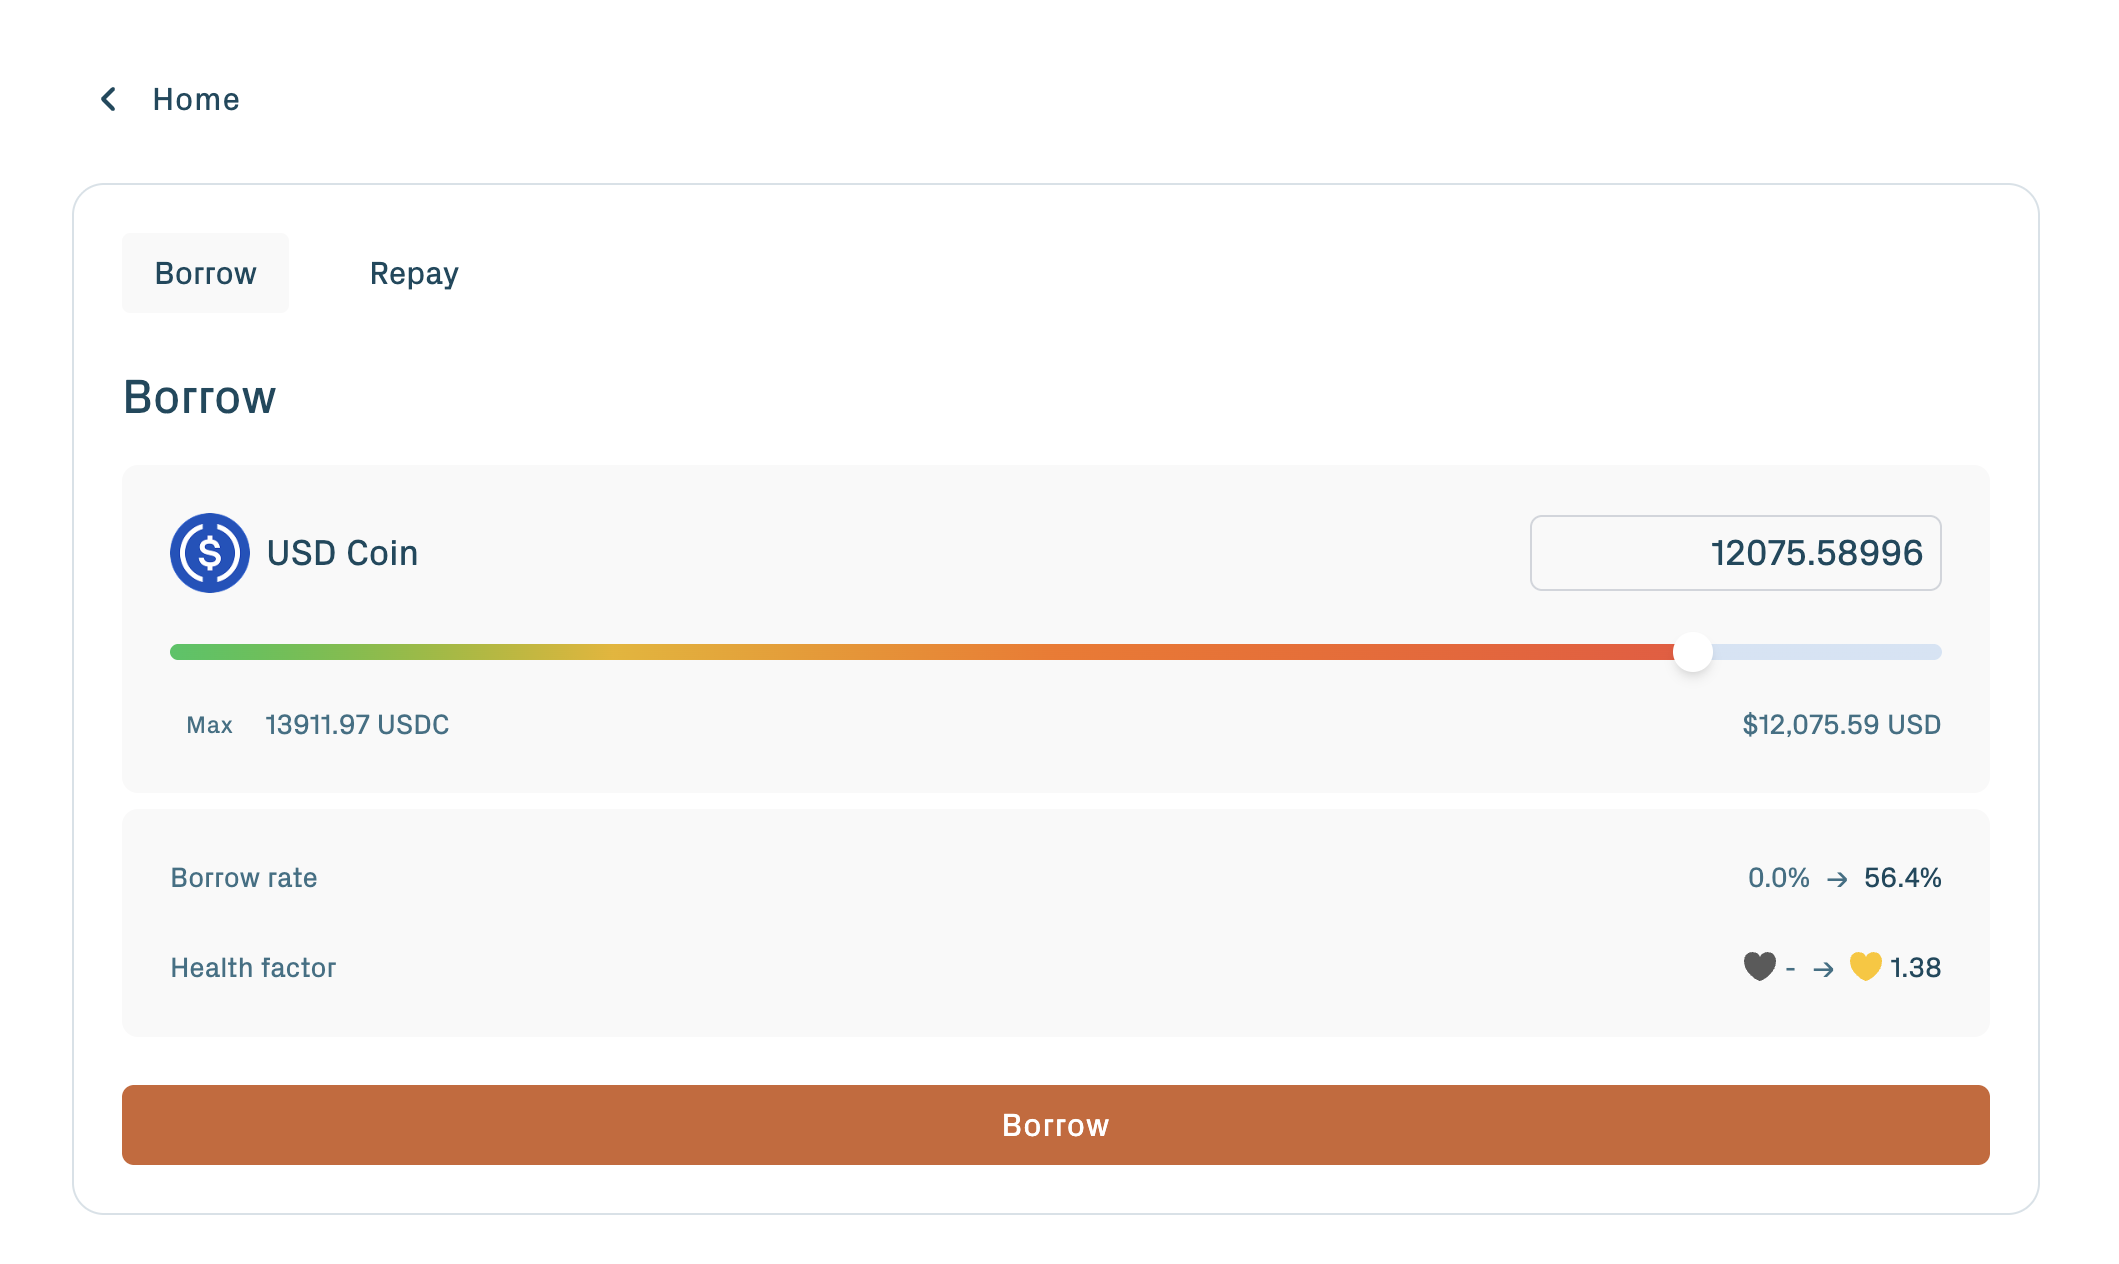
3. Confirm the Ethereum transaction.
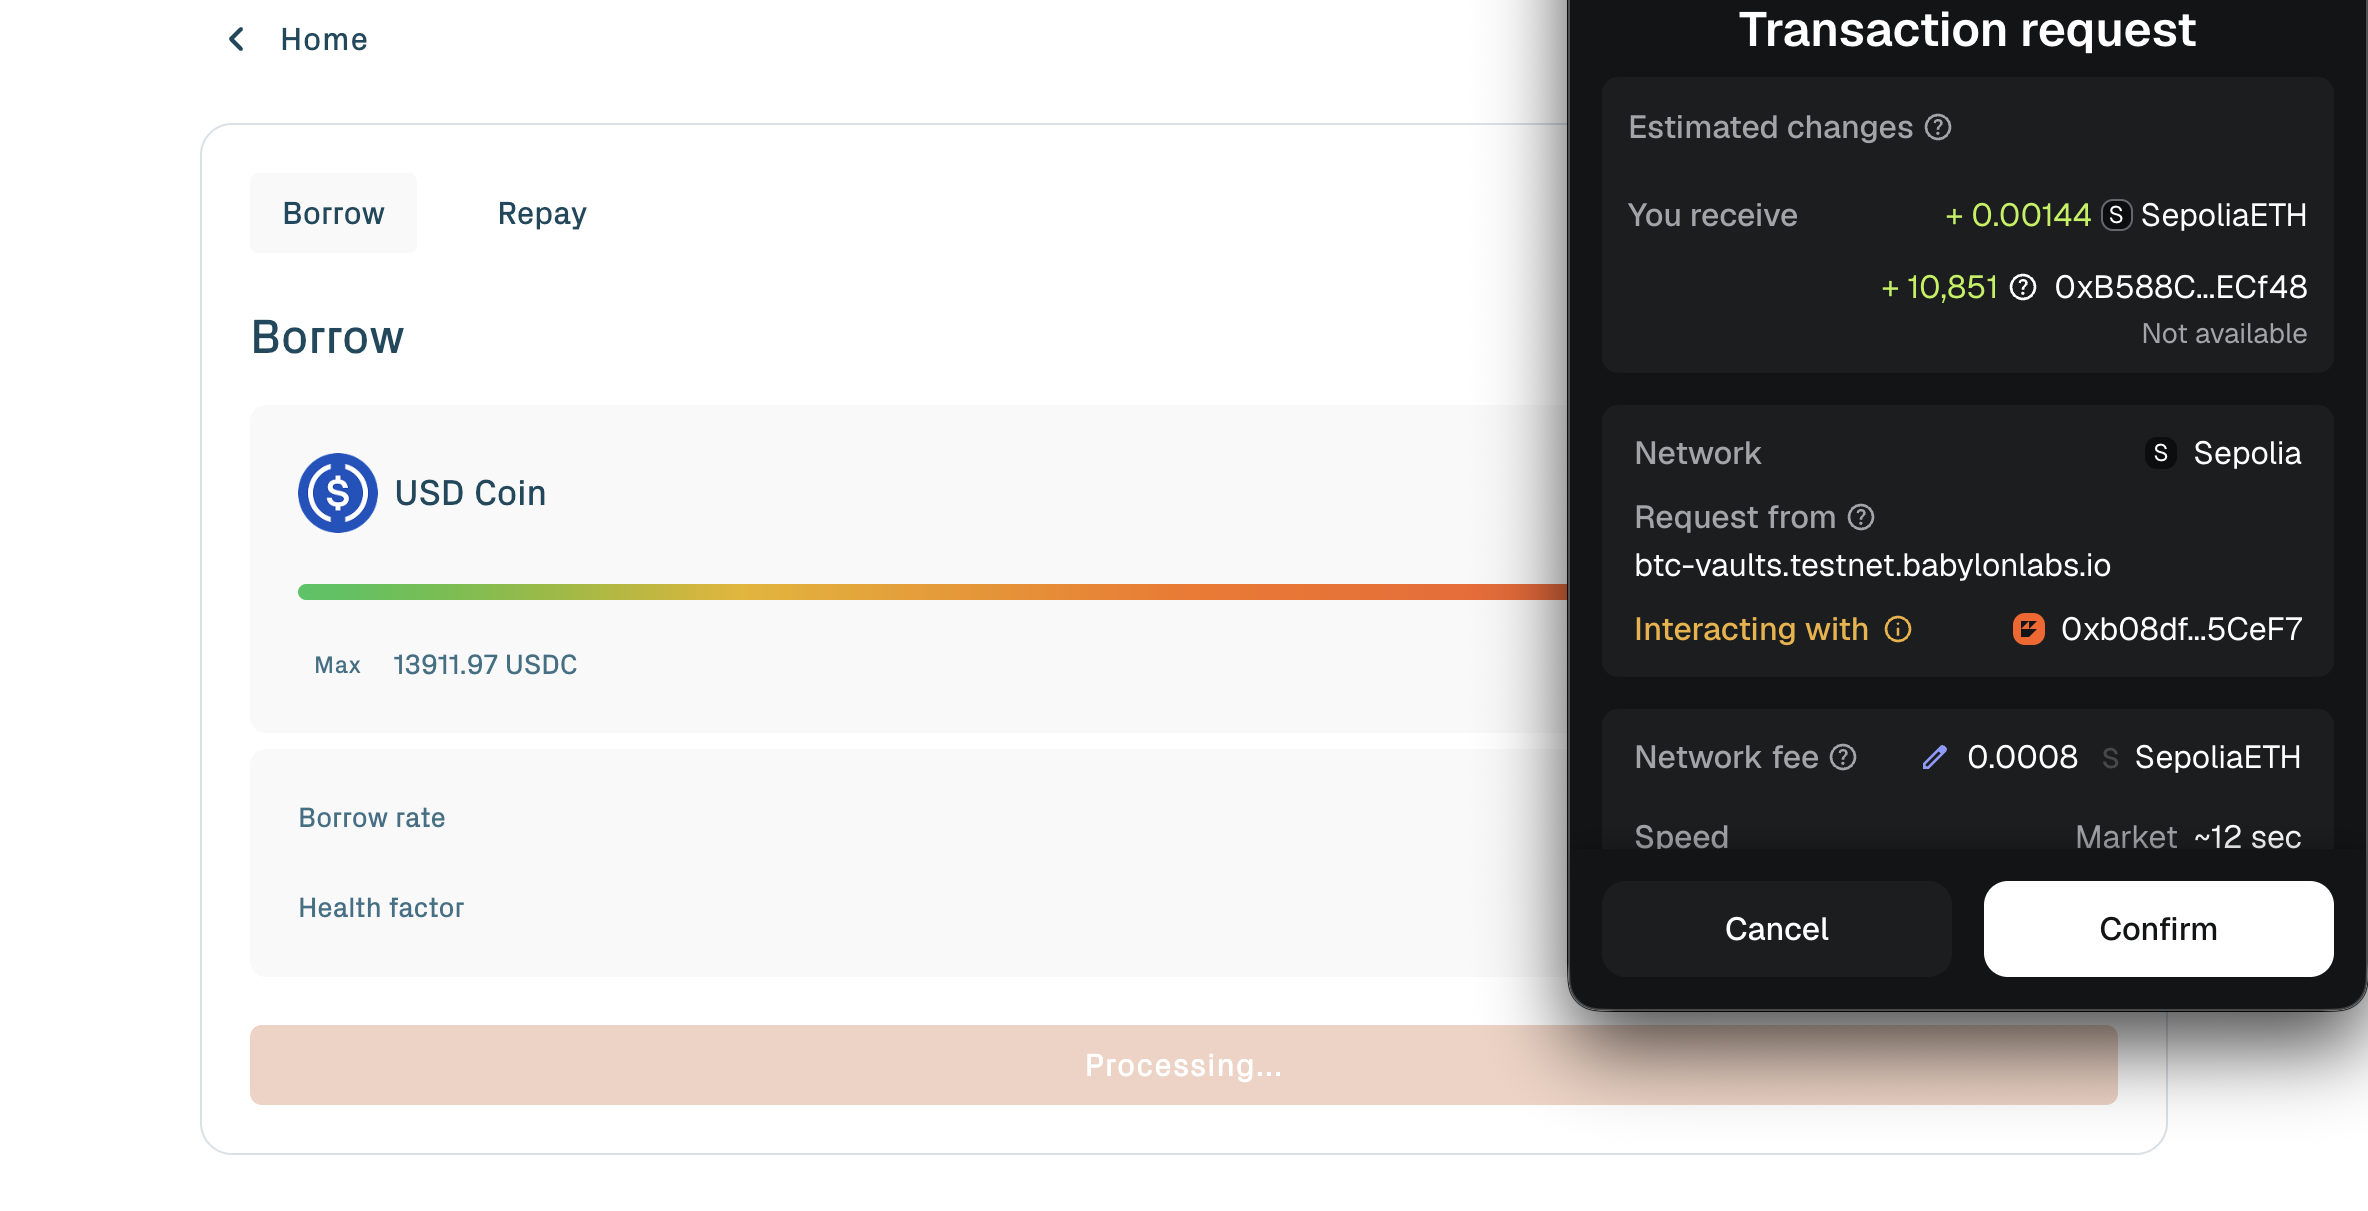
4. Wait for the portal to refresh the position preview and health factor.
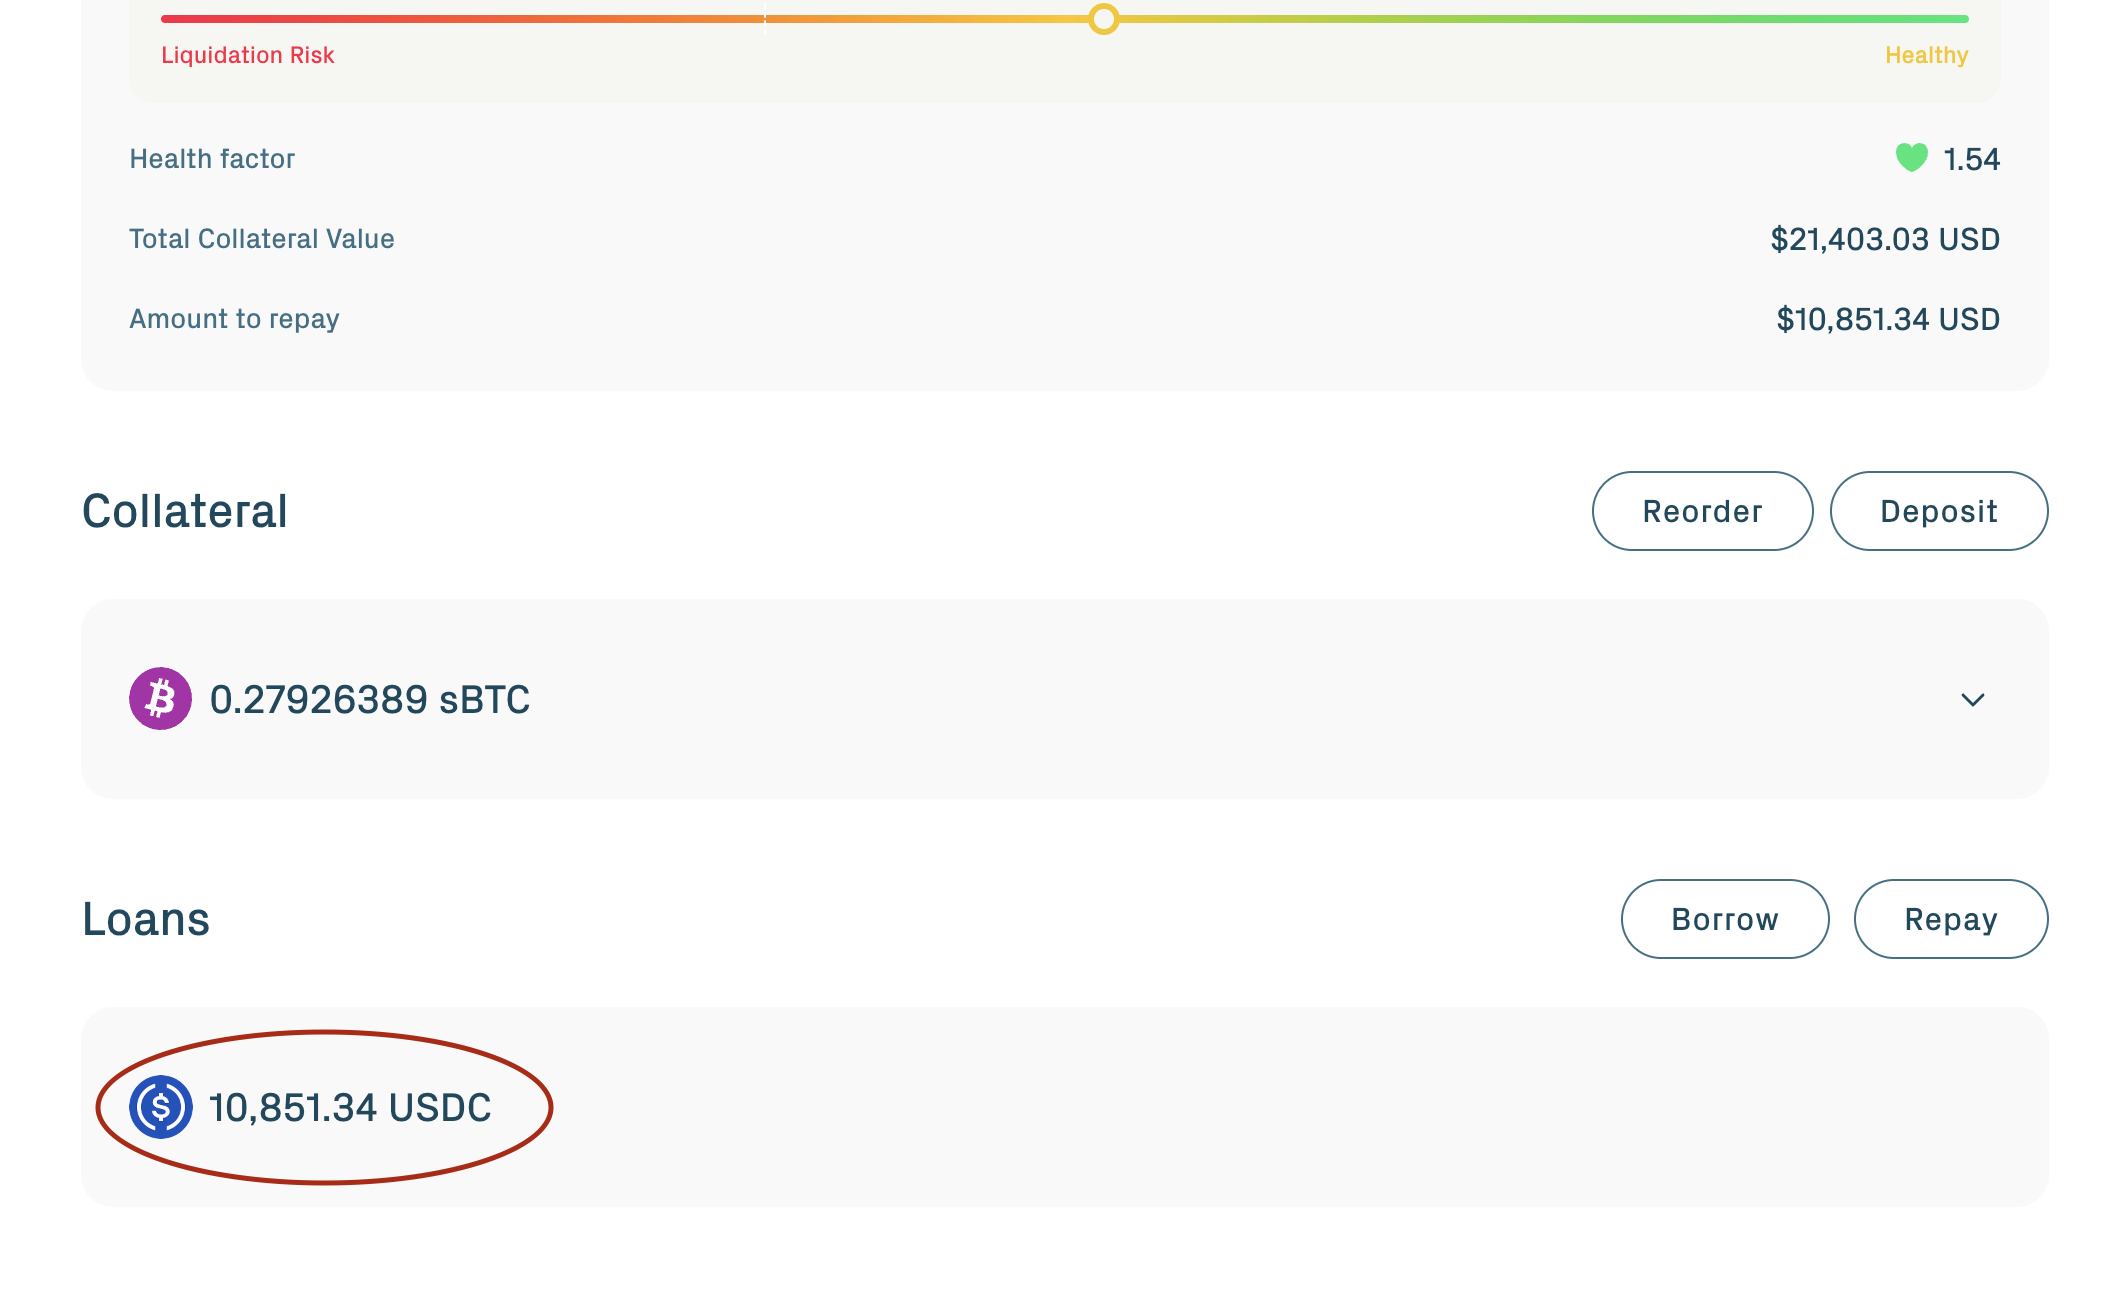

The borrowed asset arrives in your Ethereum wallet. The app now shows your health factor, a single number summarizing how close the position is to liquidation. A higher number is safer.
Step 5: Repay the debt
To close the position, repay what you borrowed.
From the Loans section, click Repay:
- Repay full closes the entire borrow and unlocks redemption.
- Repay partial pays down a portion; the position stays open with reduced debt.
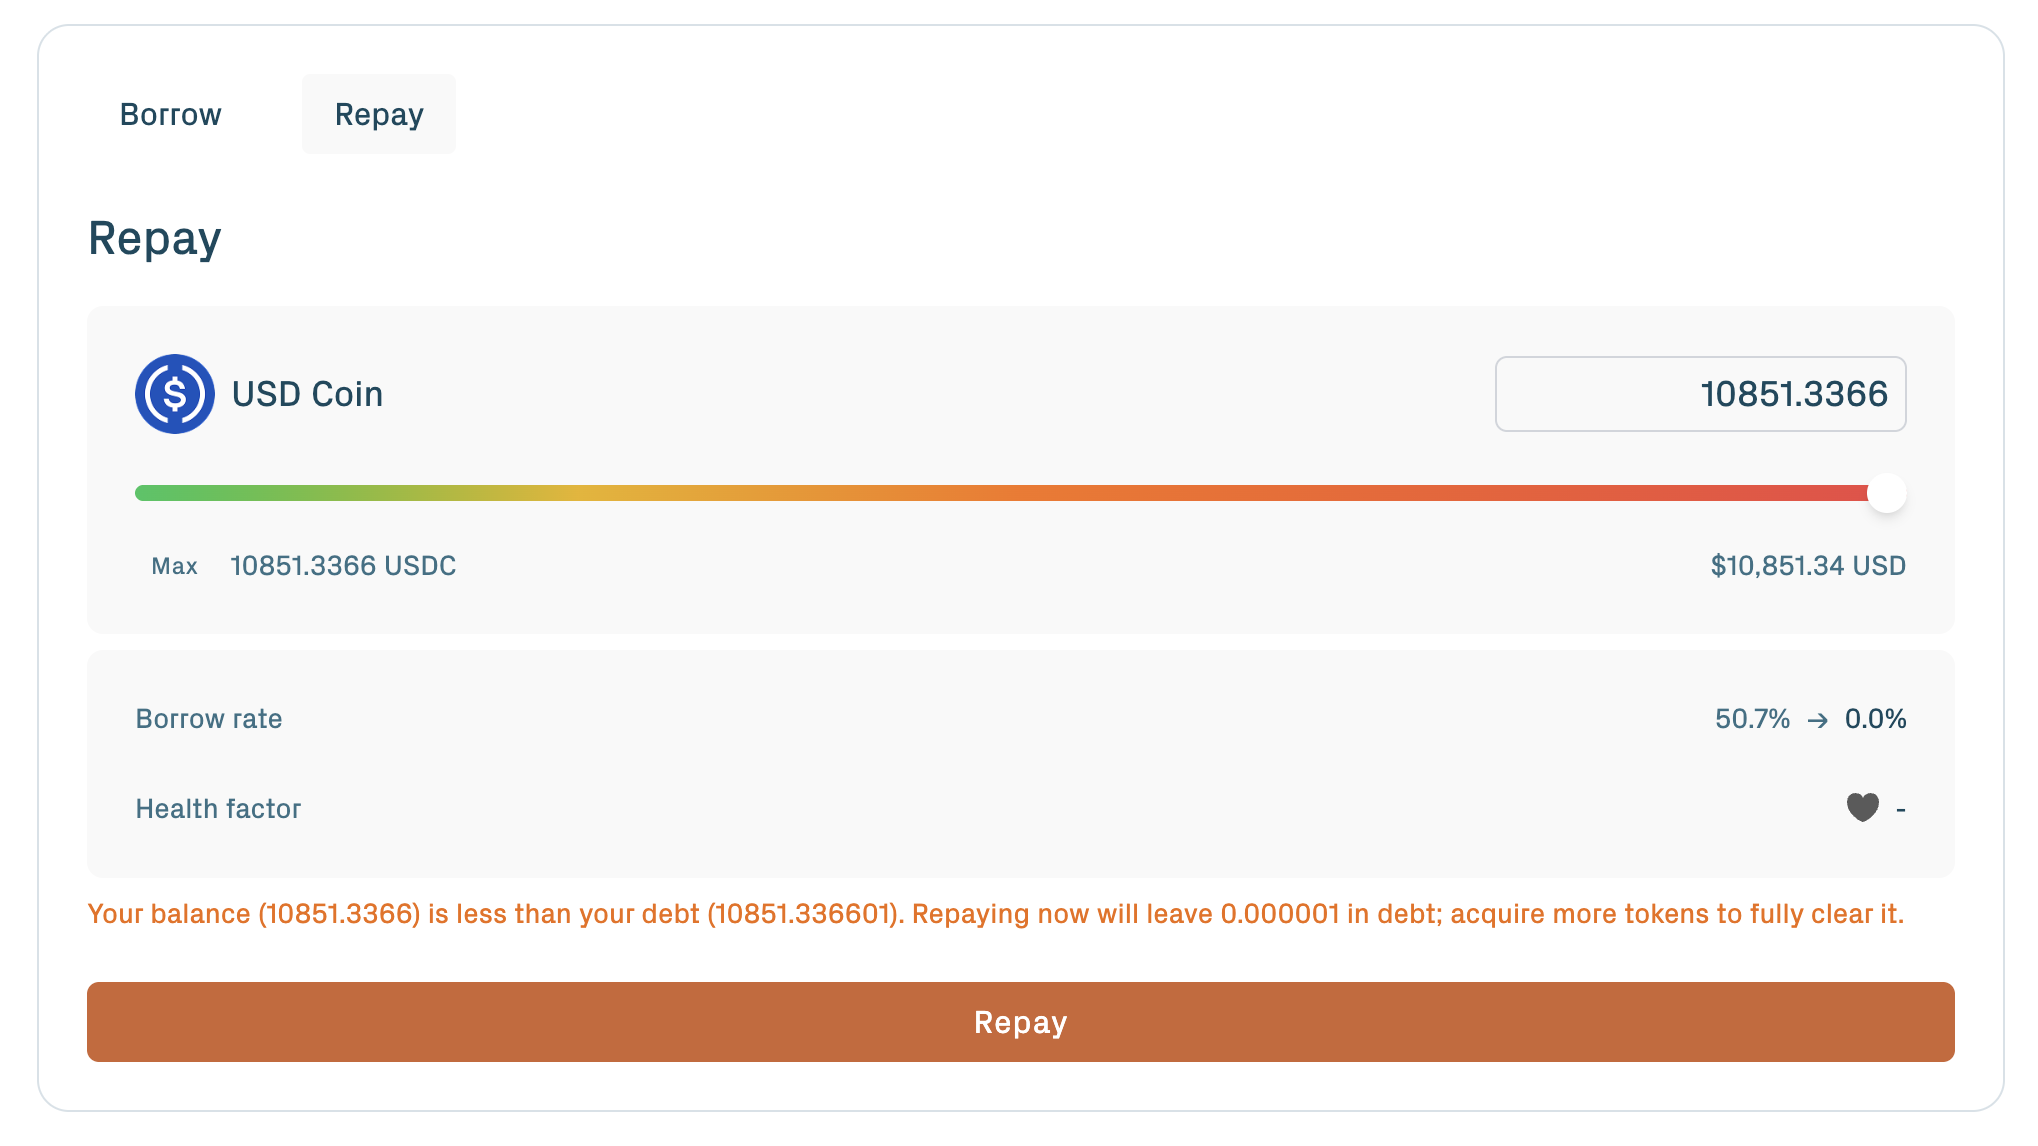
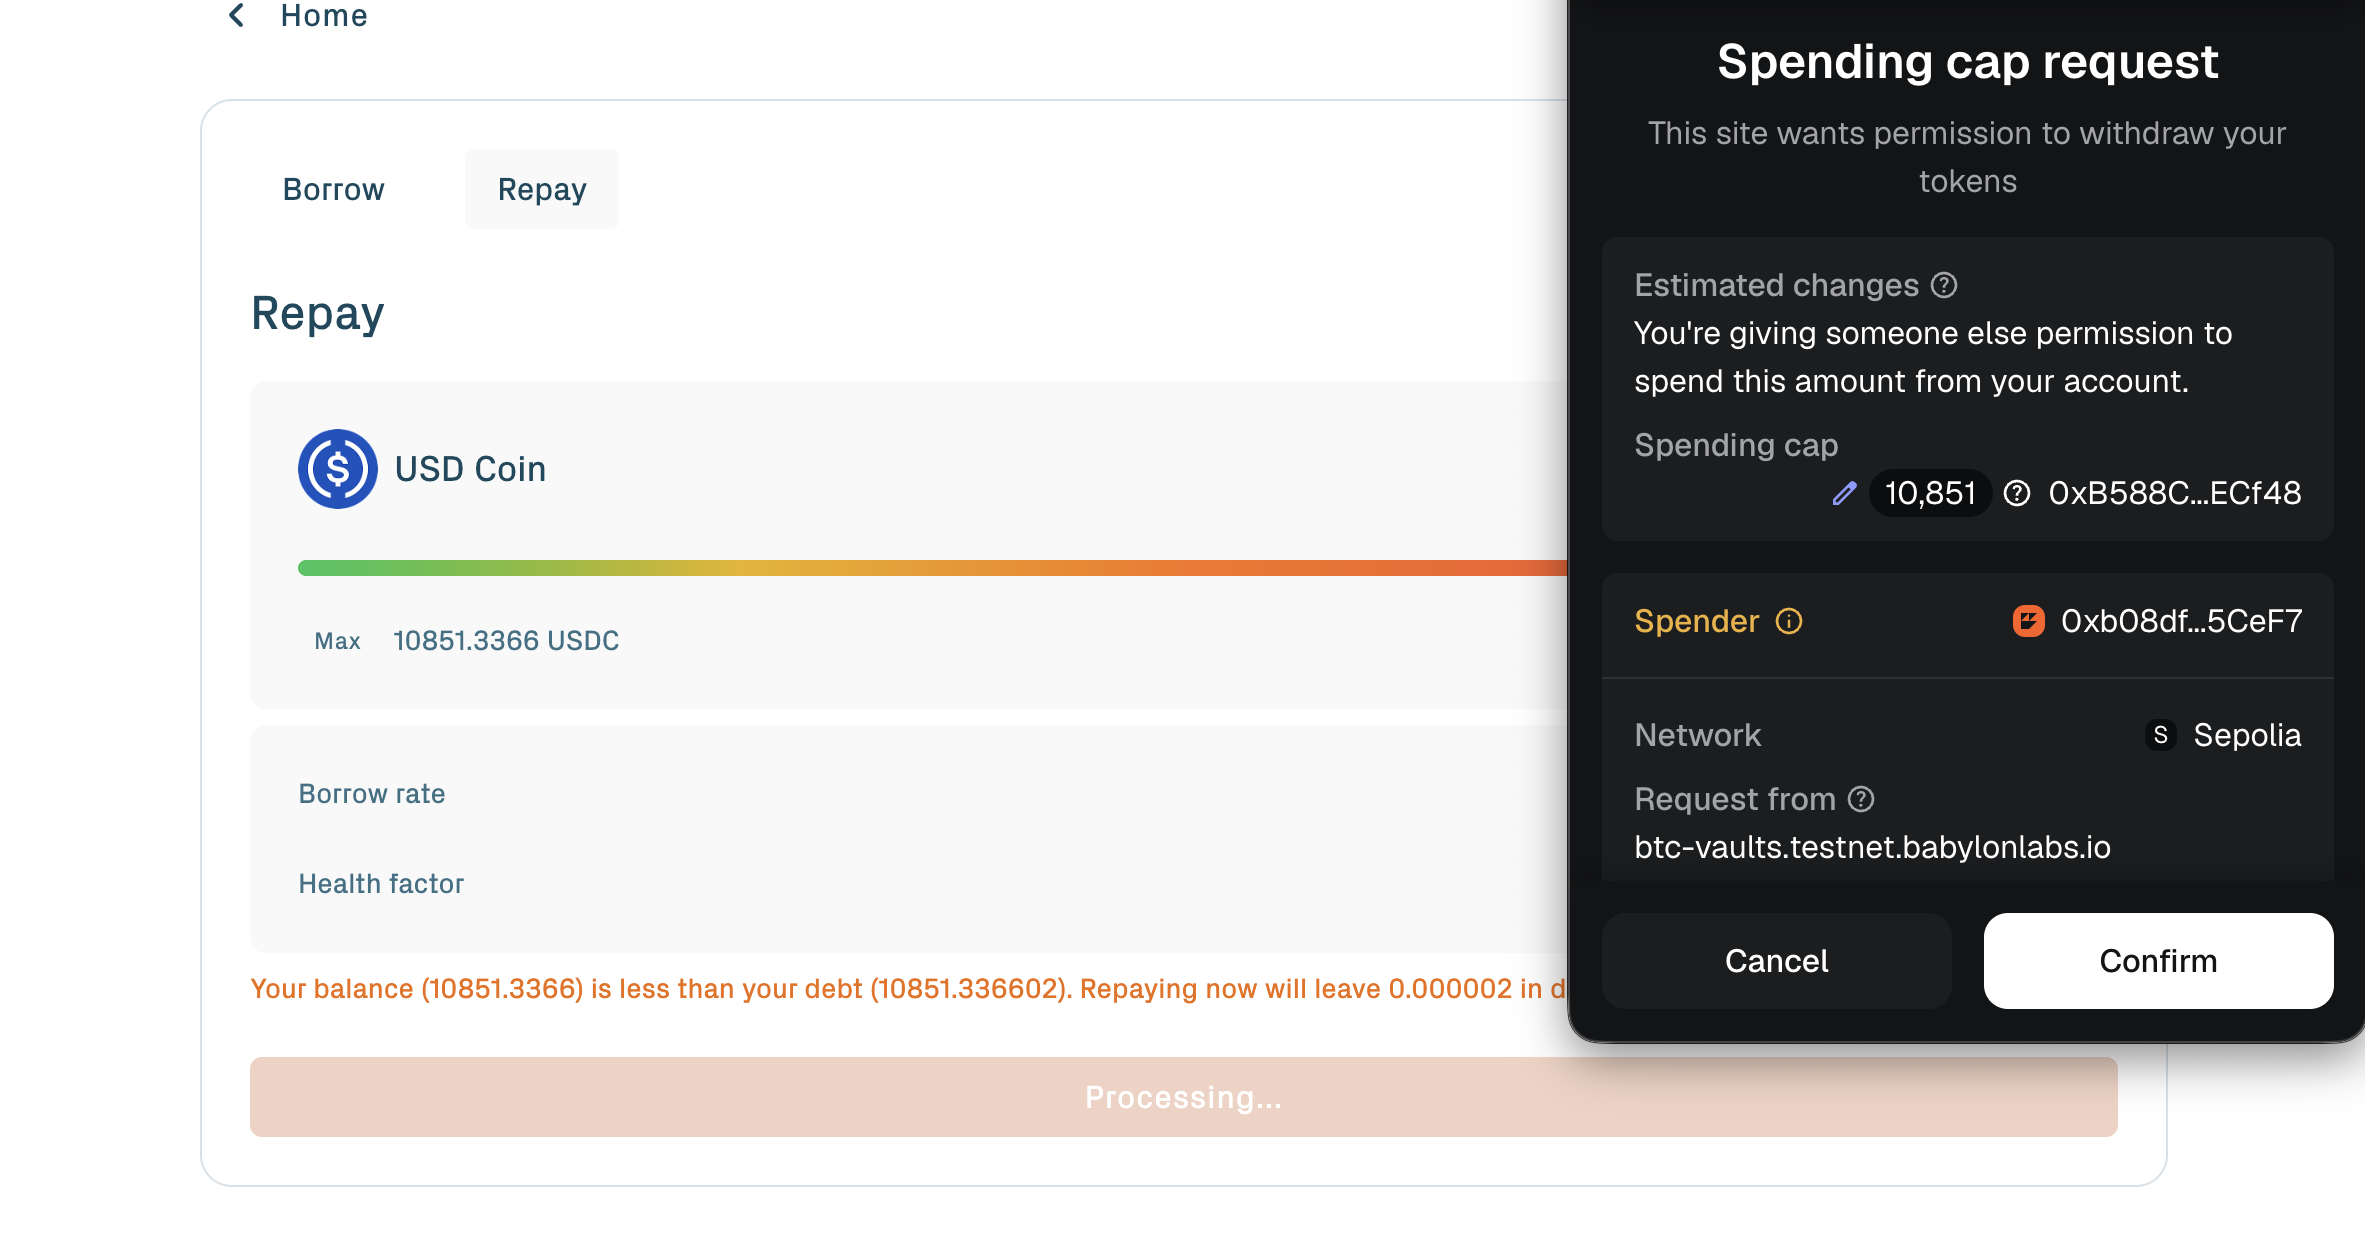
Repaying usually shows an ERC-20 spending cap approval first, then the repayment transaction. Approve a small buffer because interest can accrue while the transaction is pending; any excess stays in your wallet.
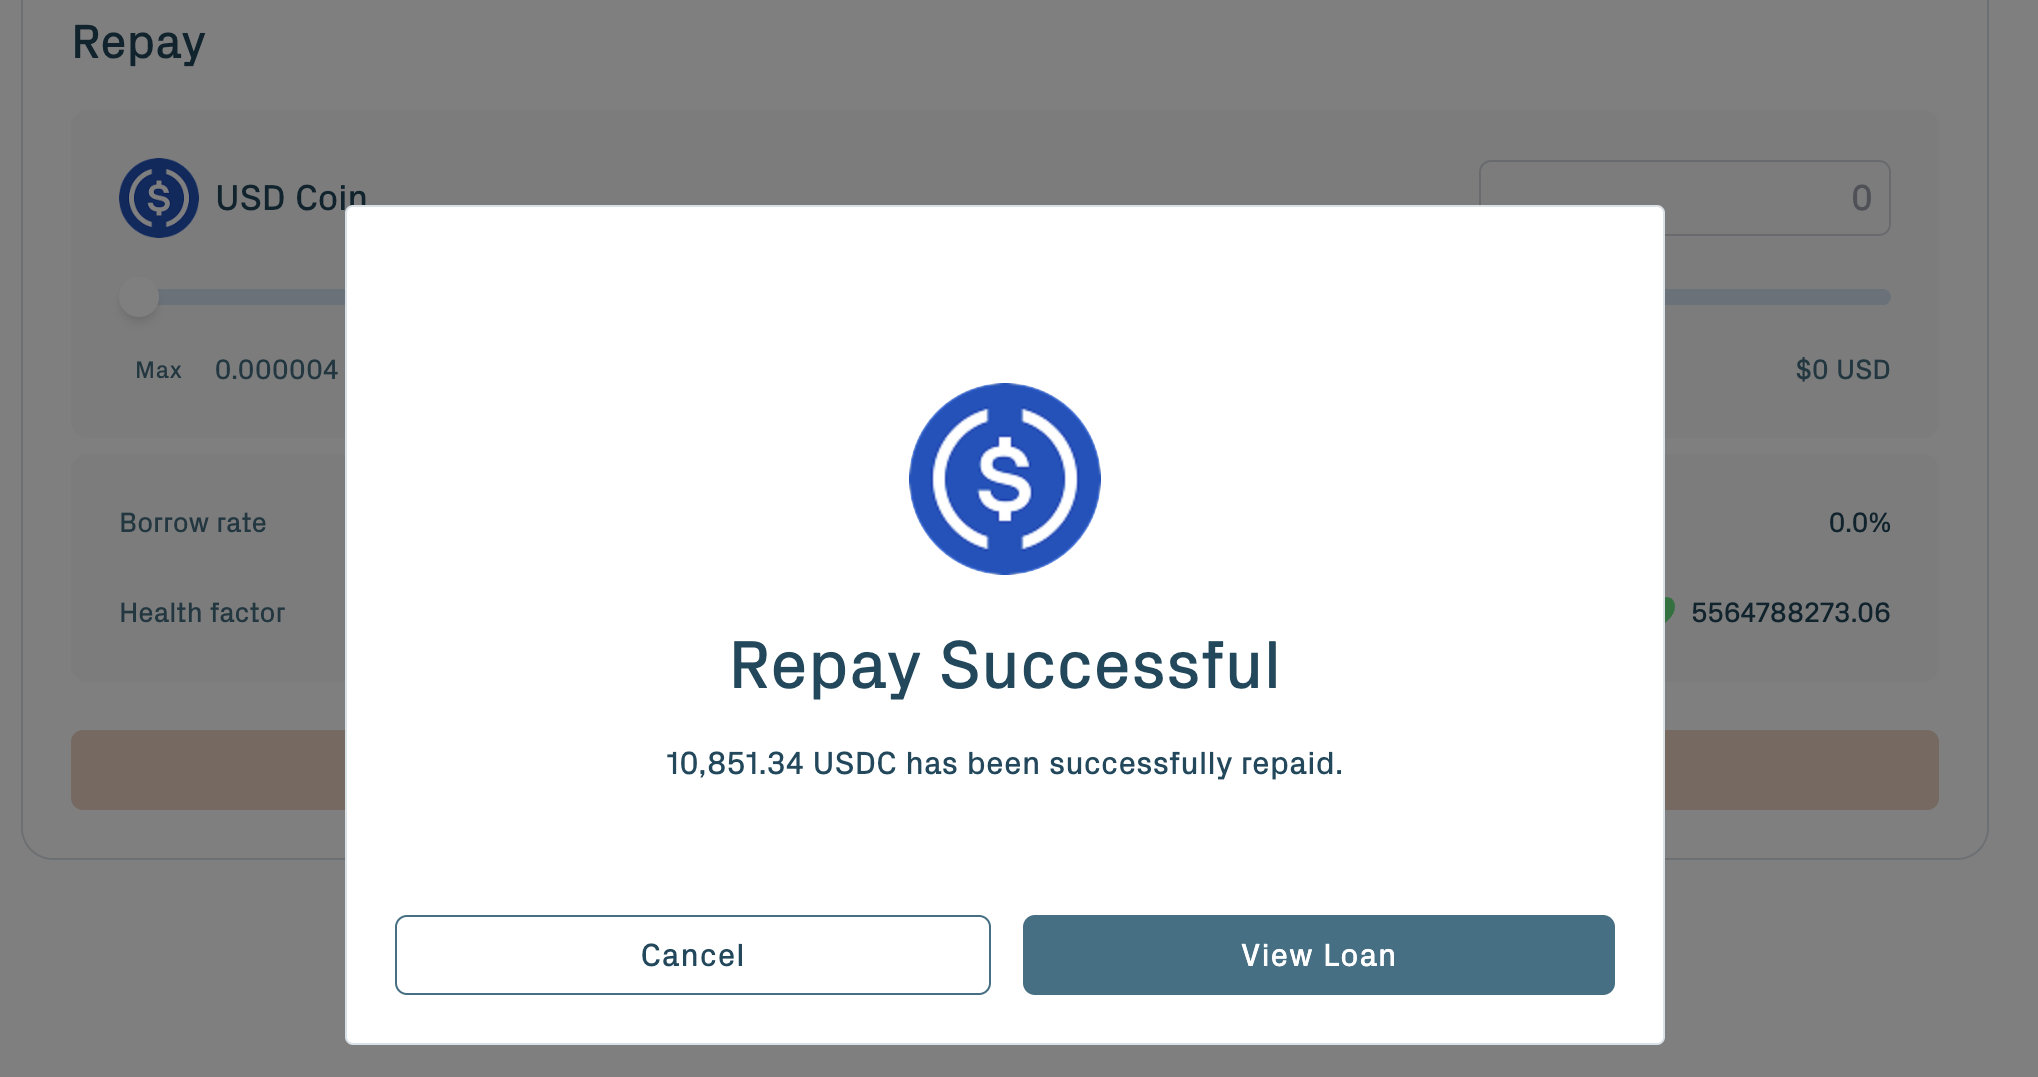
Interest accrues continuously until repayment, so the exact amount due is slightly higher than the principal borrowed. After full repayment, the vault is eligible for redemption.
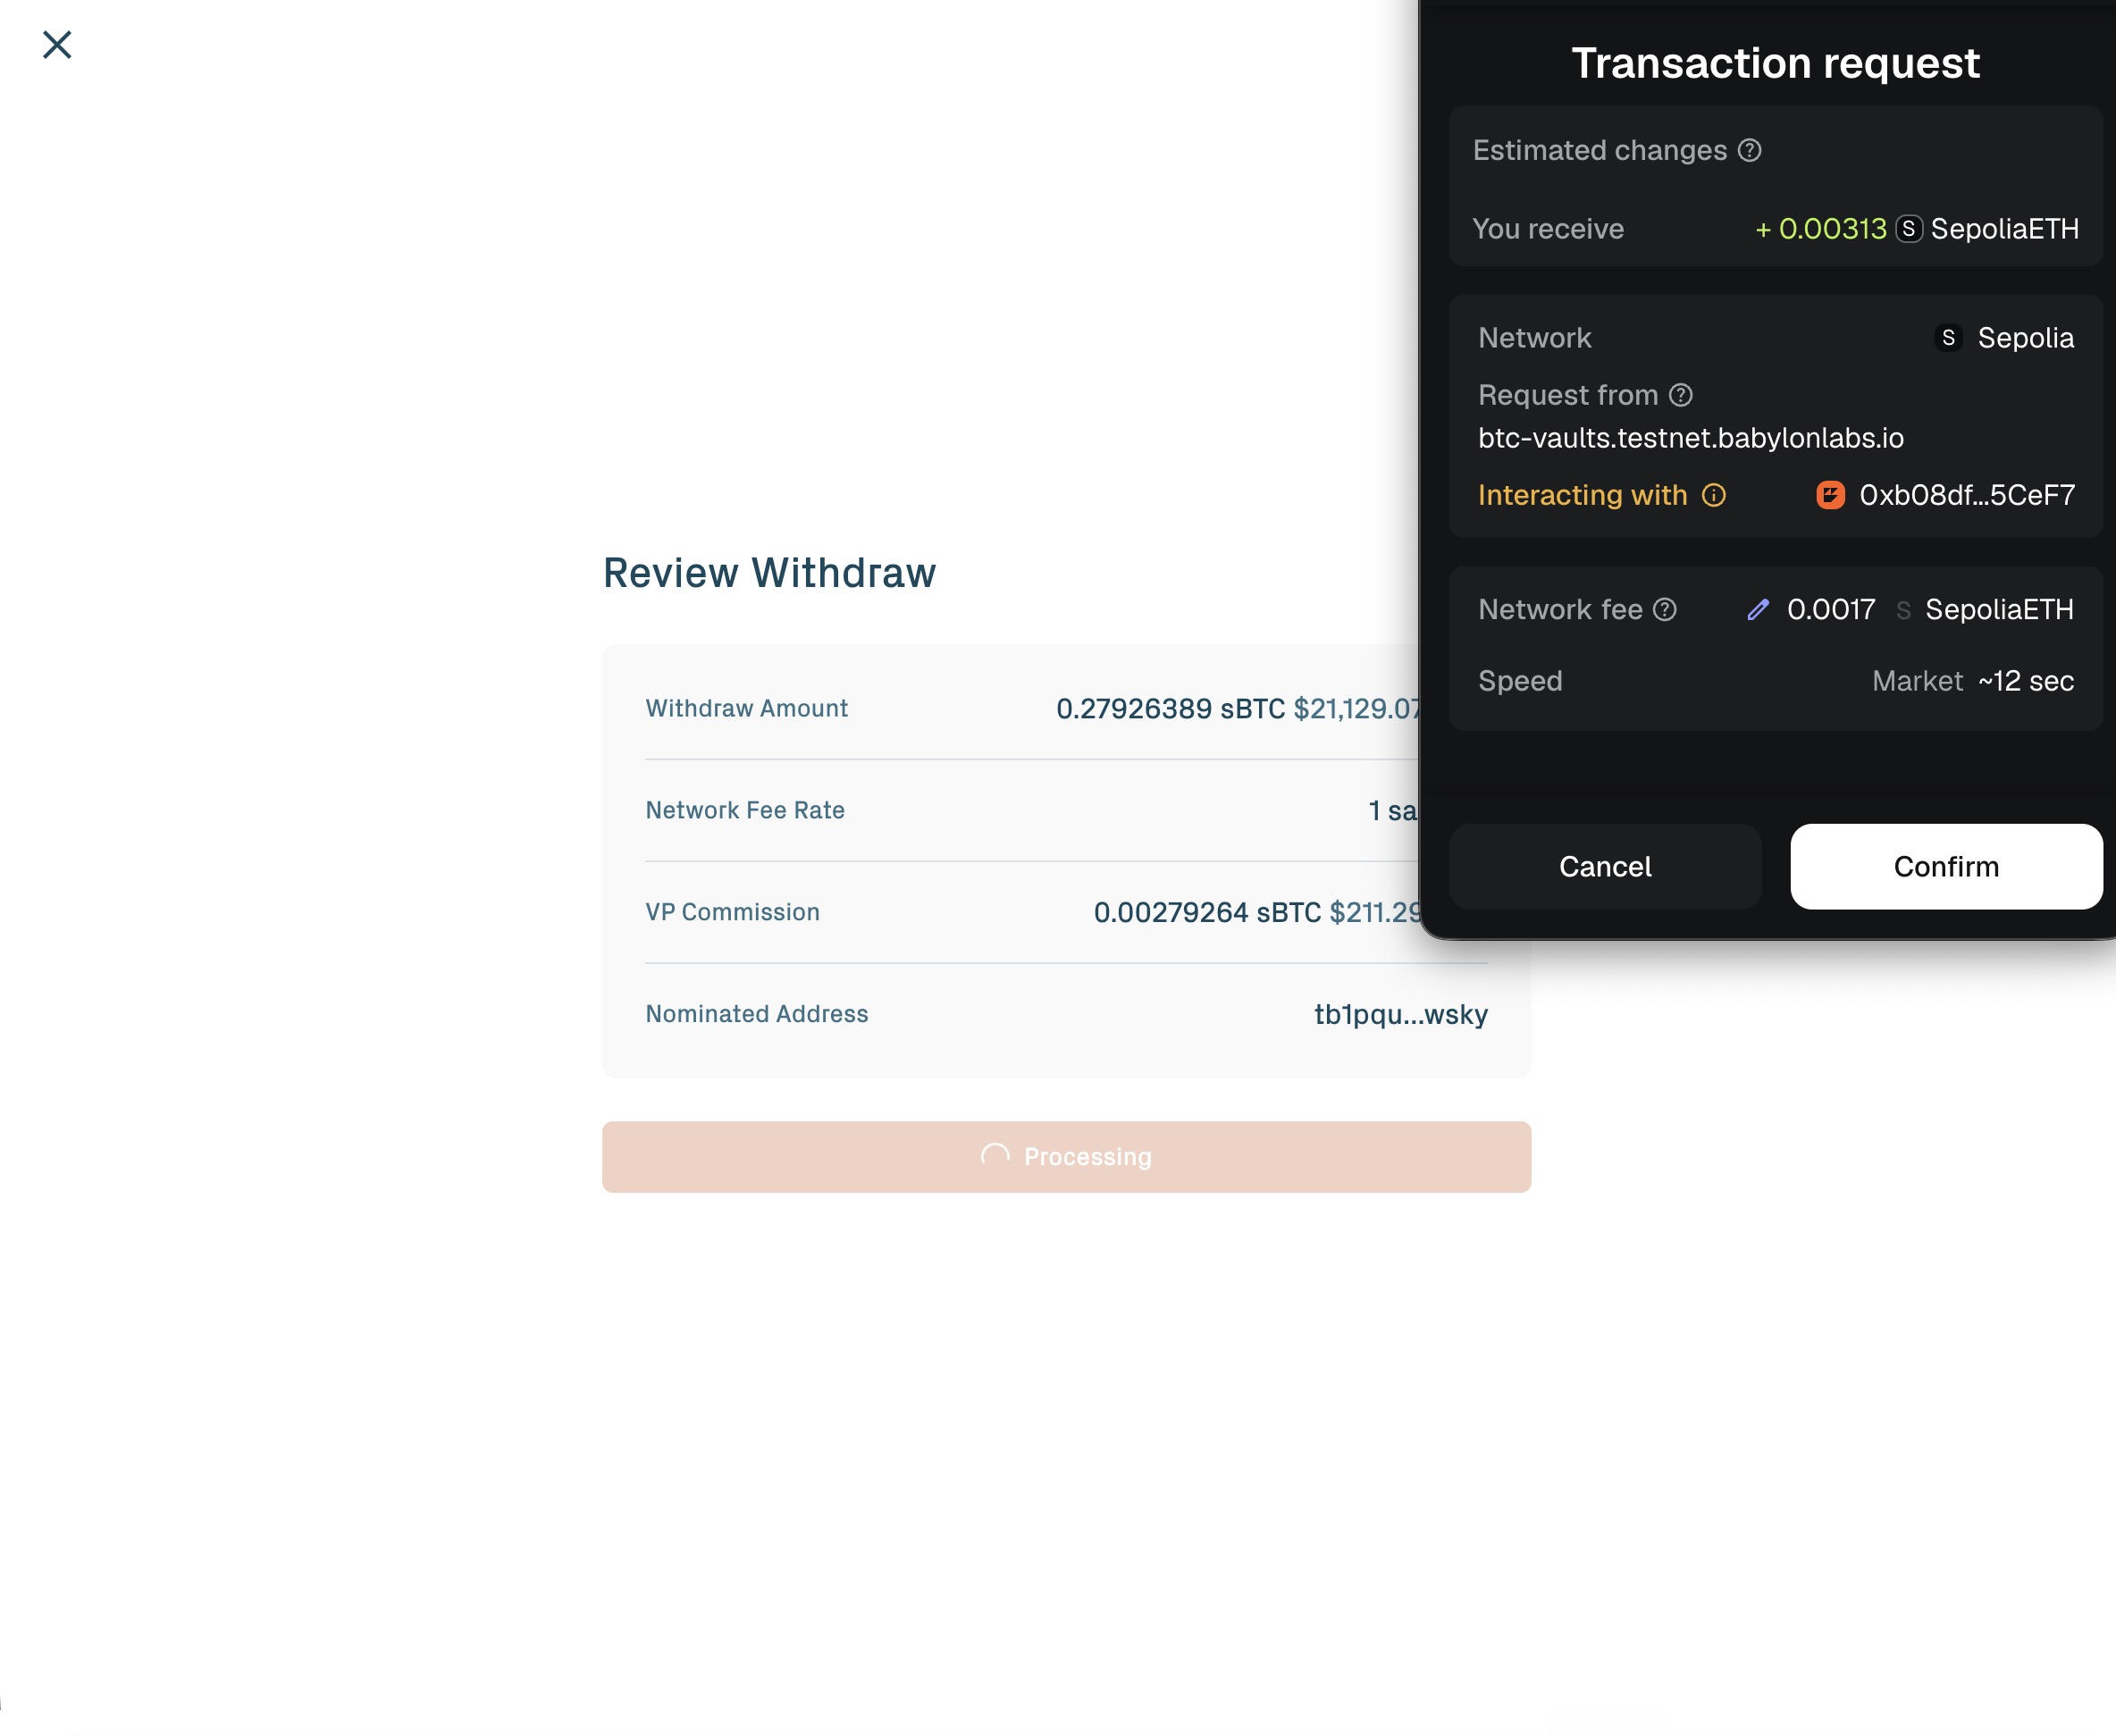
Step 6: Withdraw and redeem
Redeeming releases the underlying BTC from the vault back to your Bitcoin wallet. This step crosses back from the Aave v4 application layer into the TBV protocol layer.
From the Collateral section, select an in use vault and click Withdraw.
Review the withdrawal amount, network fee rate, VP commission, and the nominated Bitcoin address.
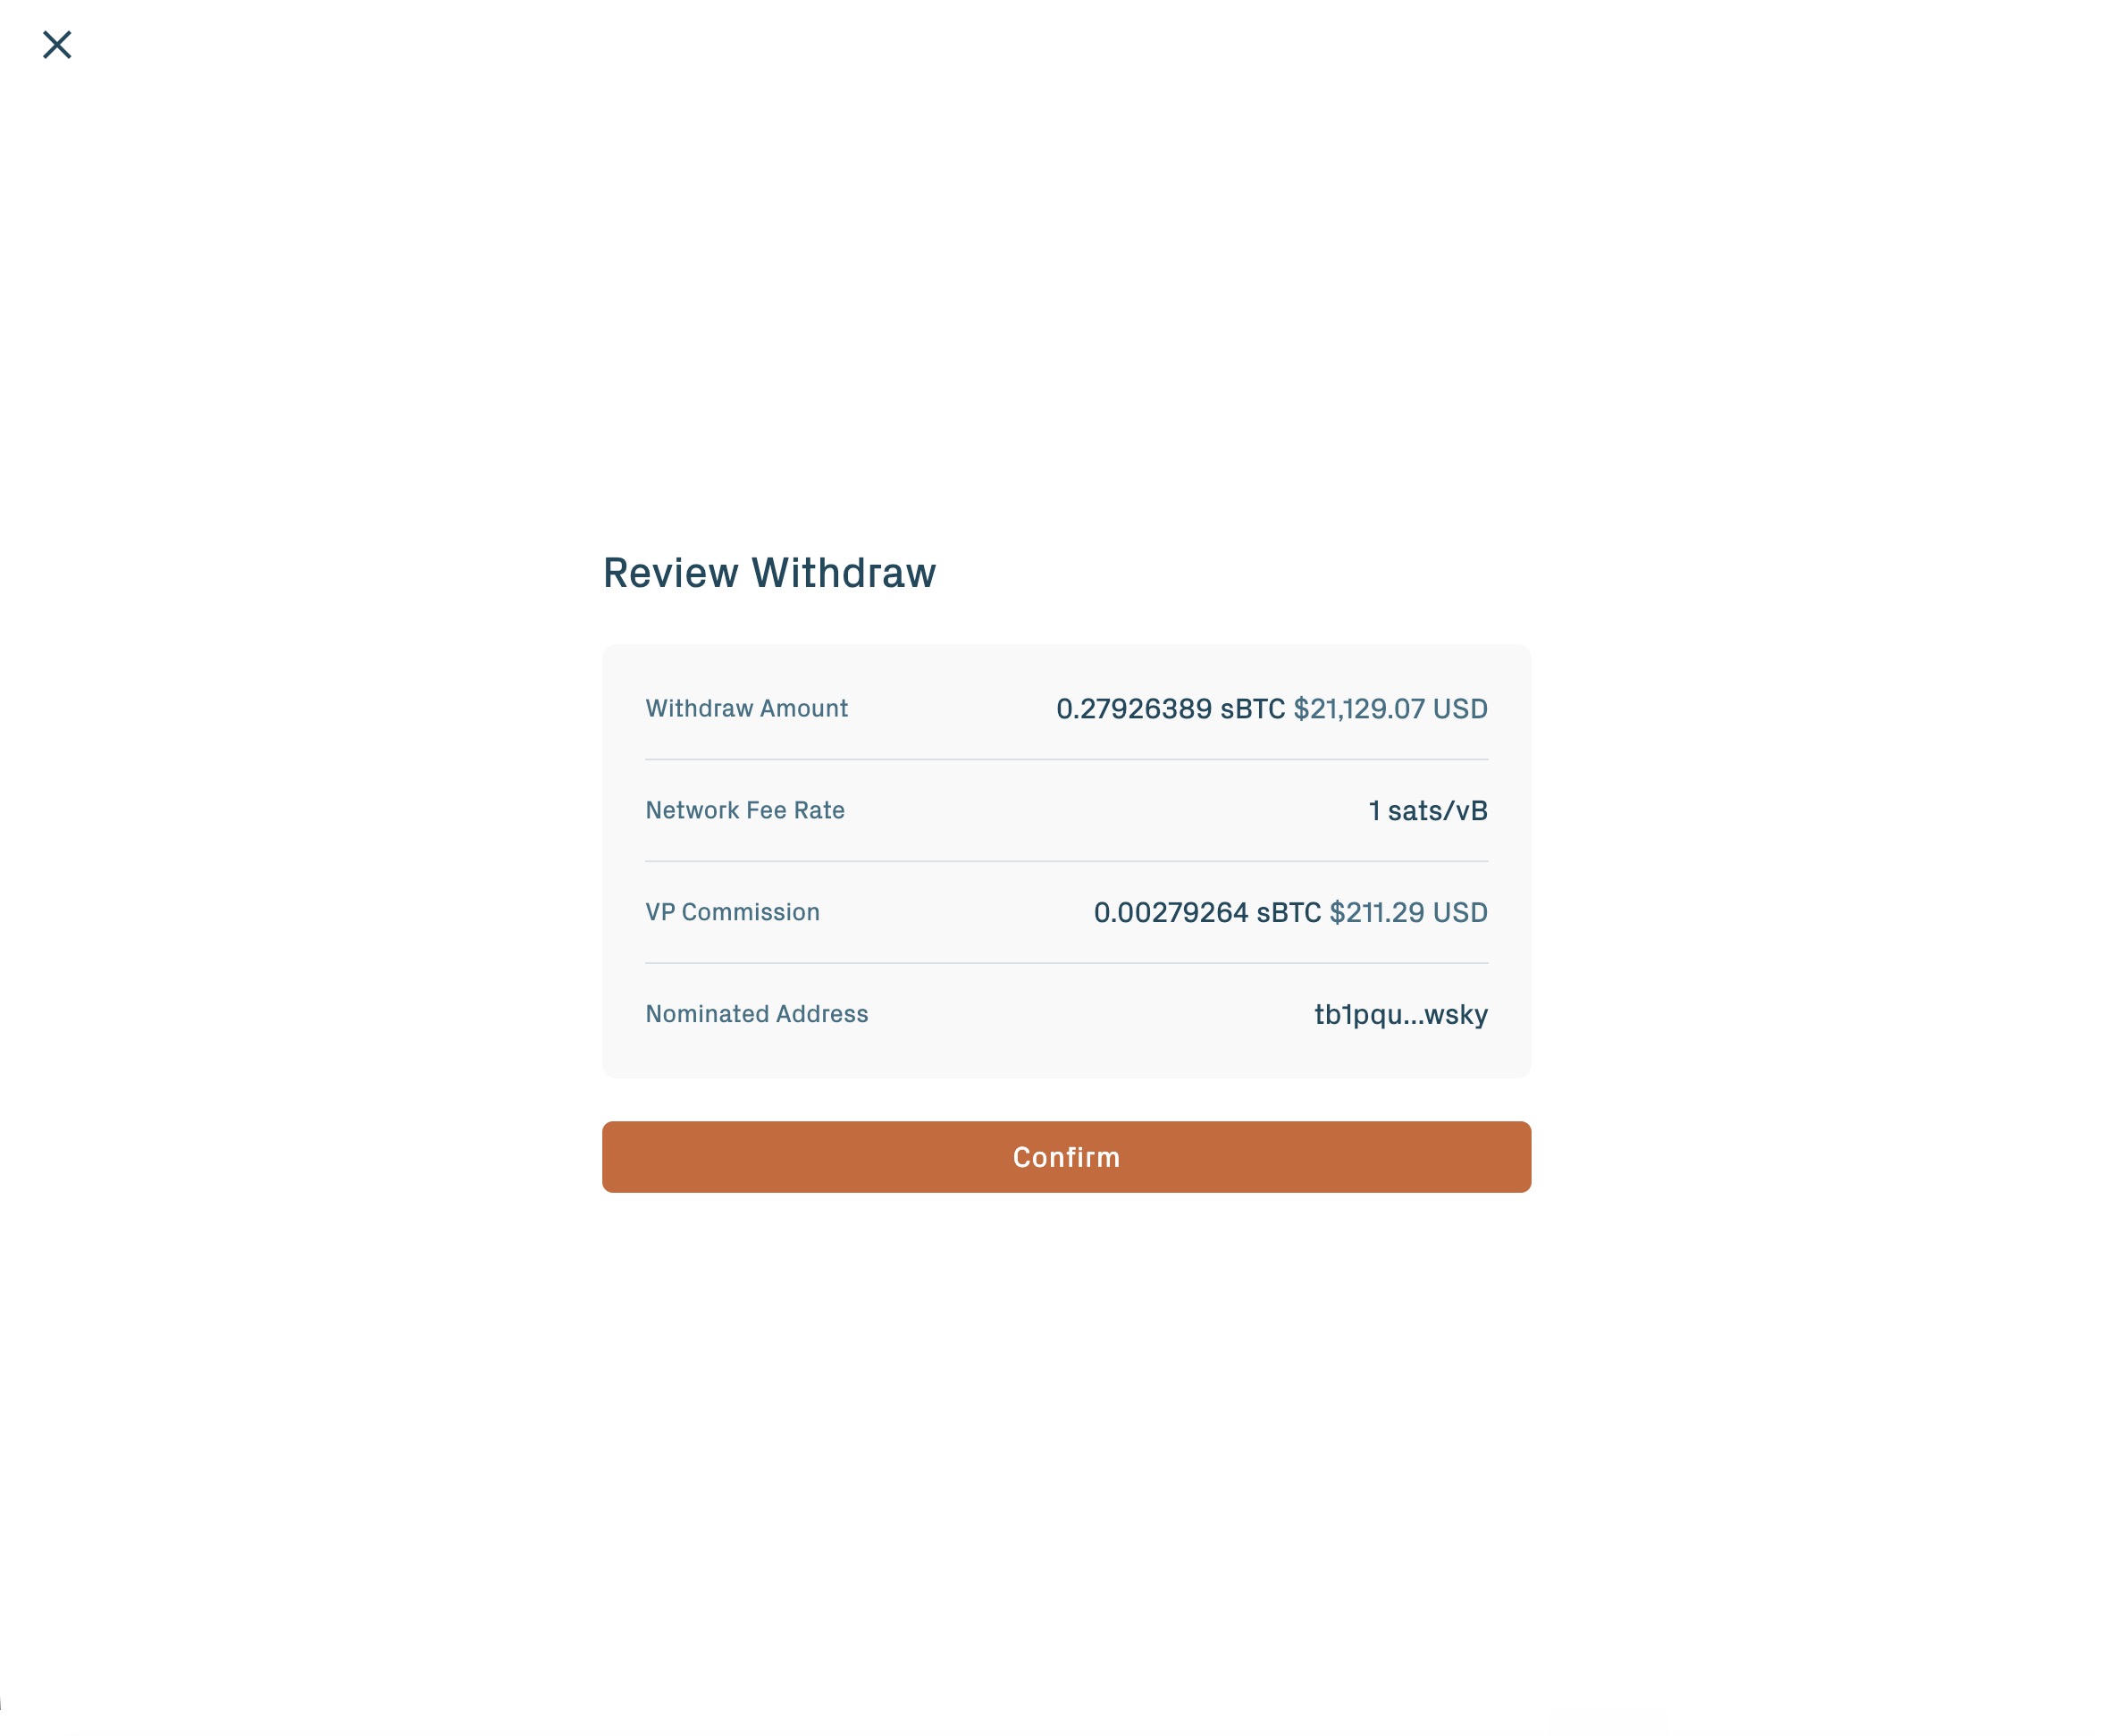
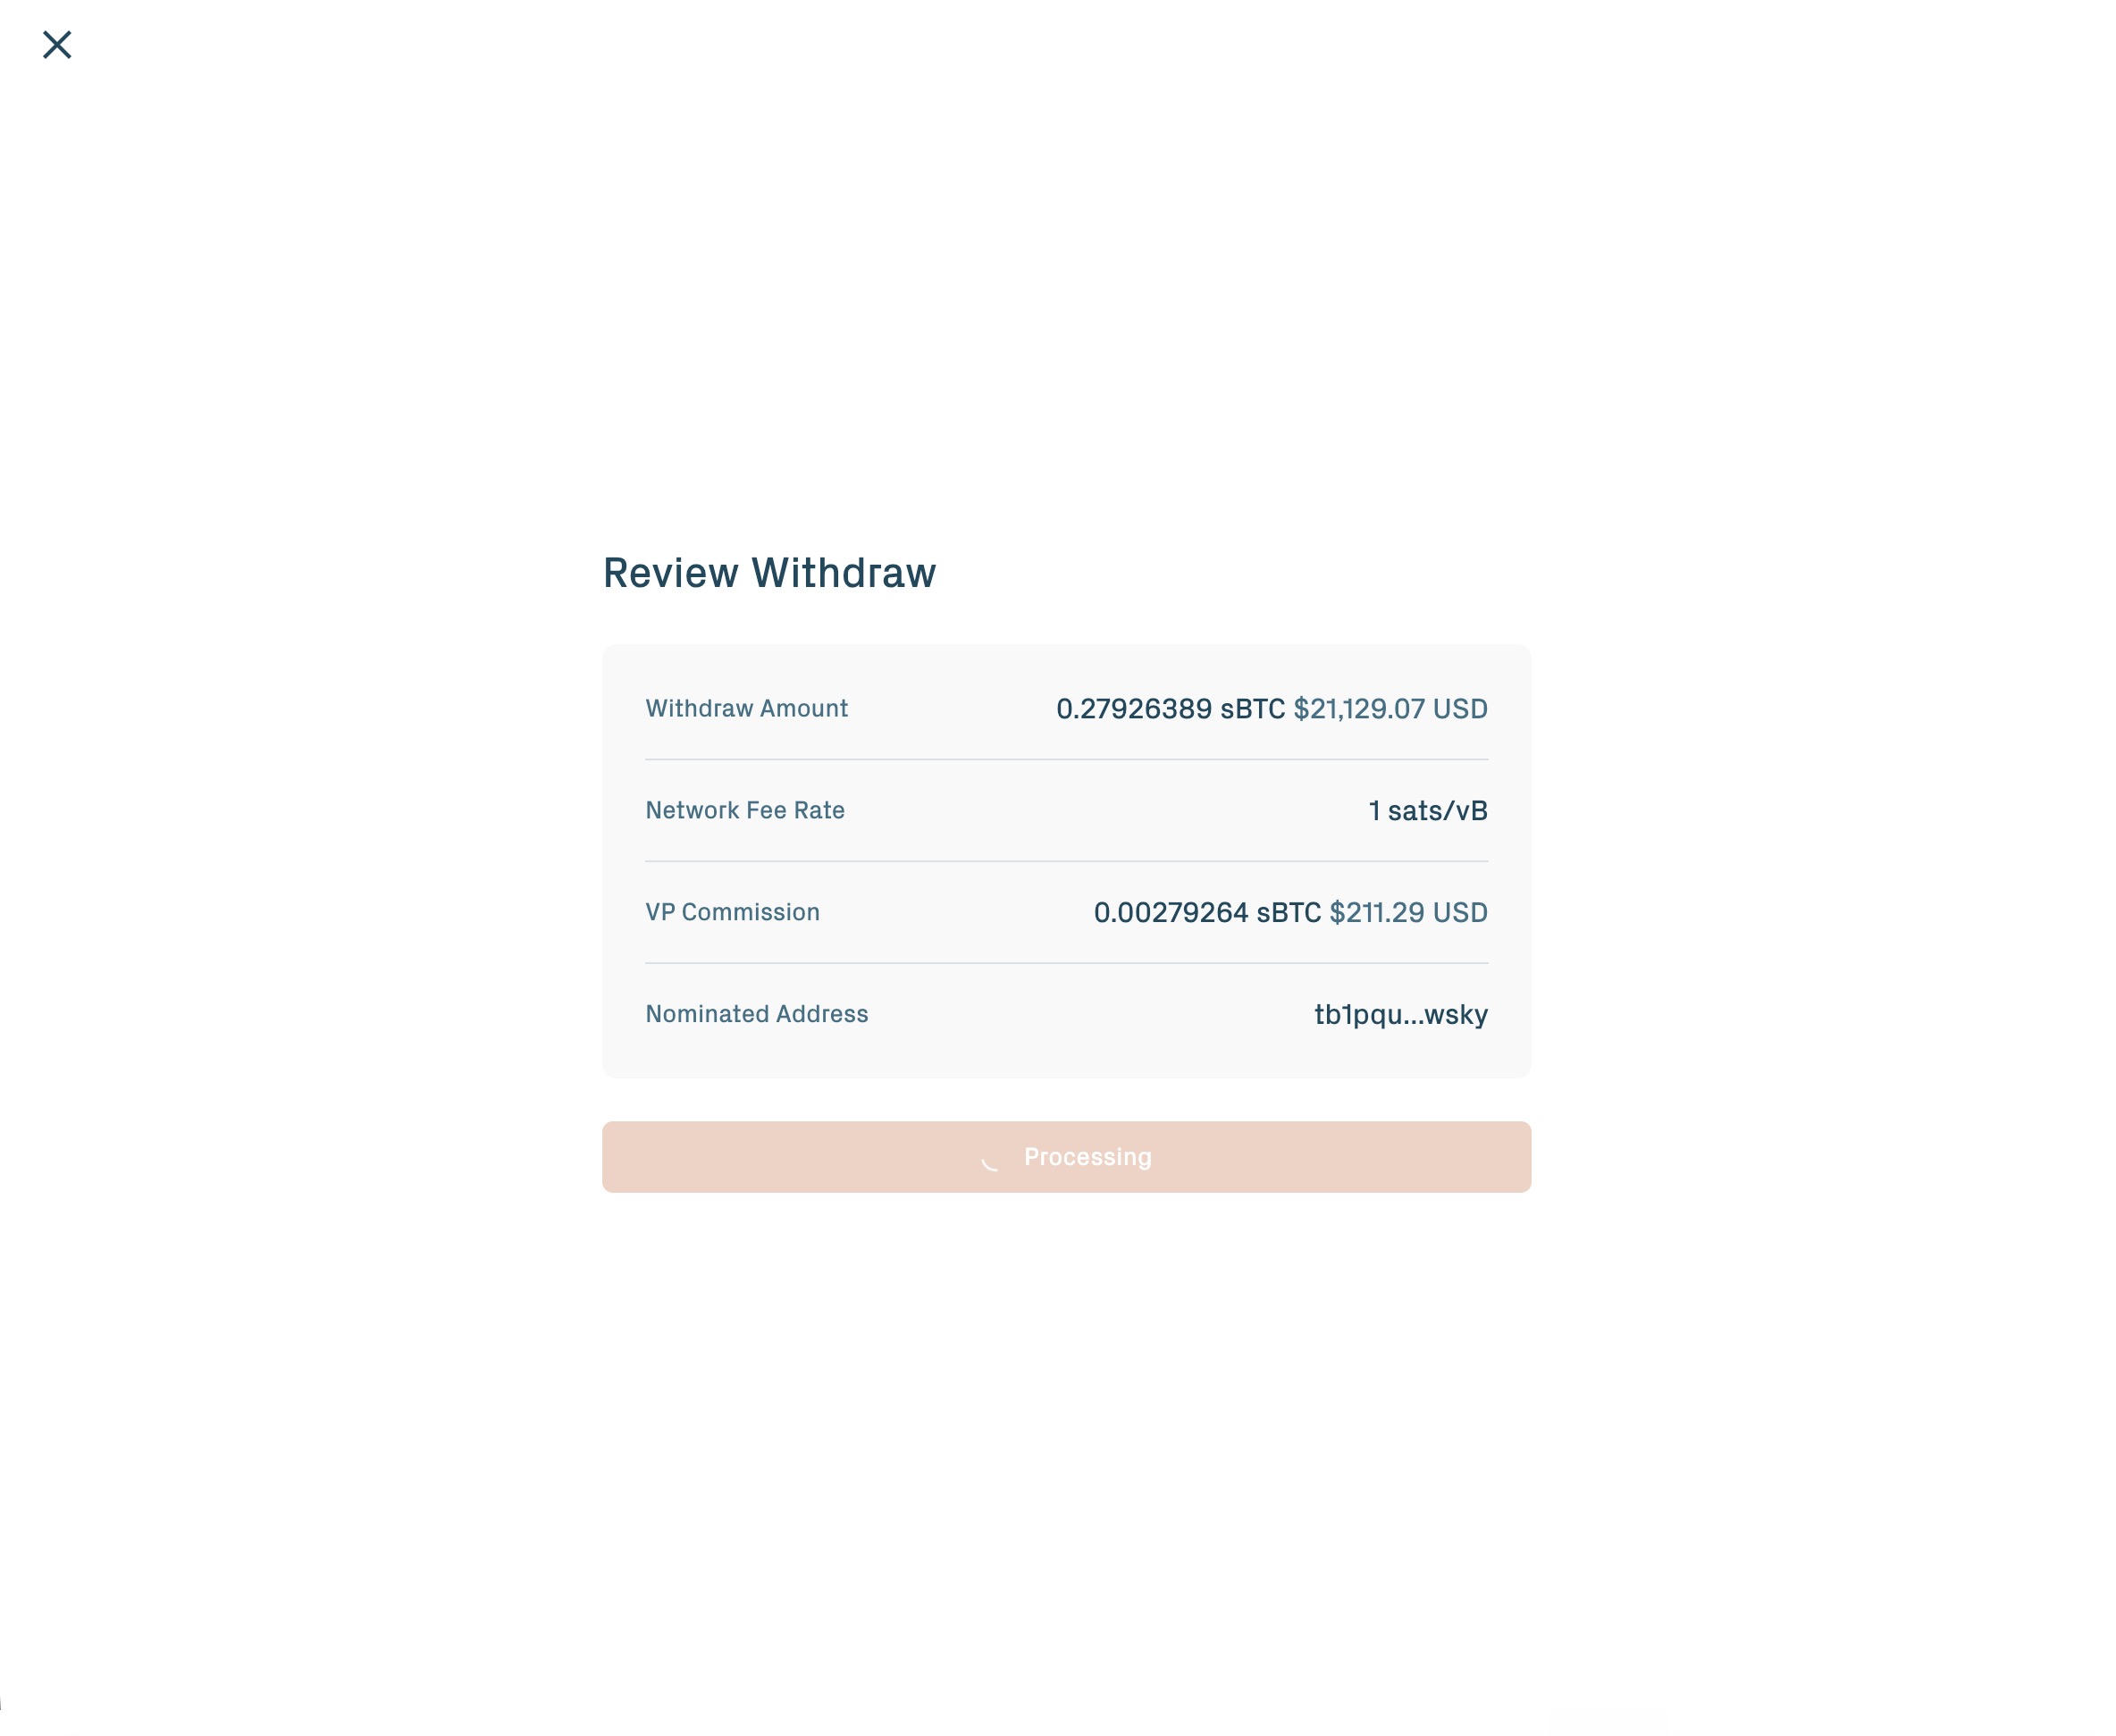
Confirm the Ethereum transaction.
The redemption then runs in three protocol-side phases:
- Claim. The Vault Provider generates a zero-knowledge proof in the background showing the debt is repaid, then submits a redemption claim on Bitcoin. The app shows progress.
- Challenge period. A window of about 3 days opens during which an Application Vault Keeper or Universal Challenger may dispute the claim. If no valid challenge appears, the claim finalizes.
- Payout. Your BTC arrives at the address recorded in the vault.
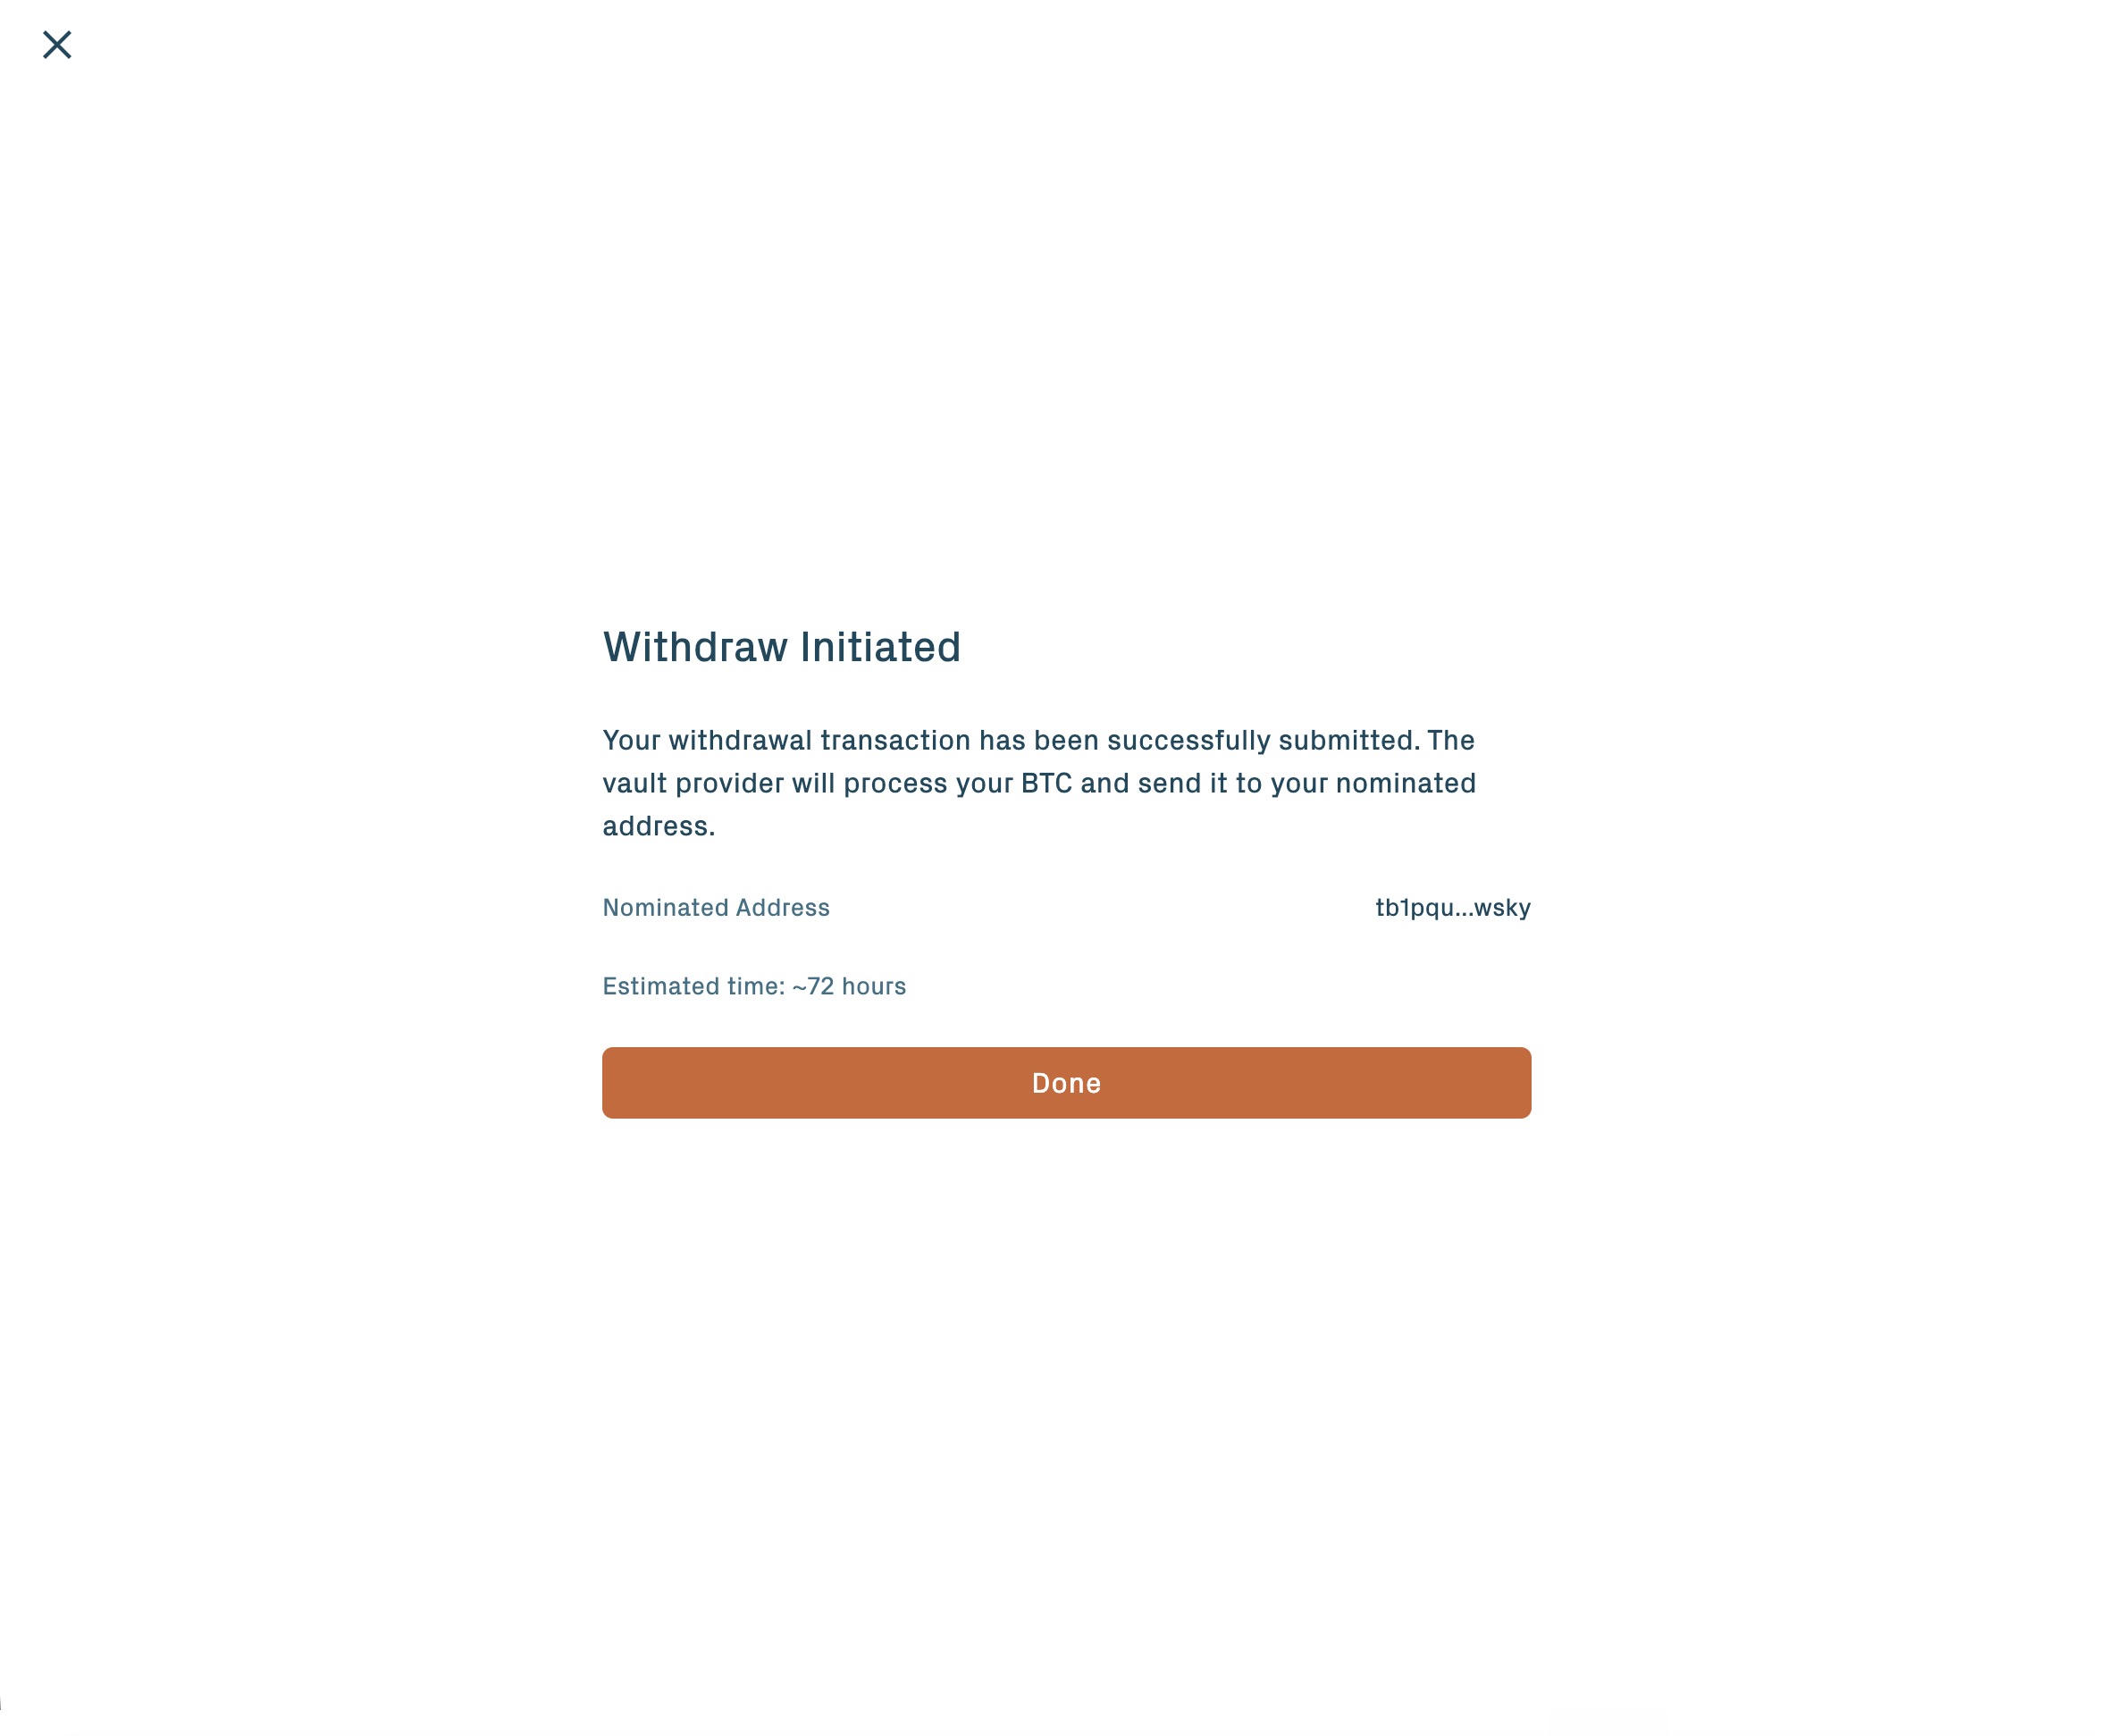
The 3-day window is inherent to the proof-verification mechanism.
If something stalls
Common scenarios and where to look:
- Pre-PegIn still pending after a few hours: check the Bitcoin block explorer (see Setup). If the transaction is propagated but not confirmed, wait — signet block times can be irregular.
- Vault stuck in Pending past ~24 hours: the off-chain setup likely failed. The vault will transition to Expired and your peg-in fee will be refunded. See the refund path on Create a vault for BTC recovery.
- Wallet won't connect or transaction rejected: verify the wallet is on the correct network (see Setup for chain IDs).
- Vault Provider not responding during redemption: the depositor self-claim path applies. See Withdraw & redeem.
For anything else, ask in the public-testnet support channel listed on Community & support.
You've completed a full cycle
Wallets connected, signet BTC locked, collateral activated, stablecoins borrowed, repaid, and BTC recovered.